Computer vision models can identify defects in glass with high accuracy. Computer vision solutions, unlike traditional machine vision, learn from examples of defects. You can train a model to identify exactly the glass defects you need to identify and improve your model over time if conditions change. For example, you can detect scratches, blemishes, chips, and other defects.
You can apply computer vision to any type of glass, from solar panel glass inspection to glass used in the production of bottles to windshield manufacturing.
In this guide we are going to show you how to build a computer vision-powered system that identifies defects in glass. To build the system, we will:
- Collect images for use in training a model
- Annotate images with objects of interest
- Train a model
- Deploy the model on your own hardware
Here is an example of the vision system we will build in this guide identifying a scratch in a glass bottle on an assembly line:
You can use your own data to build a system that meets your exact needs.
Without further ado, let’s get started!
Step #1: Create a Roboflow Project
To get started, we need to create a Roboflow project. This project will store the data for our model, as well as the model itself.
If you don’t already have one, first create a Roboflow account. Then, go to your Roboflow dashboard and click the “Create a Project” button. You will be taken to a page on which you can create your Roboflow project.
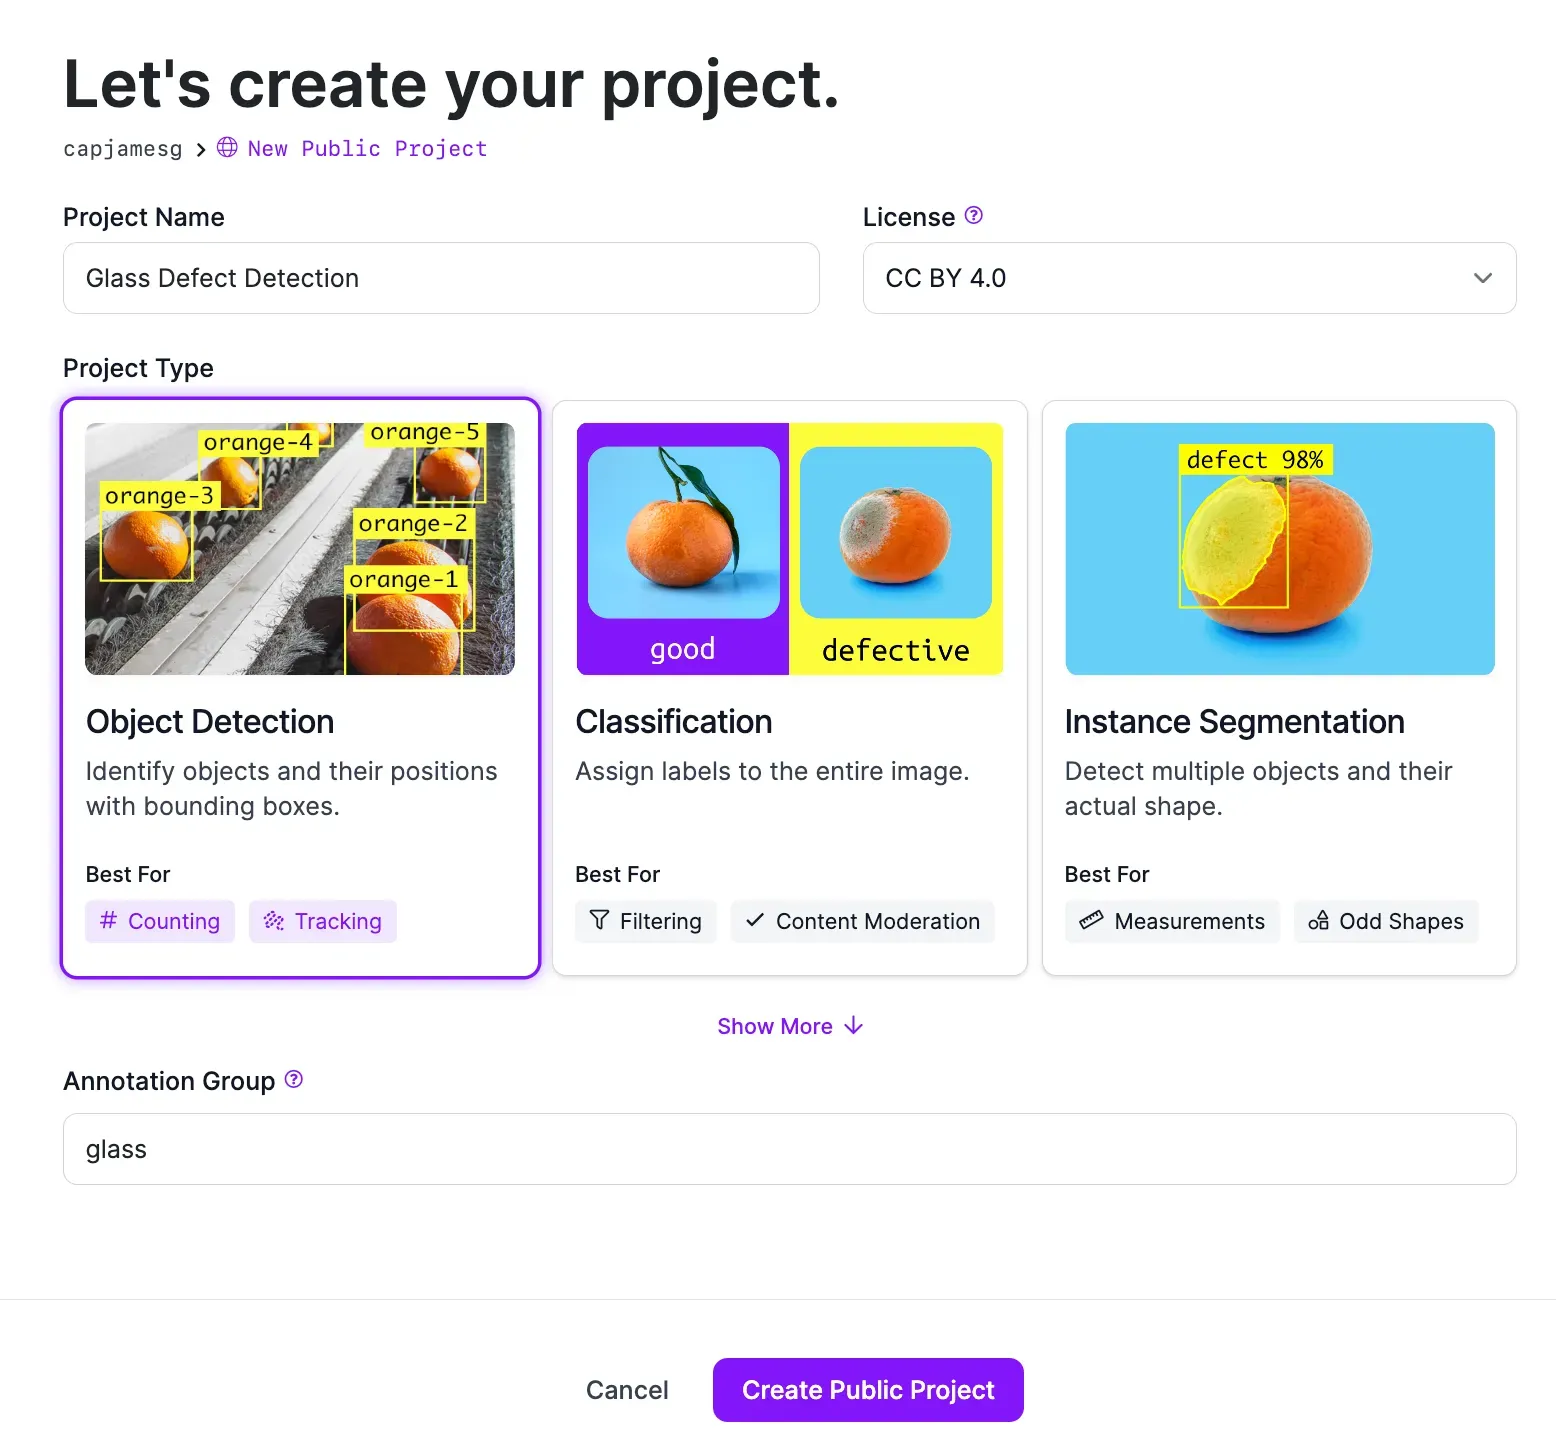
On this page, set a project name and fill out the required fields. Select “Object Detection” as your task type. Click “Create Project” to create your project. You will be taken to a page on which you can upload data.
Step #2: Upload Images
There are two keys to building an accurate vision system:
- Use data representative of the environment in which your model will be deployed, and;
- Label objects of interest precisely.
We recommend gathering photos or videos of glass from your assembly line or manufacturing plant for use in training your model. This will help you achieve optimal model performance for your environment.
If you have videos, you can upload them to Roboflow and split them into images, the required format for labeling data and training models.
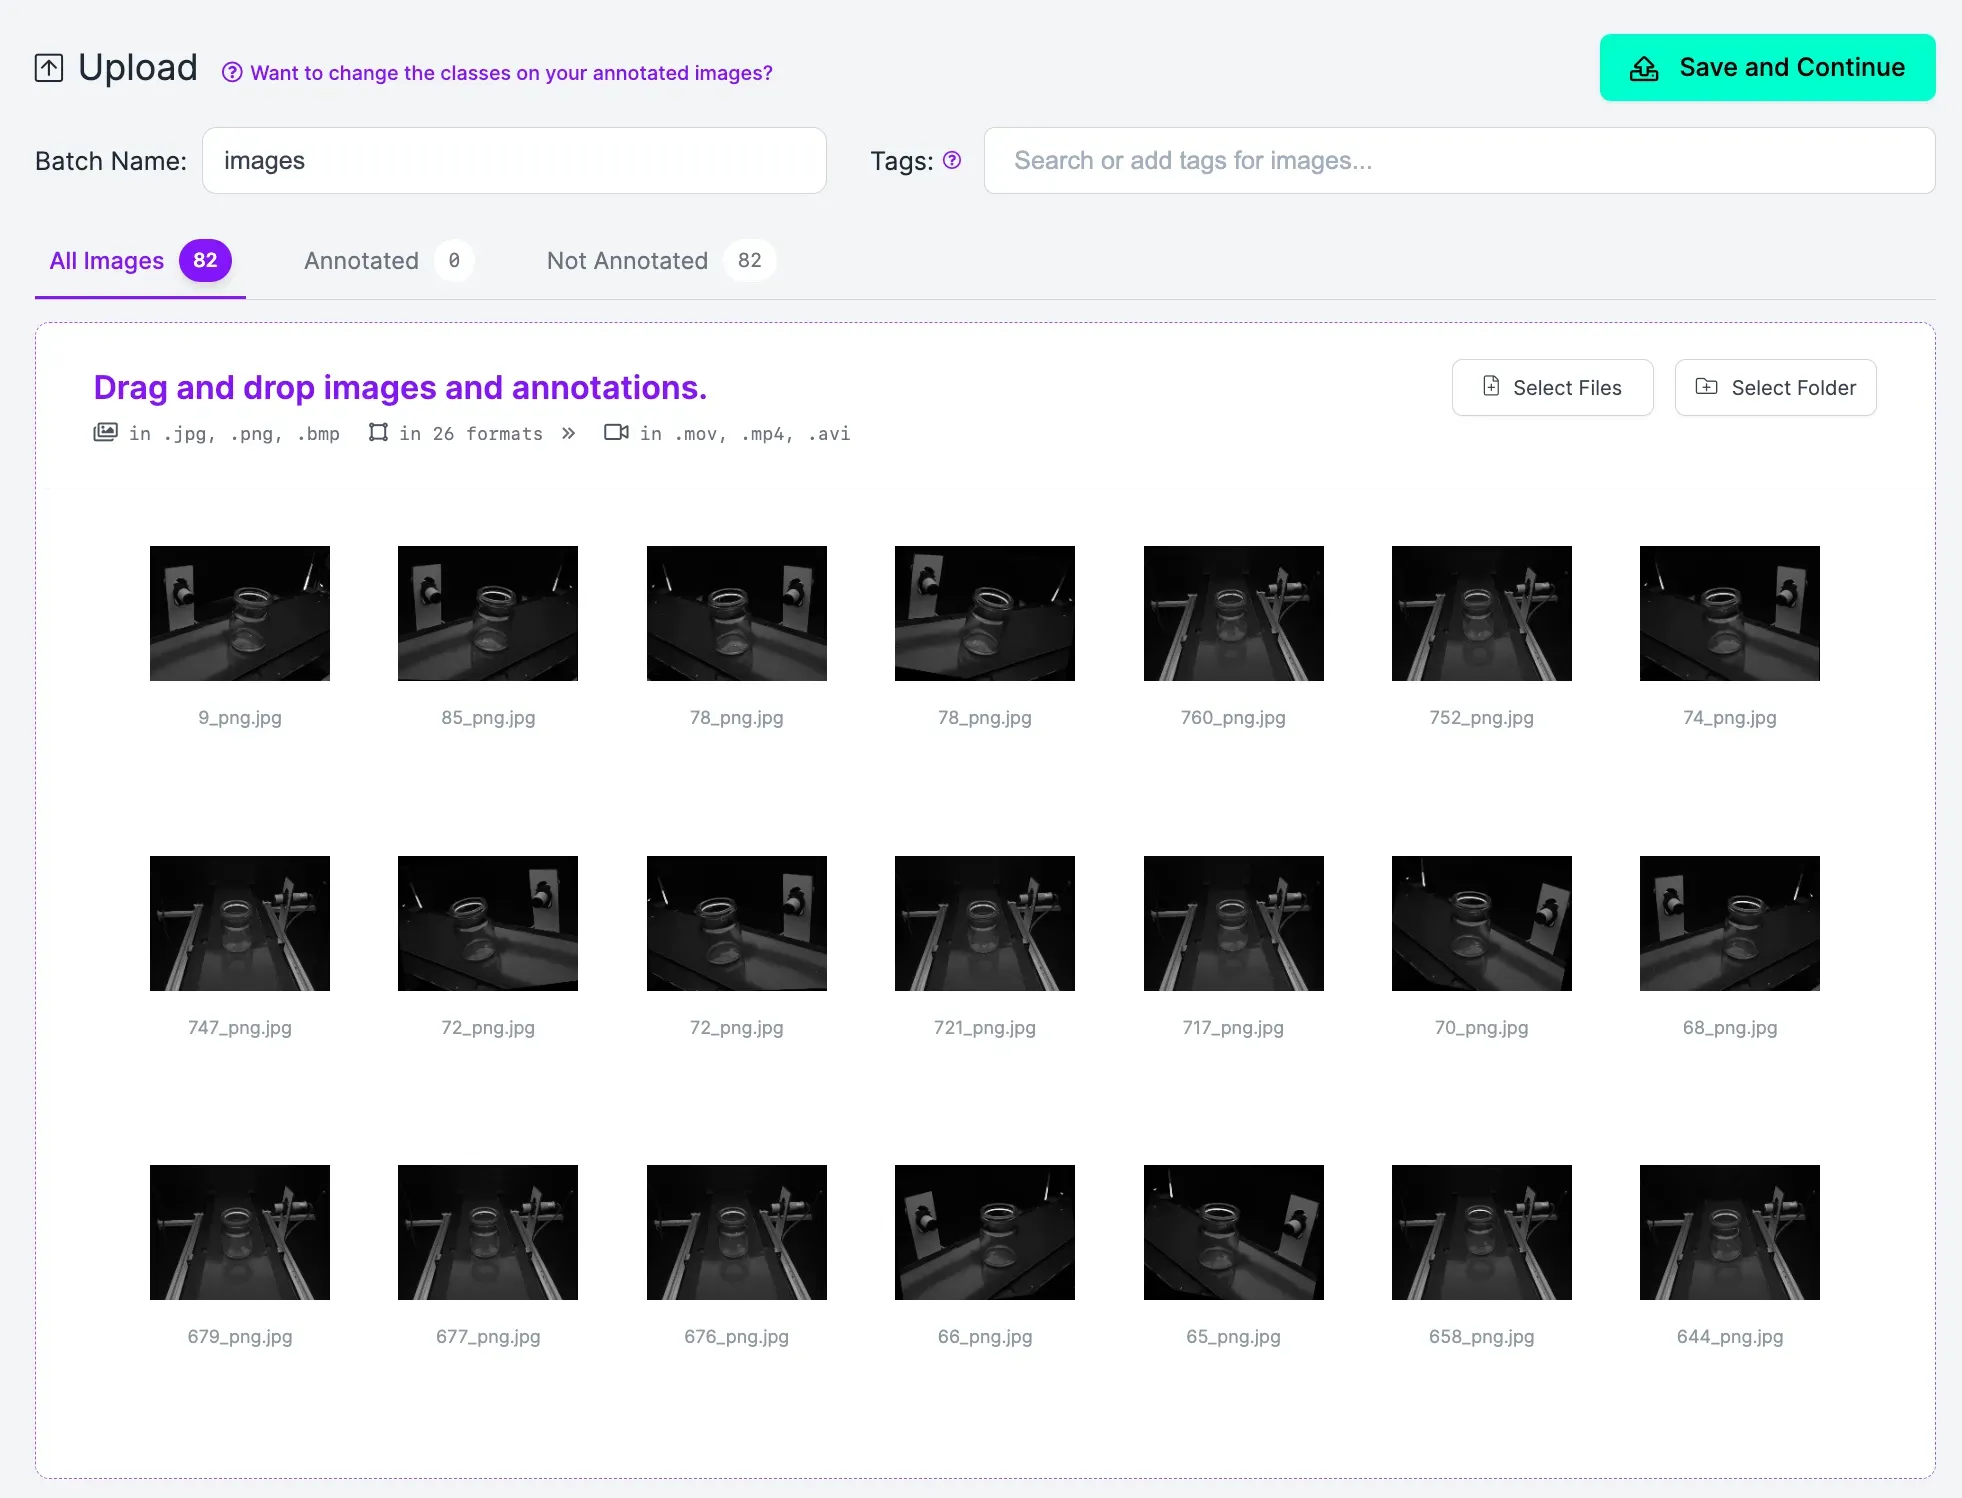
To upload images or videos, drag them into the Roboflow web interface on the upload data page. When you do this, your images will be processed. Then a button that says “Save and Continue” will appear. When clicked, your data will be uploaded to Roboflow.
Step #3: Annotate Images
With data in your workspace, you can begin labeling objects of interest.
In this guide, we are going to label glass defects and focus on one type of defect: scratches. You can build your vision system to identify as many categories of defect as you need. For the first version of a vision system, we recommend focusing on one or two defects.
We need to annotate objects of interest (scratches) to teach our model how to identify them.
To start annotating images, click “Annotate” in the left sidebar. Then, select an image to annotate.
The Roboflow Annotate web interface will open. Here, you can annotate your images. To annotate an image for object detection, we need to use the bounding box drawing tool. You can trigger this tool using the “b” key on your keyboard, or by clicking the box in the right sidebar.
Once you have selected the bounding box tool, click on the point where you want to start drawing your box. Then, drag the box around your object of interest. Stop dragging the cursor once you have enclosed the object of interest in a box. Your box should be as close to the boundaries of the glass defect as possible.
Then, select a label for the class. For this guide, we will label scratches with the label “scratch”.
Label all objects of interest in the images in your dataset.
Step #4: Generate a Dataset
Once you have labeled all the images in your dataset, you are ready to generate a dataset version. A dataset version is a frozen-in-time snapshot of your dataset. You can use a dataset version to train a model on Roboflow.
To generate a dataset version, click “Generate” in the Roboflow sidebar. On this page, you can customize how you generate your dataset. We recommend leaving all of the pre-set values for training the first version of your model.
Once you have trained the first version of your model, you can experiment with adding additional preprocessing steps or augmentations that may help you boost model performance. To learn best practices for adding preprocessing and augmentation steps, refer to our guide on image preprocessing and augmentation.
Click “Generate” at the bottom of the page once you have configured your dataset version. A version of your dataset will be generated. This will take a few moments. You will be taken to a page for your dataset version once it has been generated.
Step #5: Train a Model
With a dataset version ready, you can start training a vision model to identify defects in glass.
To train a model, click “Train with Roboflow” on your dataset page.
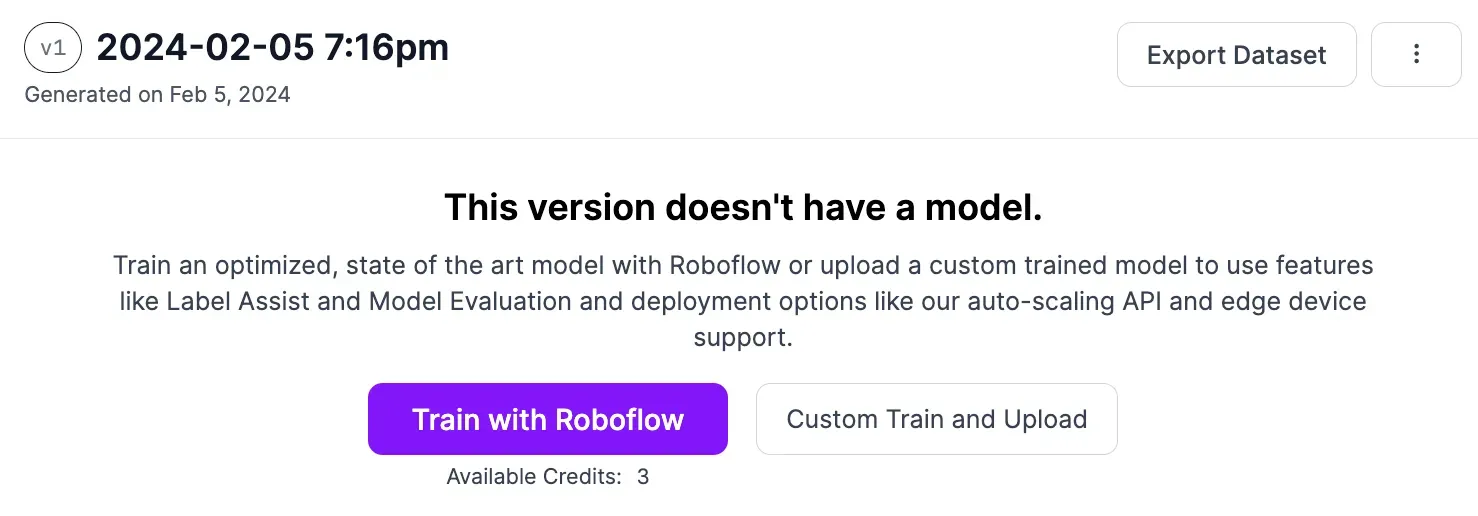
In the window that appears, select “Fast” training and train from the Microsoft COCO checkpoint. After you configure your training job, you will receive an estimate for how long it will take to train your model. Your training job will then be allocated to a computer.
You can watch the progress of your training job in real time from your model page. You will receive an email once your model has been trained and is ready to use in your application.
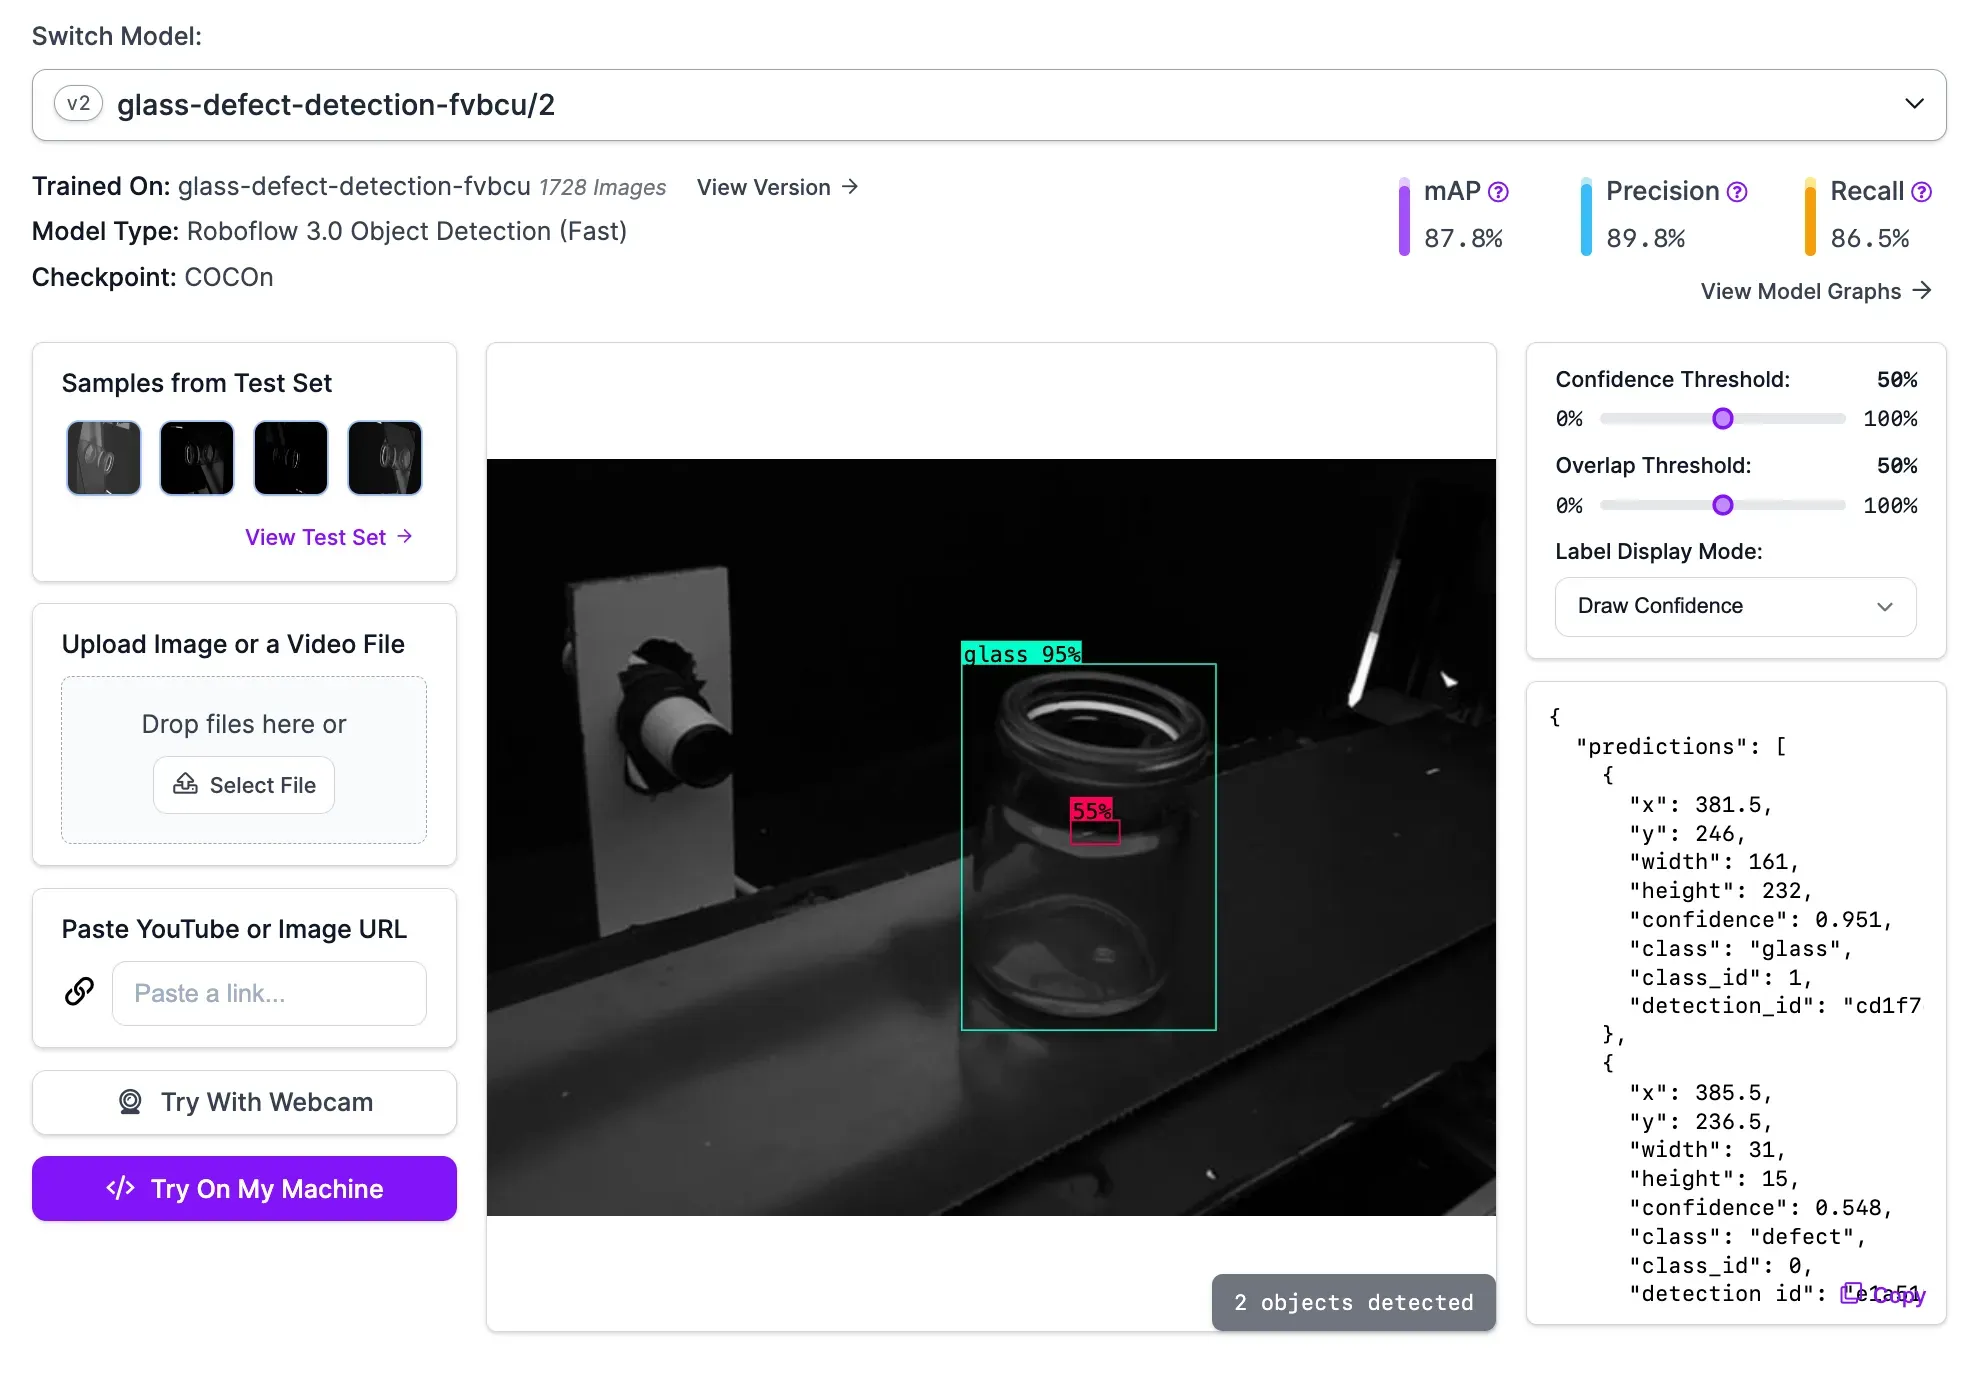
You can test your trained model from the "Visualize" tab accessible from the sidebar in your Roboflow project:
Step #6: Deploy the Model
With a trained model ready, it is time to deploy your glass detection model. To do so, you can use Roboflow Inference, a solution for using vision models. You can connect Inference to cameras, RTSP streams, or run a model on images. For this guide, we will show how to use your model with images. Refer to the InferencePipeline documentation for guidance on deploying your model to a camera or RTSP stream.
To get started, first install Inference and Supervision, tools we will use to deploy and work with our vision system results, respectively:
pip install inference supervision==0.18.0Then, create a new Python file and add the following code:
from inference import get_roboflow_model
import supervision as sv
import cv2

image = cv2.imread("image.jpg")

model = get_roboflow_model(model_id="glass-defect-detection-fvbcu/2")

result = model.infer(image)[0]
detections = sv.Detections.from_inference(result)

bounding_box_annotator = sv.BoundingBoxAnnotator()
label_annotator = sv.LabelAnnotator()

annotated_image = bounding_box_annotator.annotate(
    scene=image, detections=detections)
annotated_image = label_annotator.annotate(
    scene=annotated_image, detections=detections)

sv.plot_image(annotated_image)
In this code, we download our model, run our model on an image called “image.jpg”, and visualize the results. We can use this code to validate our model is working and see results.
Replace:
- The model ID with your Roboflow model ID. Learn how to retrieve your model ID.
- “Image.jpg” with the name of the image on which you want to run inference.
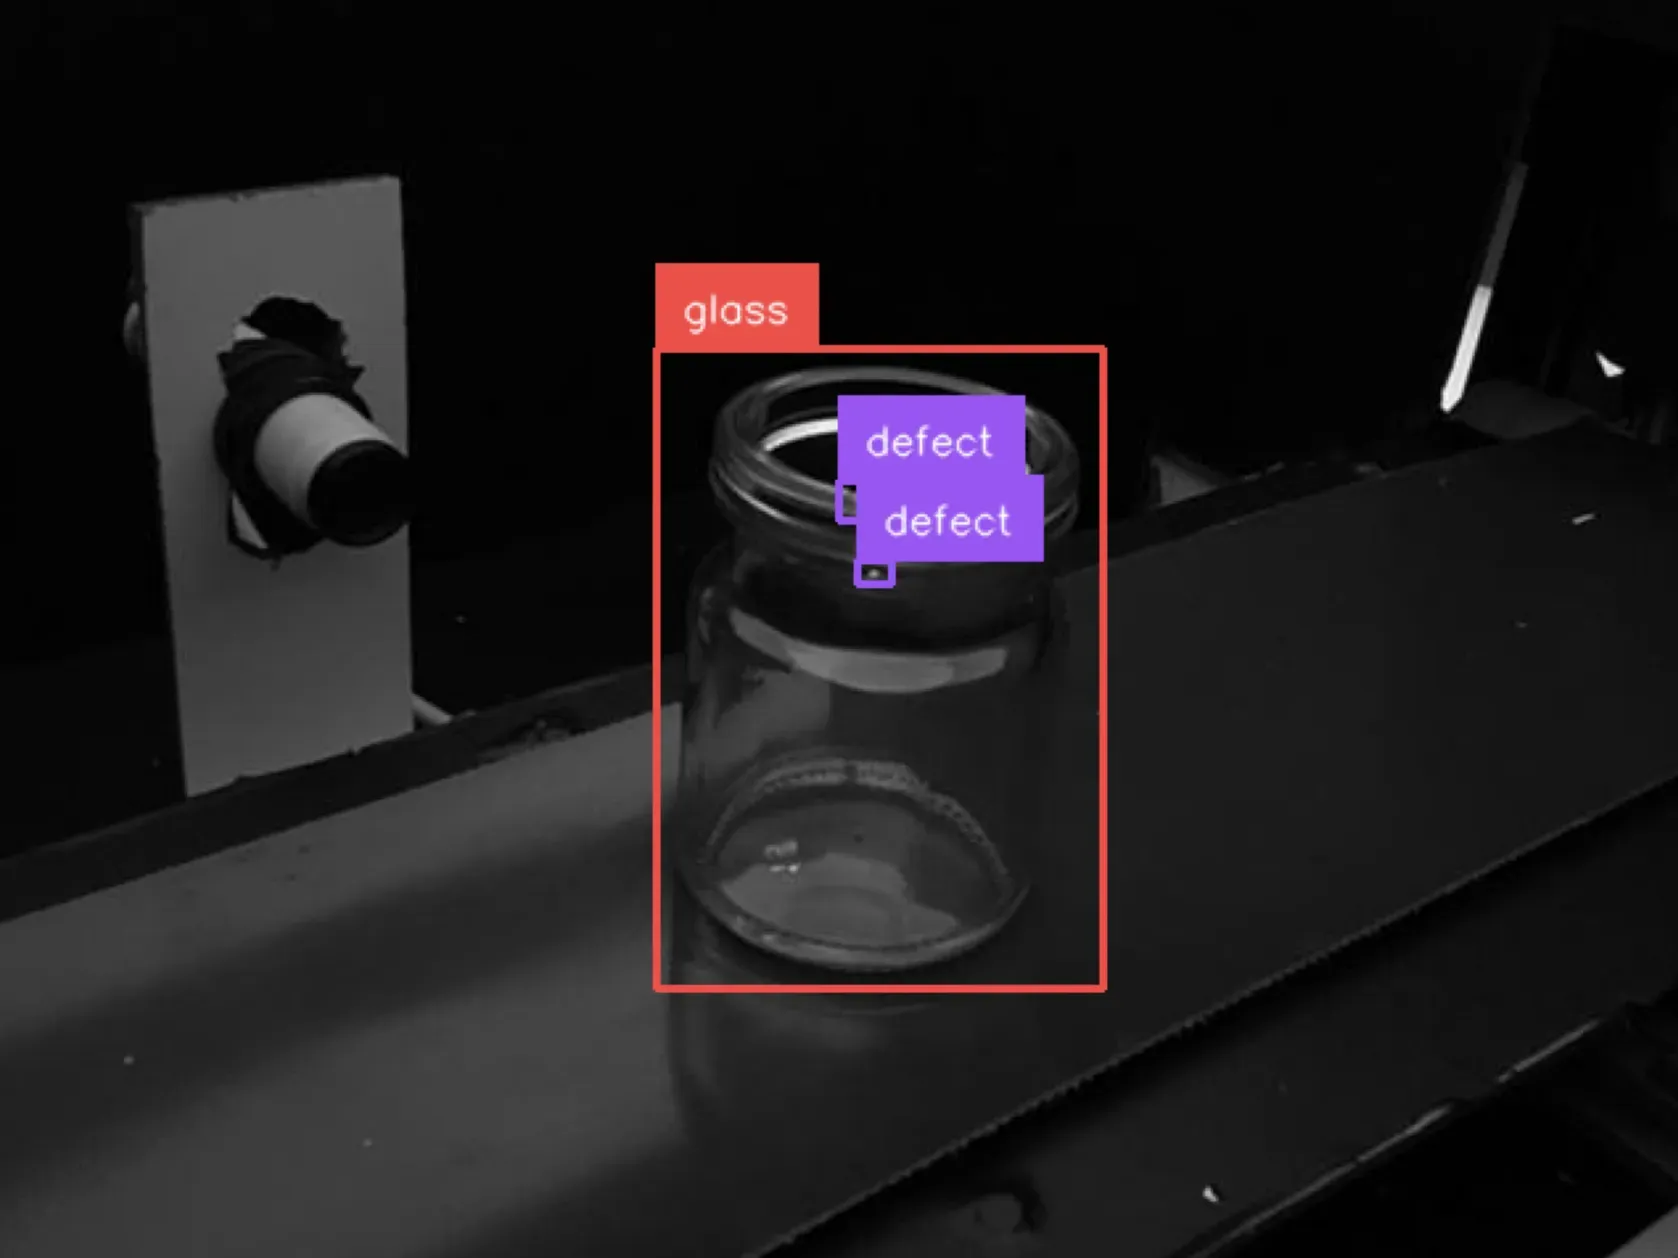
Let’s run our code on this image of a glass bottle with a defect on the rim and an abnormality below the rim:
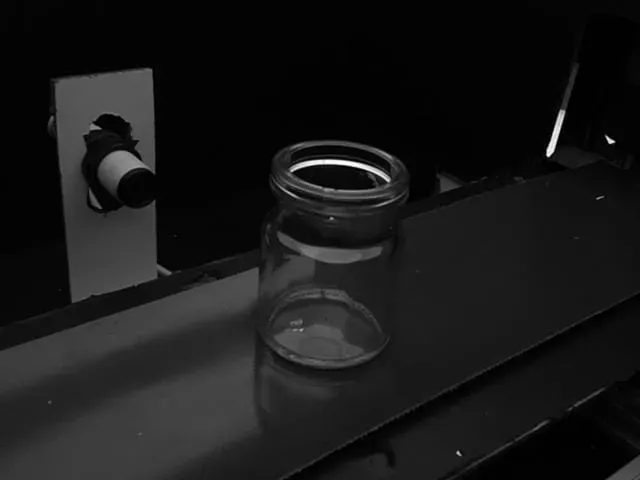
Here are the results:

Our system successfully identified defects on the glass.
If you trained your model to identify multiple defects, the code above will allow you to visualize any instances of the detects your model was trained to identify.
Conclusion
You can use computer vision to identify defects in glass. For example, you can identify scratches in solar panel glass or glass used in bottle manufacturing; you can identify cracks, chips, and any other visible defects.
In this guide, we walked through how to use computer vision for glass inspection. We developed a vision system to identify a specific kind of glass defect. To do so, we collected images, labeled those images, trained a model using our labeled images, and deployed the model using Roboflow Inference.
If you need assistance building your own glass inspection system, contact the Roboflow sales team. Our sales team are experts in developing custom computer vision solutions for use cases across industry, from logistics to manufacturing to analytics.