When you are preparing boxes of chocolates on an assembly line, it is essential that every box meets your specifications. There should be the correct number of chocolates, boxes should be in the correct order per the intended arrangement for the box, And chocolates should be in good condition; not slightly melted, not scratched.
You can use computer vision to conduct various visual inspections on chocolate boxes. In this guide, we are going to walk through how to build an inspection system that ensures there are the correct number of chocolates in a box, in the correct order.
Here is an example of our system identifying all the unique chocolates in a box:
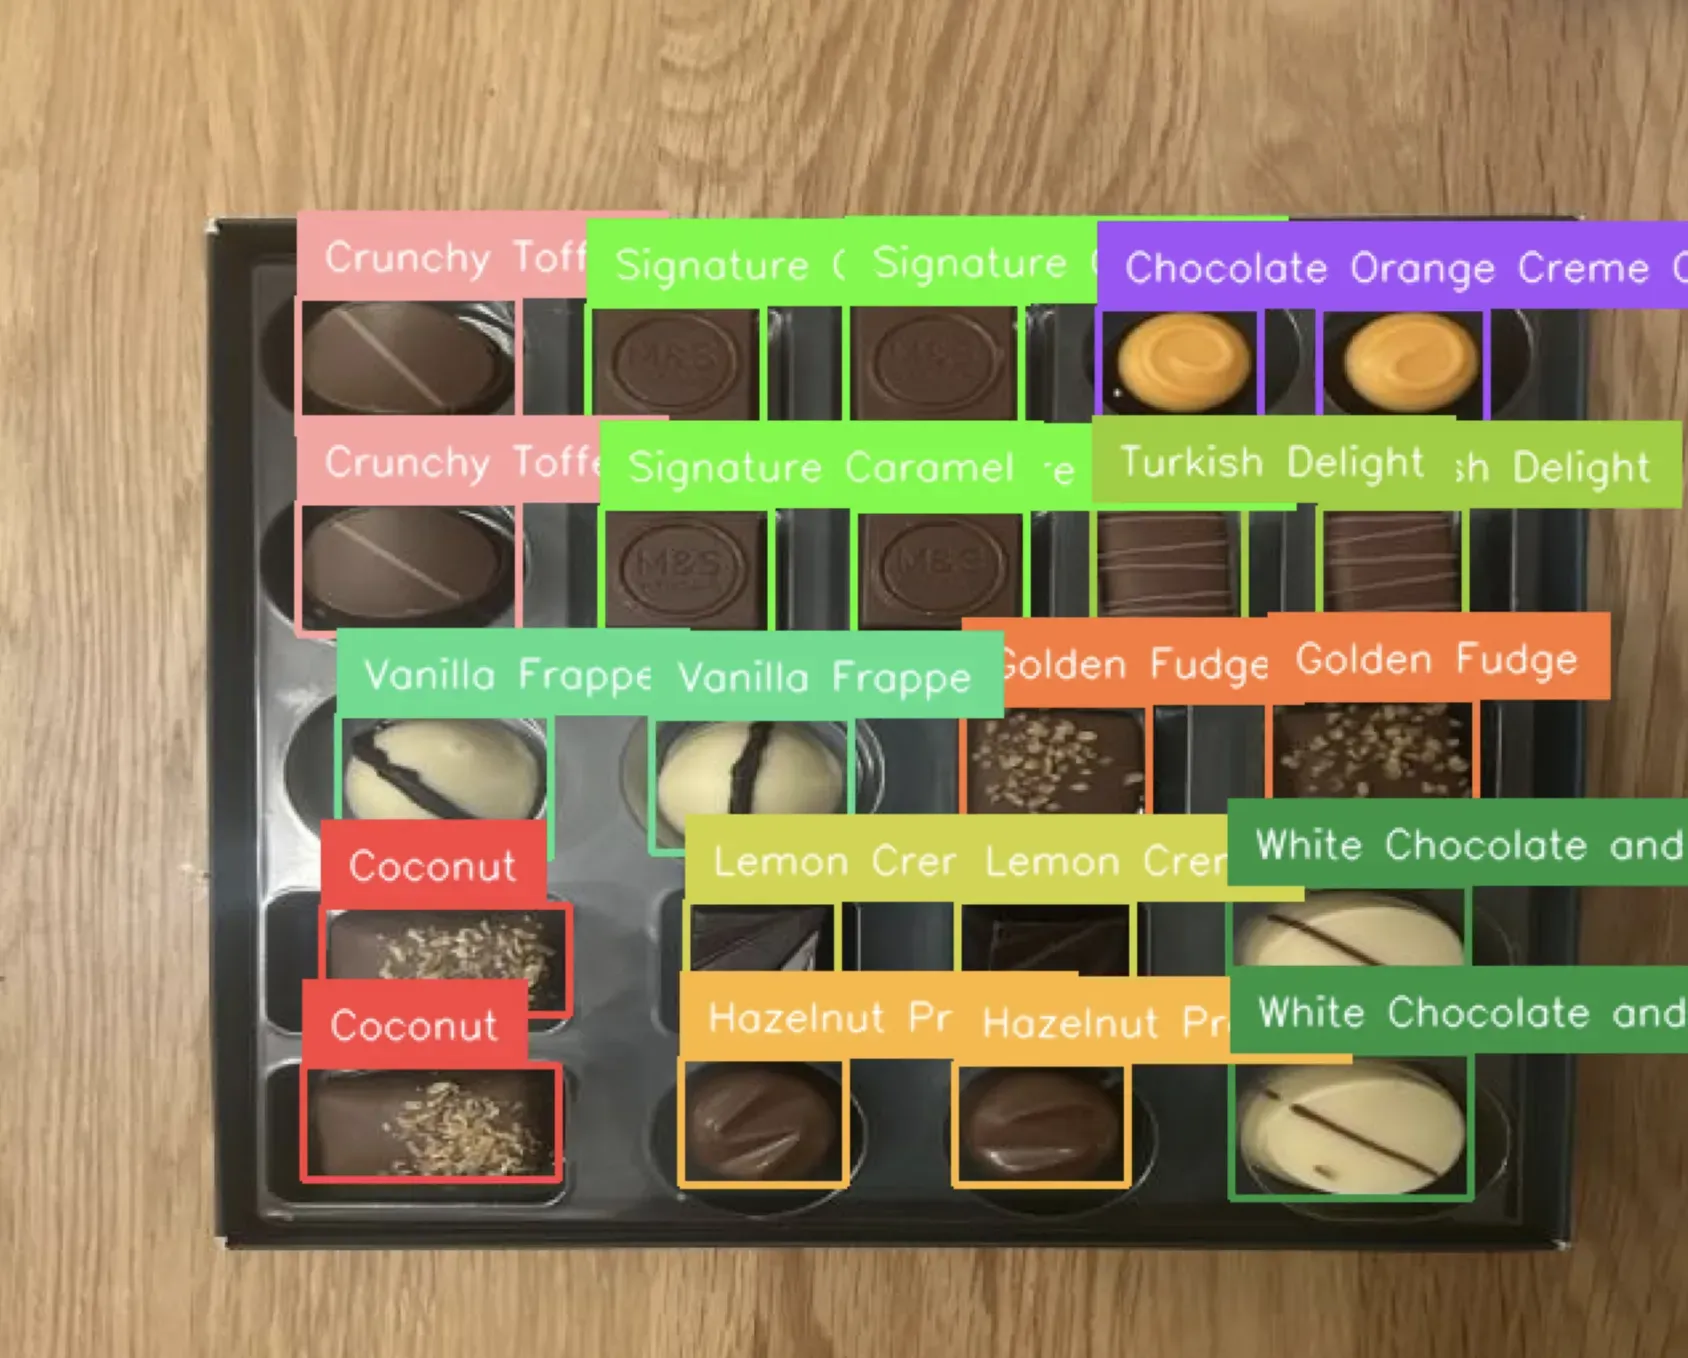
With this capability, we can accept or reject a box if it does not meet conditions (i.e. all chocolates are in the right place). Try the model here for yourself.
Without further ado, let’s build a chocolate box quality assurance system.
Step #1: Create a Project
To get started, create a free Roboflow account. On your Roboflow dashboard, click the “Create Project” button to create a project. Assign a name for your project, then choose the “Object Detection” option.
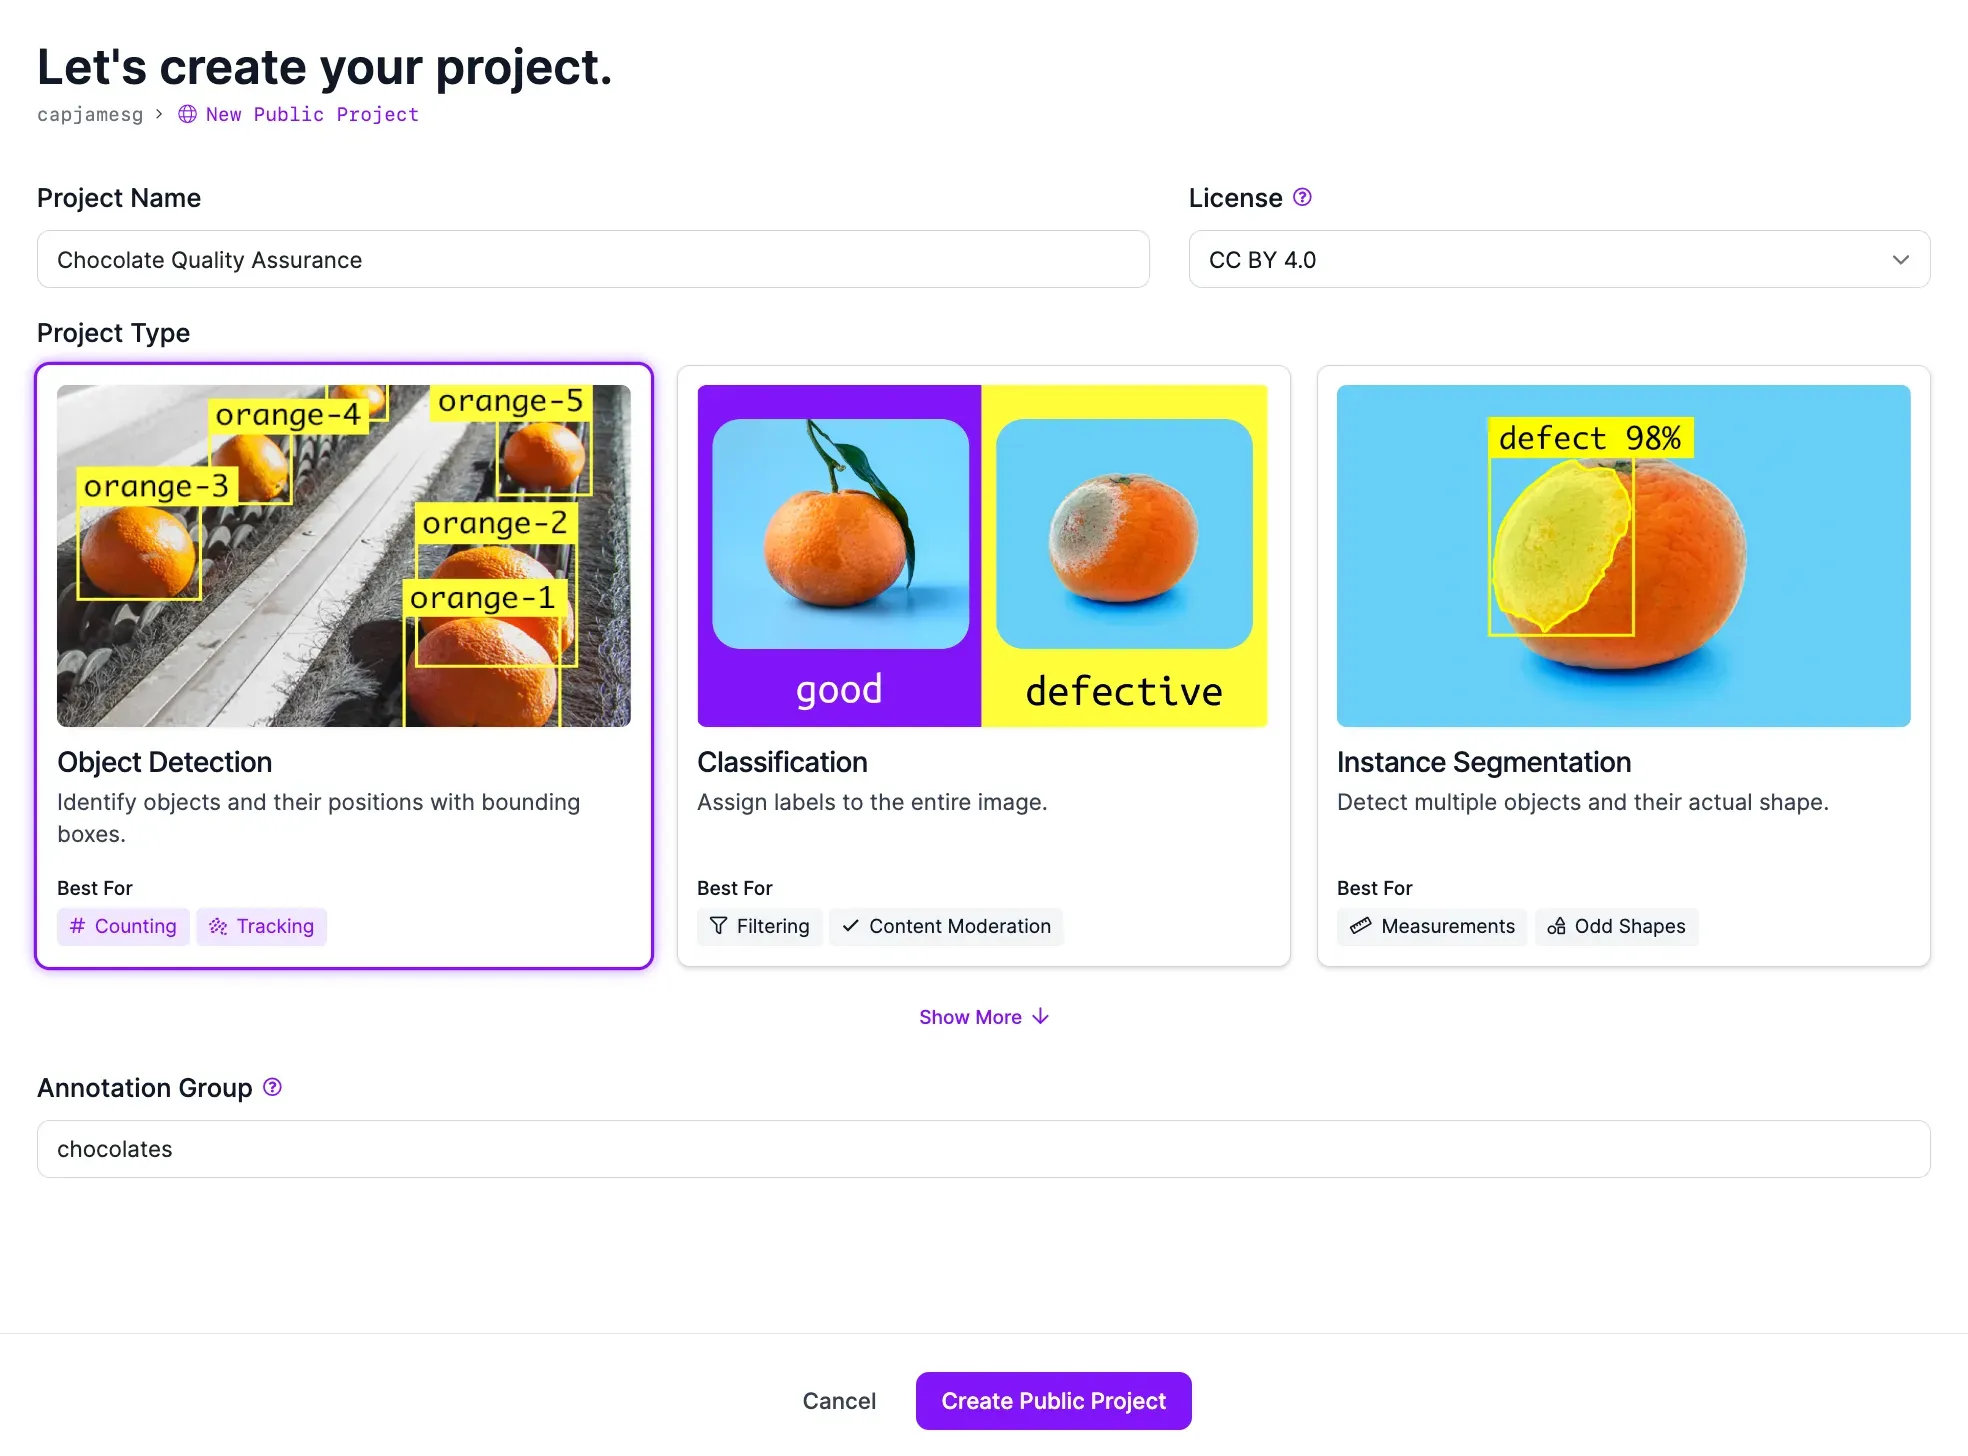
Once you have filled out the required fields, click the “Create Project”.
Step #2: Upload Chocolate Box Images
To train a vision model, you need to annotate images that contain your objects of interest. For optimal model performance, you should use images of your own chocolates.
We recommend collecting 20-30 images. You can then upload and annotate these images for use in training a model with the Roboflow platform.
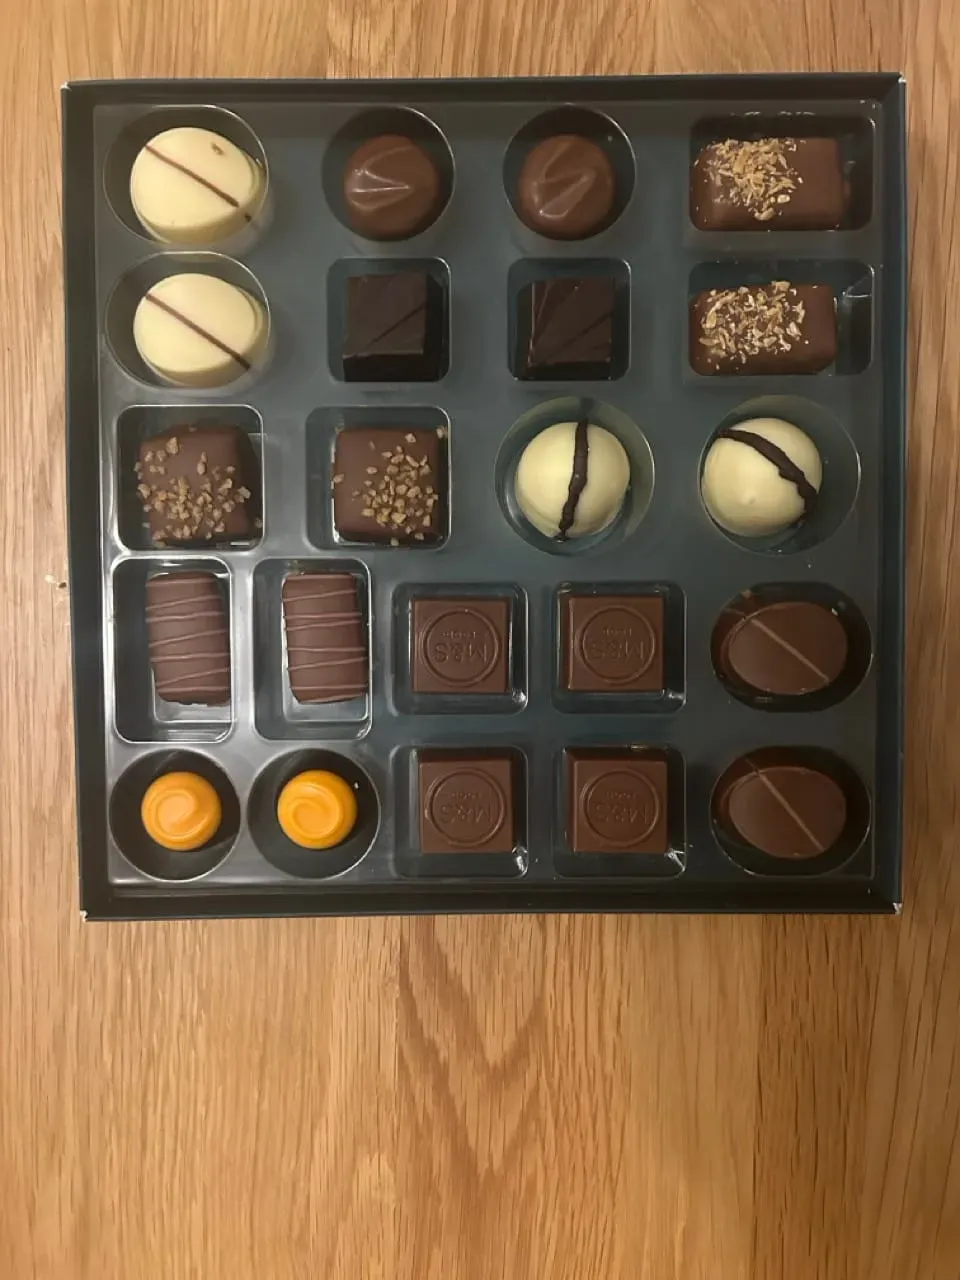
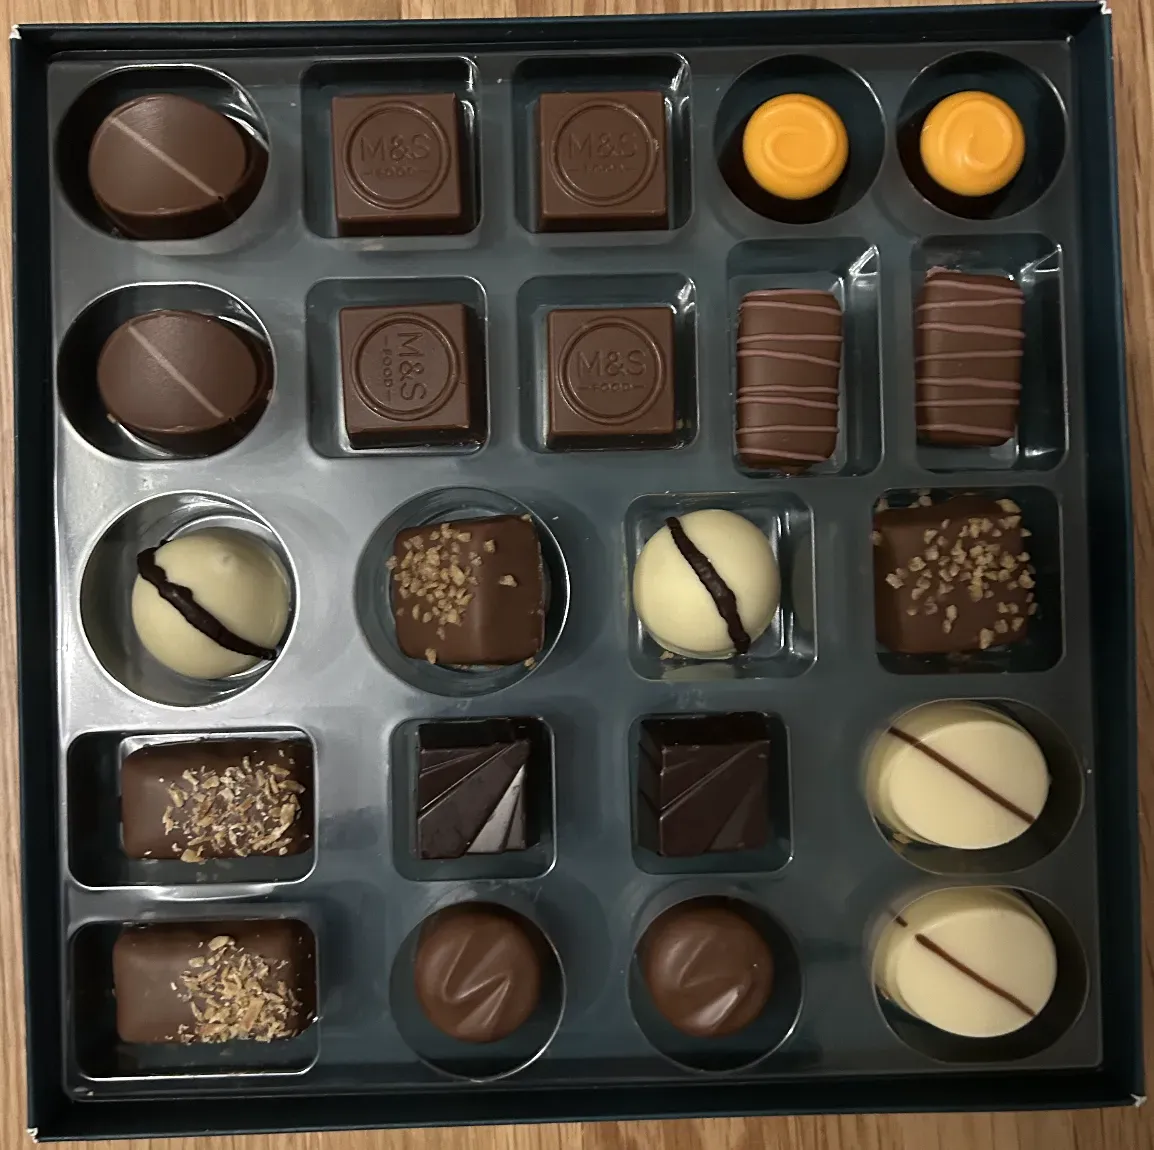
Here is an example of an image we will use in this example for training:
Once you have collected images, you can upload them to Roboflow. To upload your images, drag them into the upload data page in the Roboflow web interface. If you don't have images, download the images from this project on Roboflow Universe.
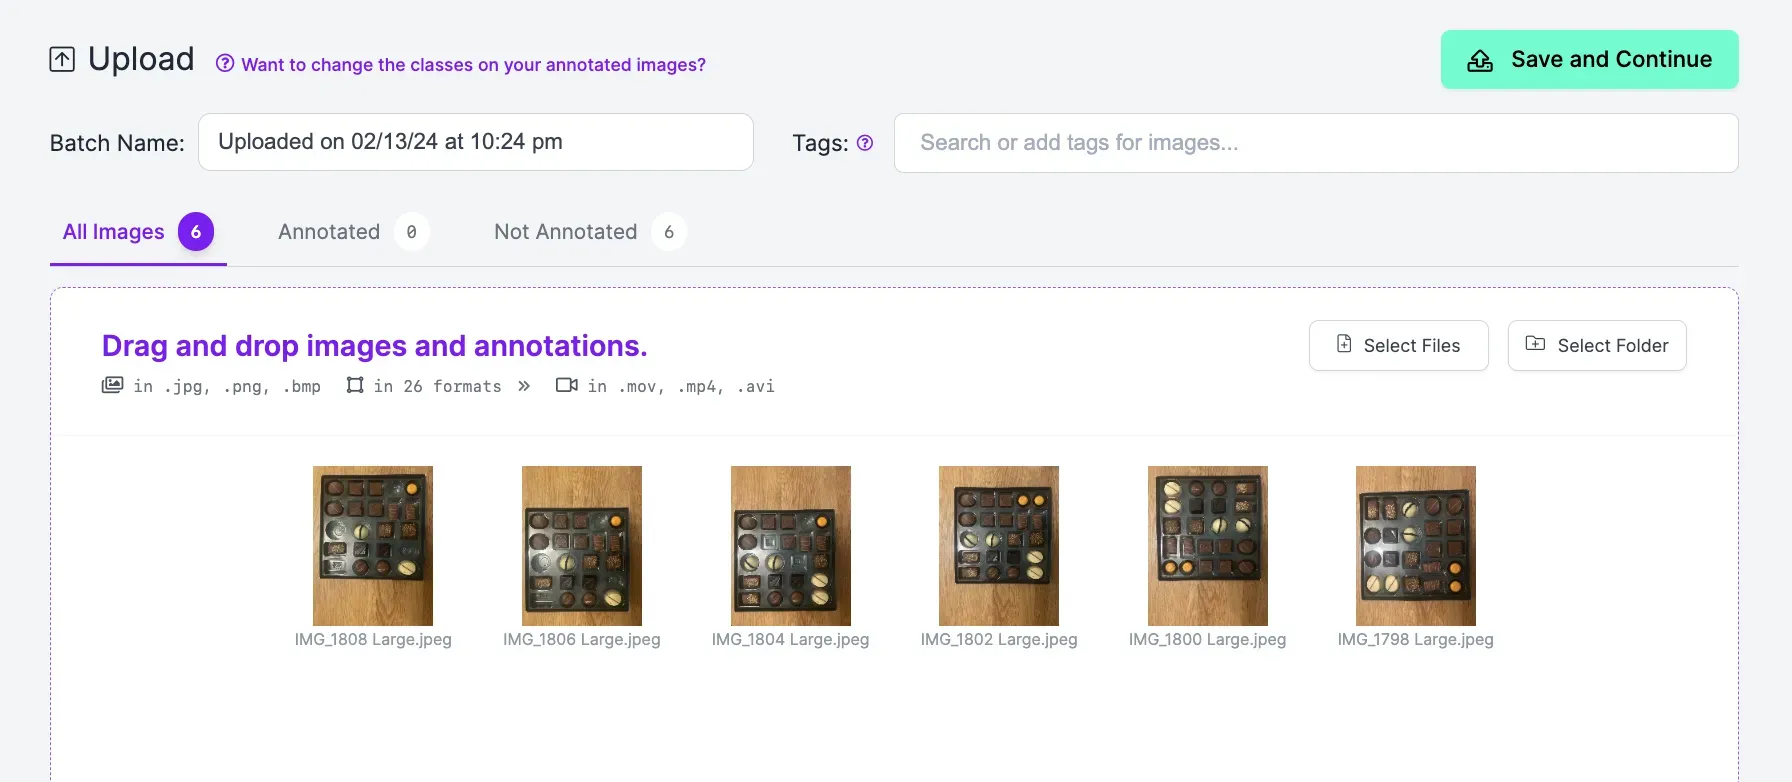
Your images will be processed in your browser. Then, a “Save and Continue” button will appear. Click this button to upload your images. It will take a few moments for your images to upload, after which point you can start labeling them in Roboflow.
Step #3: Label Chocolate Box Images
Computer vision models rely on annotations to learn how to identify different objects of interest. We need to draw bounding box annotations around all of the chocolates in the images we have uploaded. These annotations will be used with our images to train a computer vision model.
Click “Annotate” in the left sidebar then select an image to start labeling your data. When you select an image, the Roboflow Annotate interface will appear. In this interface, you can label your images.
To draw a bounding box, press “b” on your keyboard or select the bounding box tool from the right sidebar. Then, click where you want to start drawing a bounding box on your image. Drag the box around the object of interest. Then, stop clicking. You will be asked to choose or assign a label to the region.
Draw boxes around all chocolates. You should give every flavor of chocolate a unique name that is meaningful to your use case. For example, all coconut chocolates could have the label “Coconut”. All caramel milk chocolates could have the label "Caramel Milk Chocolate".
Step #4: Generate a Dataset Version
Once you have labeled all of your images, you can generate a dataset version. A dataset version is a frozen-in-time snapshot of your data.
You can apply preprocessing and augmentations to the images in a version. Preprocessing steps prepare your images for use in training your model. Augmentations may help boost model performance by generating new images from your existing images.
To generate a dataset version, click “Generate” in the left sidebar.
Leave the preprocessing steps as the default values. Add rotate and noise augmentations using the default settings.
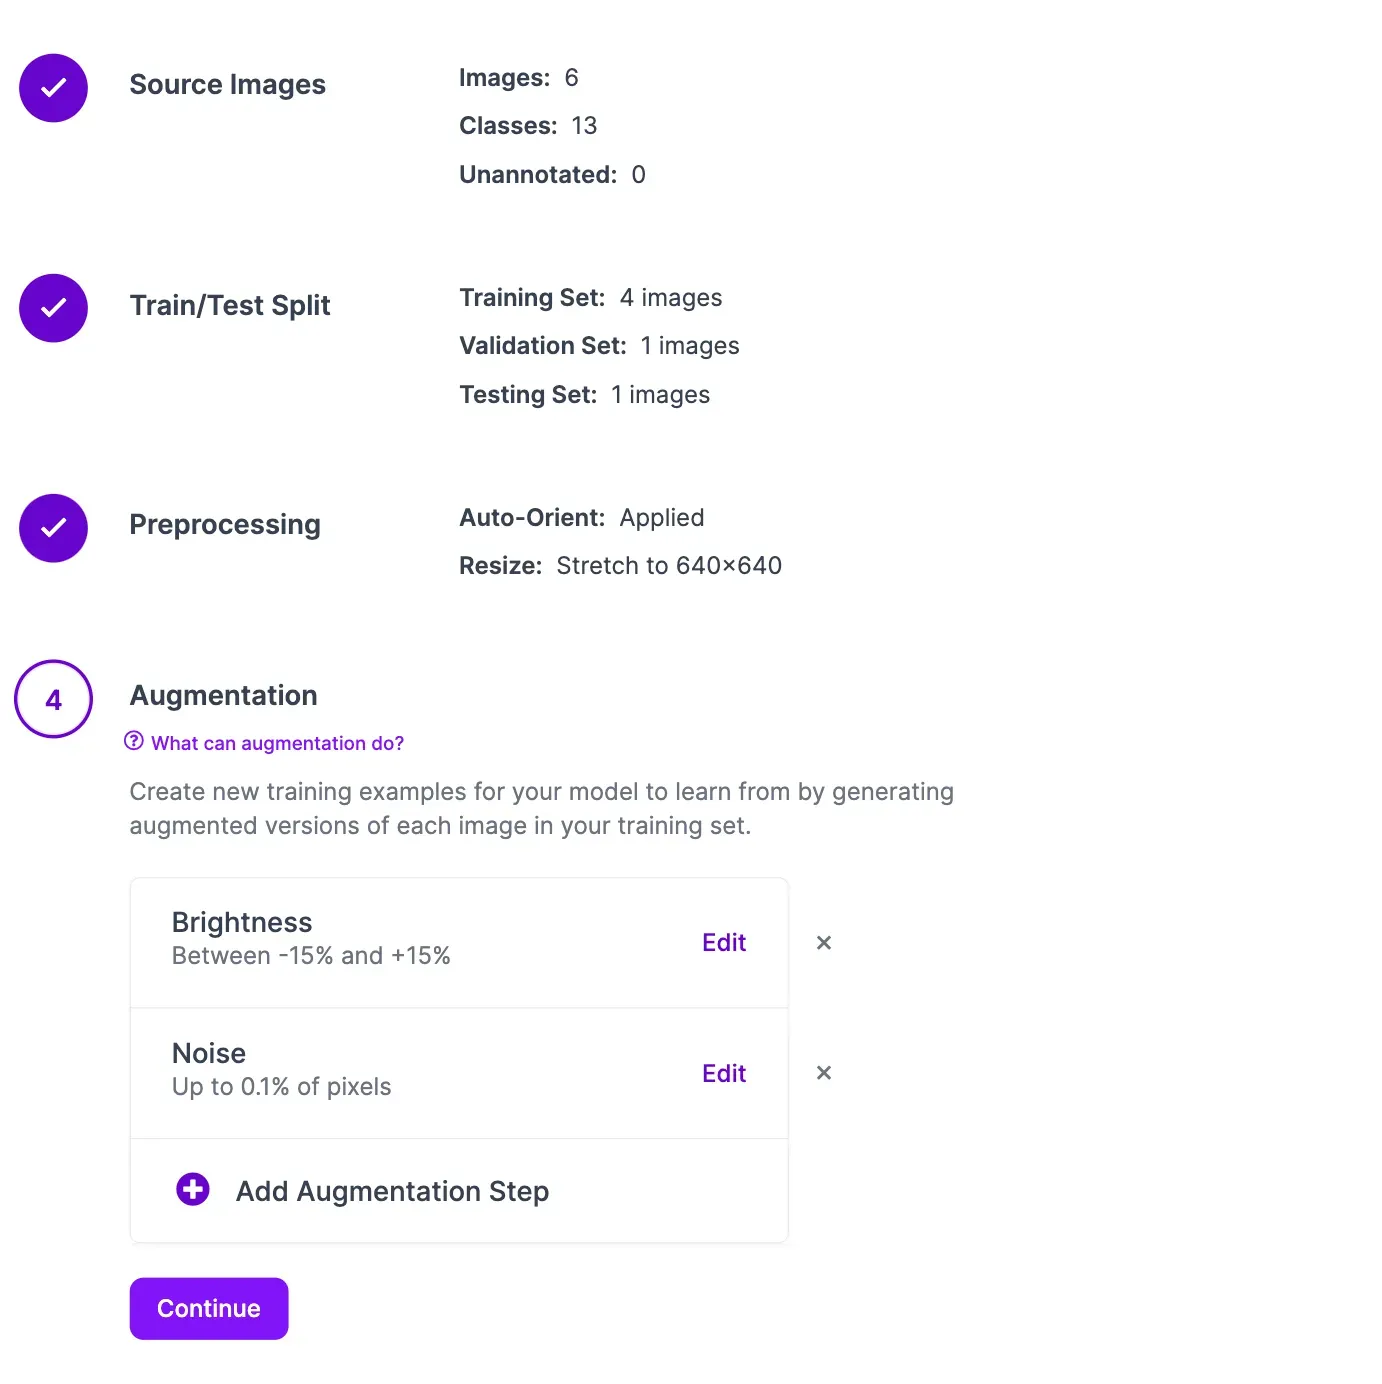
Then, click “Create” at the bottom of the page to generate your dataset version. It will take a few moments for your dataset version to generate.
Step #5: Train a Chocolate Box Inspection Model
With your dataset ready, you can train your chocolate box inspection model. This model will be able to distinguish between different types of chocolate. We will use our model with a Python script in the next step to conduct an inspection of a box of chocolates.
To train a model, click the “Train with Roboflow” button.
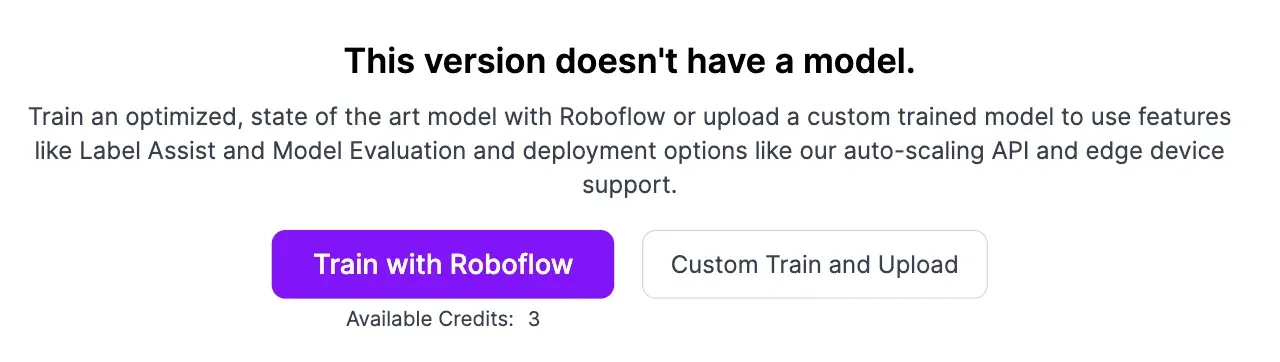
Choose “Fast” training. Then, select the option to train from a public checkpoint. Make sure the MS COCO option is selected. Then, click “Start Training”. Your model training job will be allocated to a server. You will receive an estimate that shows how long we expect it will take to train your model.
You can view the progress of your model training job live from your dataset page:
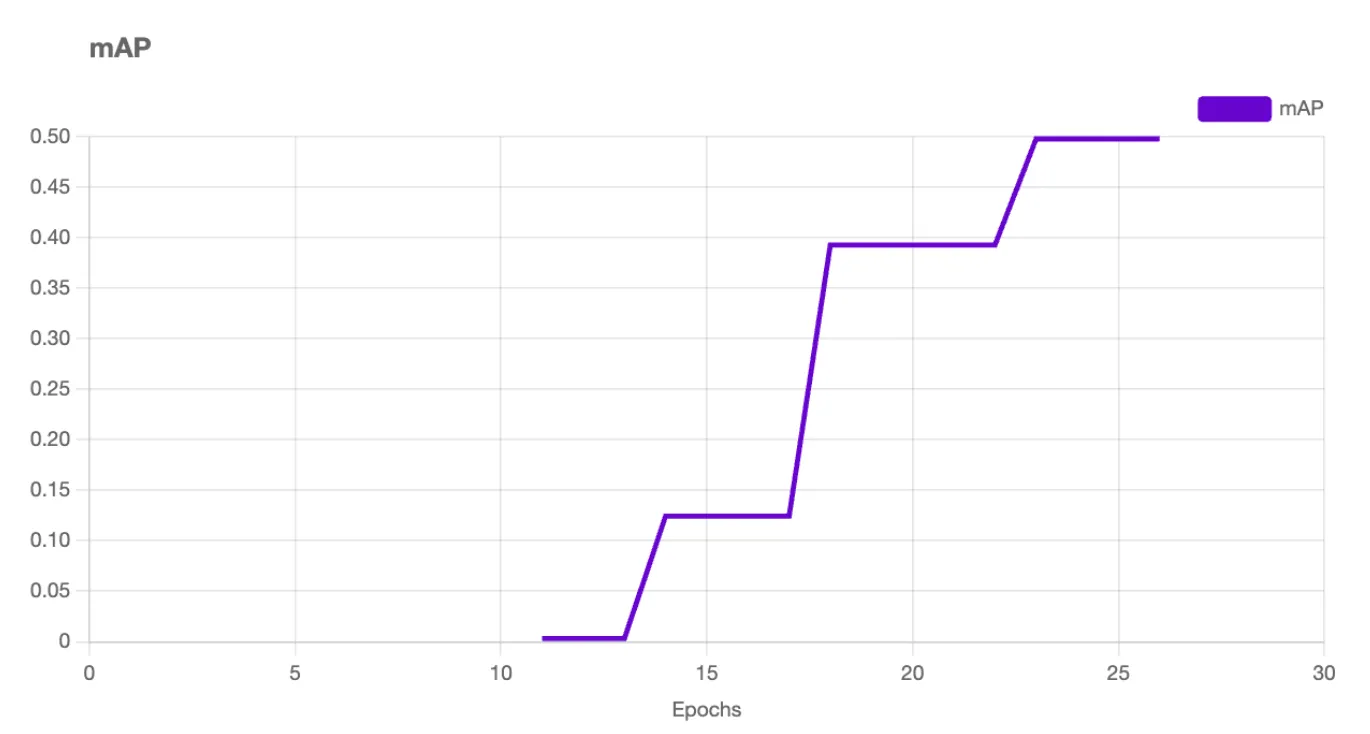
You will receive an email once your model has finished training.
When your model is ready, you can test it using the Visualize page. You can access this page by clicking the “Visualize” link in the left sidebar. On this page, you can select an image from your test set to use in evaluating your model. You can also upload another image or a video.
Here is an example of our model running on an image:
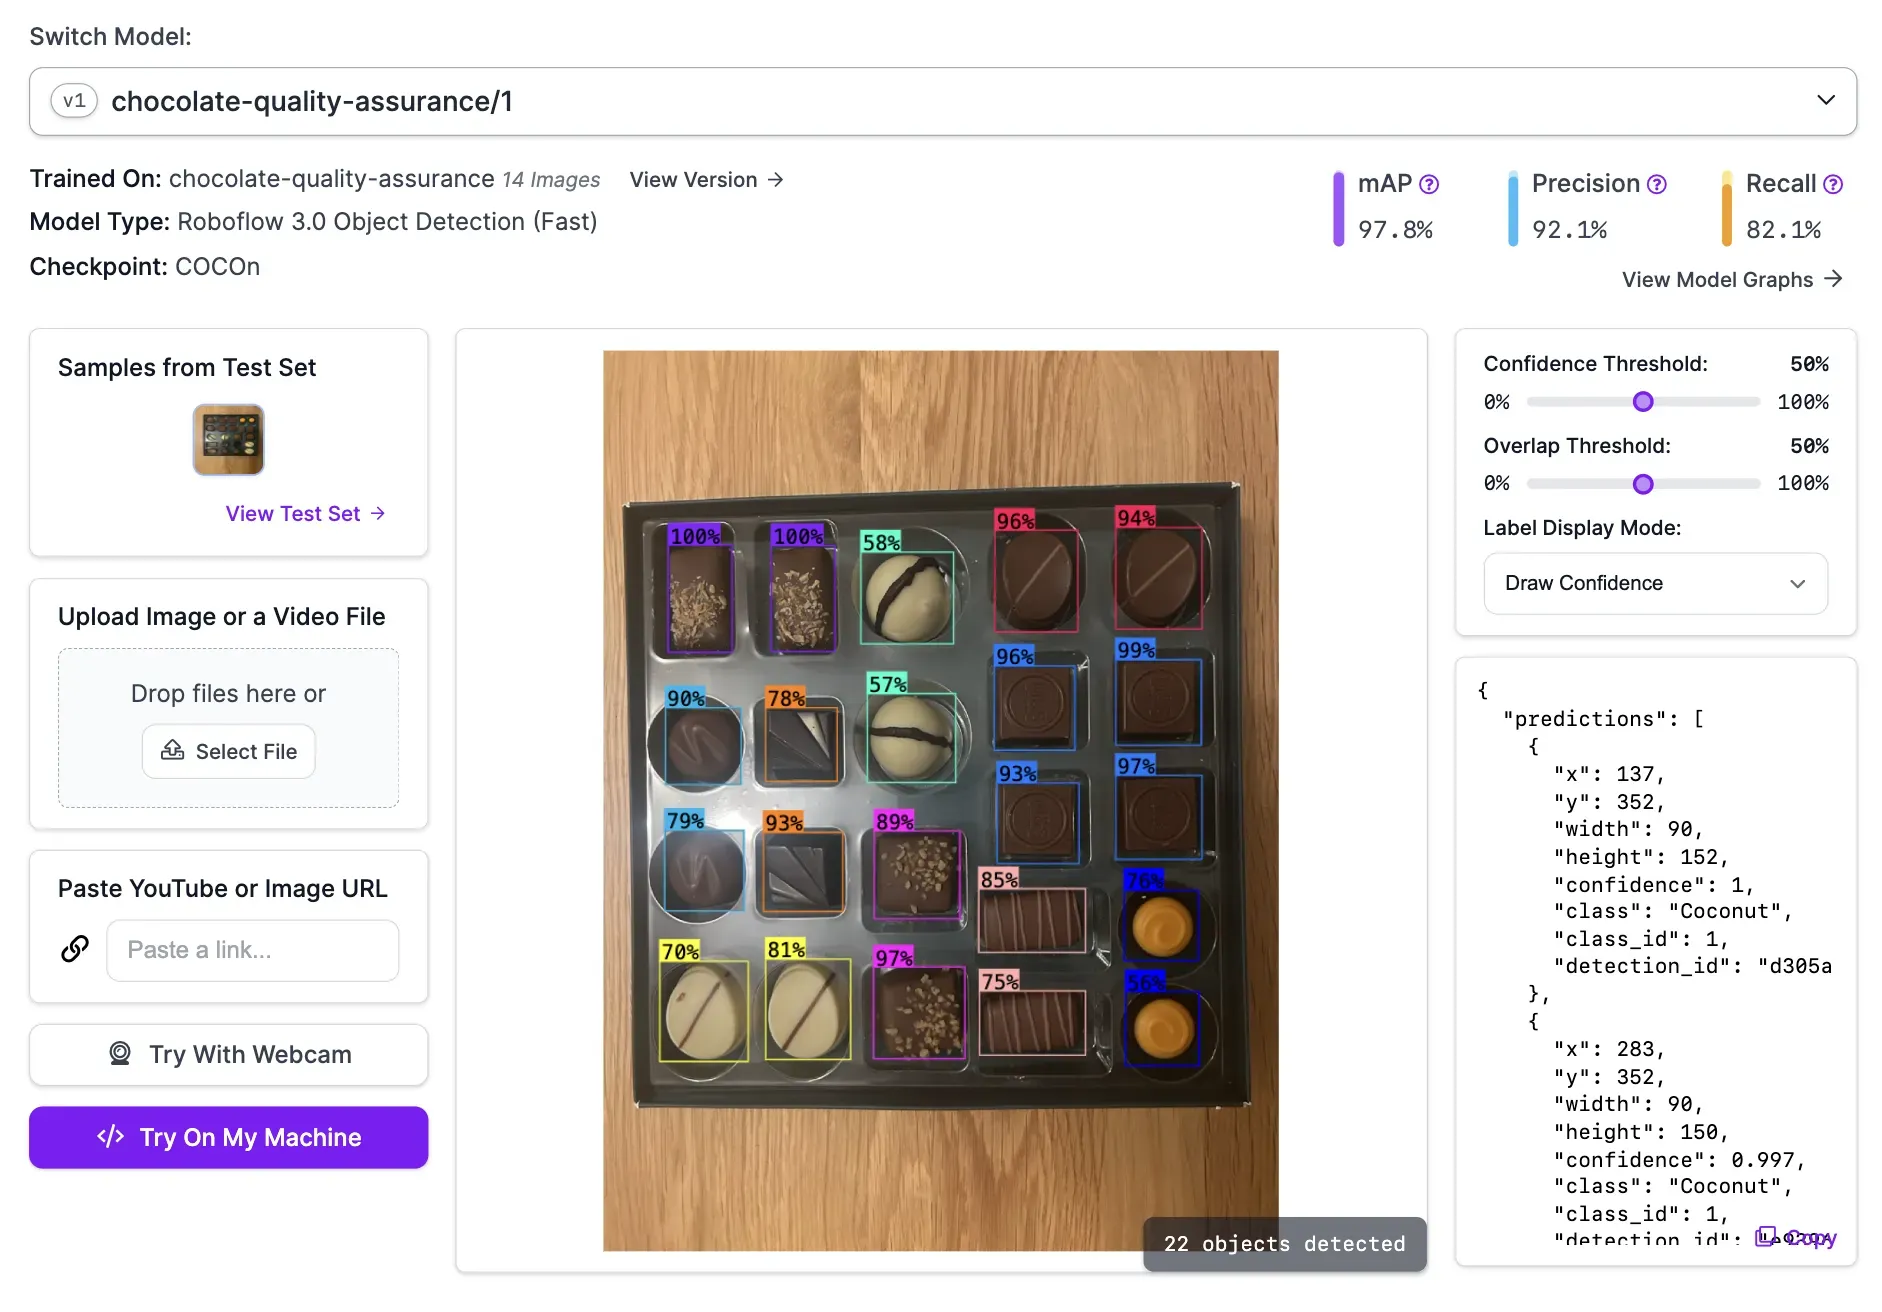
Our model successfully identified all the chocolates in the box.
Step #6: Deploy the Chocolate Box Inspection System
You can deploy your chocolate box model on your own hardware using Roboflow Inference, an open source inference server that lets you deploy and manage computer vision models. The software behind Inference powers millions of API calls a month for enterprise applications.
Using Inference, you can run our model on your own hardware. Then, you can add logic to ensure that:
- There are the correct number of total chocolates in the box;
- There is the right balance of different types of chocolates in the box, and;
- Each chocolate is in the correct place.
To get started, first install Inference with pip:
pip install inferenceThen, install supervision, a Python package with utilities for working with computer vision models:
pip install inferenceNext, you need to set your Roboflow API key in your environment. To do so, run the following command in your terminal:
export ROBOFLOW_API_KEY="key"Learn how to retrieve your API key.
Create a new Python file and add the following code:
from inference import get_roboflow_model
import supervision as sv
import cv2

image = cv2.imread("image.jpg")

model = get_roboflow_model(model_id="chocolate-quality-assurance/1")

result = model.infer(image)[0]
detections = sv.Detections.from_inference(result)

bounding_box_annotator = sv.BoundingBoxAnnotator()
label_annotator = sv.LabelAnnotator()

annotated_image = bounding_box_annotator.annotate(
    scene=image, detections=detections)
annotated_image = label_annotator.annotate(
    scene=annotated_image, detections=detections)

sv.plot_image(annotated_image)
Above, replace:
image.jpgwith the name of the image on which you want to run your model.chocolate-quality-assurance/1with your Roboflow model ID. Learn how to retrieve your model ID.
The code above runs our model on an image. The model will return the coordinates of all of the detected objects. We then display the results to the screen so we can review them.
When you run the script for the first time, your model weights will be downloaded for use in your project. This process will take a few moments. Then, your model will run on the provided image.
Let’s run our script. Here are the results on an image of a box of chocolates with a missing chocolate:

Our model successfully identified all the chocolates.
Now that we have the logic to use our model, we can add logic to conduct an inspection.
Create a new Python file and add the following code:
import cv2
import numpy as np
import supervision as sv
from inference import get_roboflow_model

order = [
    [
        "Crunchy Toffee",
        "Signature Caramel",
        "Signature Caramel",
        "Chocolate Orange Creme Crunch",
        "Chocolate Orange Creme Crunch",
    ],
    [
        "Crunchy Toffee",
        "Signature Caramel",
        "Signature Caramel",
        "Turkish Delight",
        "Turkish Delight",
    ],
    ["Vanilla Frappe", "Vanilla Frappe", "Golden Fudge", "Golden Fudge"],
    ["Coconut", "Lemon Creme", "Lemon Creme", "White Chocolate and Vanilla"],
    ["Coconut", "Hazelnut Praline", "Hazelnut Praline", "White Chocolate and Vanilla"],
]

image = cv2.imread("chocolates_wrong.jpeg")

model = get_roboflow_model(model_id="chocolate-quality-assurance/1")

result = model.infer(image)[0]
detections = sv.Detections.from_inference(result)

points = detections.get_anchors_coordinates(anchor=sv.Position.CENTER)

indices_y = points[:, 1].argsort()
detections_y = detections[indices_y]
points_y = points[indices_y]

detections_by_row = []
current_index = 0

for row in order:
    start_index = current_index
    end_index = current_index + len(row)
    detections_row = detections_y[start_index:end_index]
    points_row = points_y[start_index:end_index]
    indices_row_x = points_row[:, 0].argsort()
    detections_row = detections_row[indices_row_x]
    current_index = end_index

    detections_by_row.append(detections_row)

detections = detections.merge(detections_by_row)

flattened_expected = [detection for row in order for detection in row]
detections = [detection[-1]["class_name"] for detection in detections]

for i, (expected, detected) in enumerate(zip(flattened_expected, detections)):
    if expected != detected:
        print(f"Error at index {i}: expected {expected}, detected {detected}")
In this code, we declare a variable called order, in which you declare in what order, from left to right, top to bottom, our chocolates should appear. Each row corresponds with a row in the box of chocolates. The names of chocolates should be exactly equal to the class names you set in Roboflow.
Run an image through the model and make sure the chocolates identified by the model match the expected results. If there is a deviation (i.e. a chocolate is missing, a chocolate is in the wrong place), the script prints an error indicating the box is defective.
You could connect this logic to your manufacturing process so that boxes of chocolates with problems (i.e. too few chocolates, chocolates in the wrong place) can be addressed as necessary.
Let’s run our script on an image of a box of chocolates that doesn’t comply with the order list above:
Our script returns:
Error at index 11: expected Vanilla Frappe, detected Golden Fudge
Error at index 12: expected Golden Fudge, detected Vanilla Frappe
Our script successfully identified that two chocolates were in the wrong place.
Conclusion
You can use computer vision to conduct visual inspections of chocolate boxes. In this guide, we built a system that can ensure a box has the correct number of chocolates and that chocolates are in the right place in the box.
To build this system, we collected images of chocolates, labeled them in Roboflow, then trained a model to identify each type of chocolate. We then used Roboflow Inference to deploy our model. We wrote logic that used the results from our model to ensure the box of chocolates met the requirements in terms of the number of chocolates in the box and chocolate position.
The model we built in this guide would play a broader role in a chocolate quality assurance system. For example, you could have another system earlier in your manufacturing process that ensures individual chocolates are not defective (i.e. that the chocolate has not melted or is the proper size).
If you need assistance in architecturing a computer vision solution for your chocolate manufacturing needs, contact the Roboflow sales team.