Before bottles can be packaged for distribution, inspections must be run to assure the integrity of the bottle cap. If a bottle cap is not properly sealed, it must be rejected before proceeding to packaging and distribution.
Computer vision can be used to identify whether a cap is or is not properly sealed, and check whether there is or is not a cap present on a bottle.
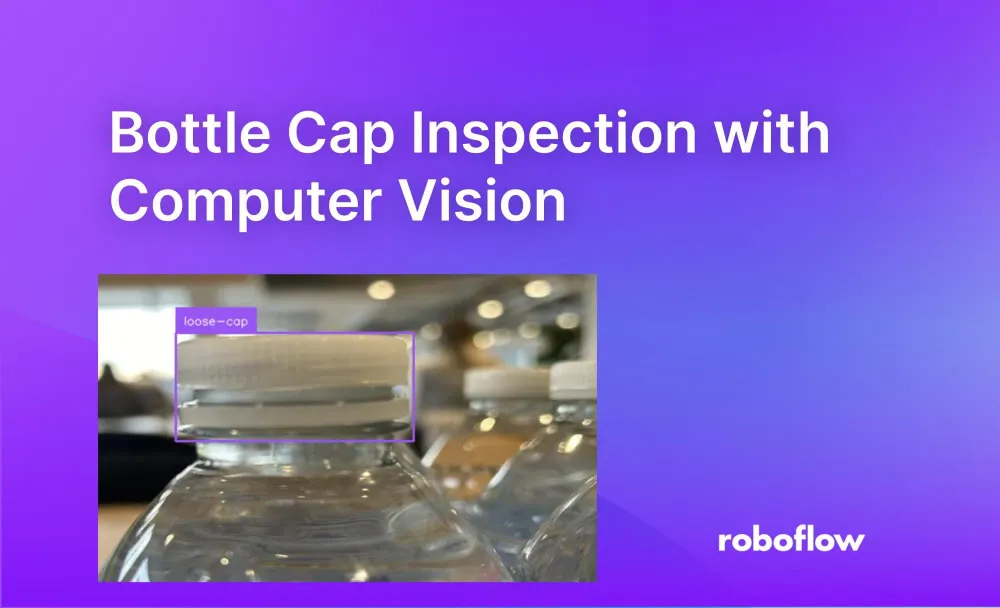
In this guide, we are going to walk through how to build a bottle cap inspection system that verifies the integrity of a bottle cap. By the end of this guide, we will have a system that can automatically identify whether a cap is sealed. Here is an example of the system running:

Without further ado, let’s get started!
Step #1: Create a Project
First, create a free Roboflow account. Then, go to your Roboflow dashboard. Click the “Create a Project” page to create a project. You will be taken to a page where you will be asked to configure your project.
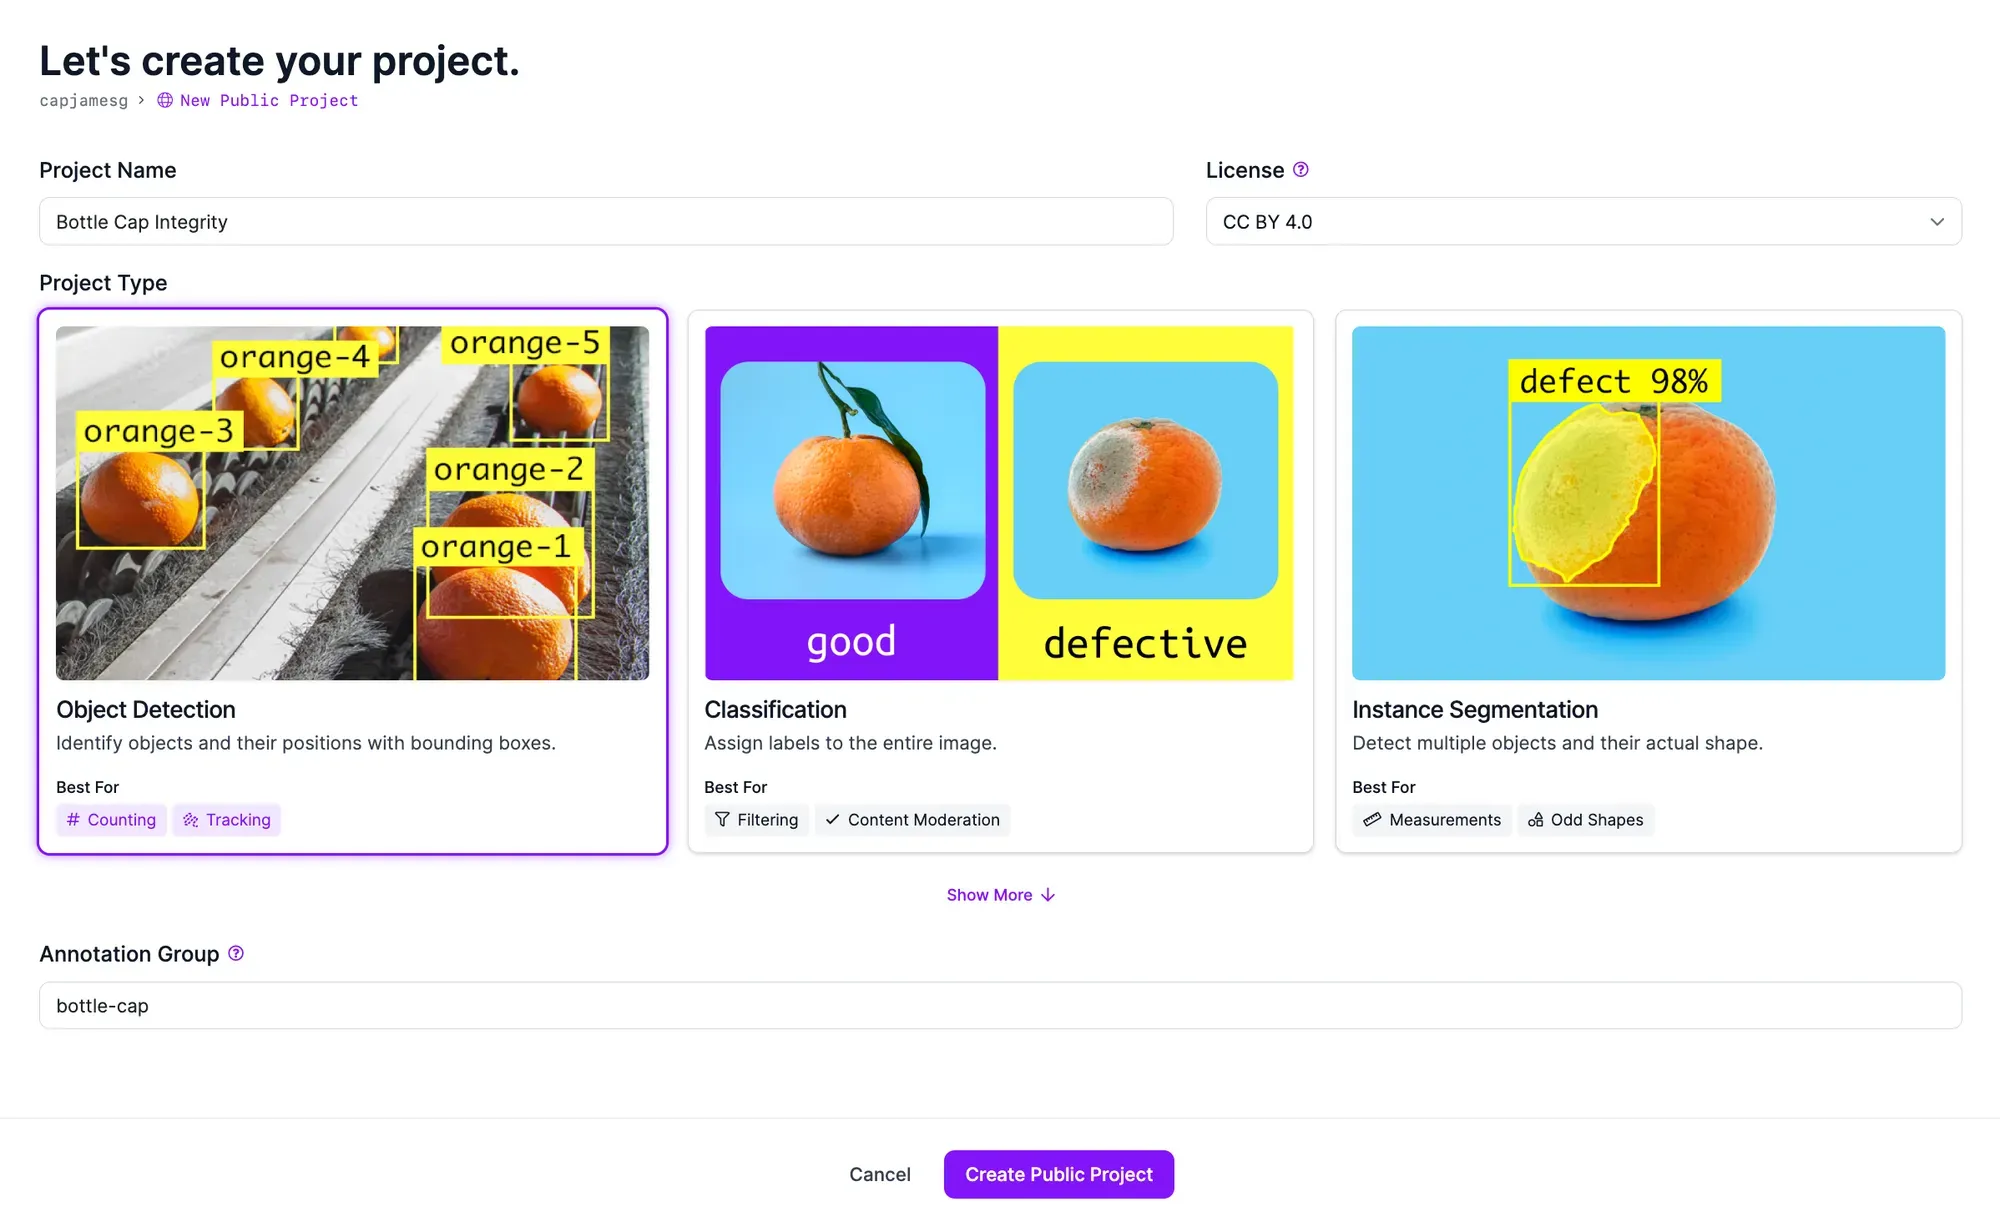
Choose a name for your project. Select “Object Detection” as your project type. Once you have filled out the required fields, click “Create Project”.
Step #2: Upload Bottle Cap Data
To build a computer vision system, you need to label images with objects of interest. We need to train our system to identify whether a bottle cap is or is not properly sealed. For that, we will need images that show a bottle cap that is both sealed, not properly sealed, and missing. For optimal performance, we recommend gathering images of bottle caps from your assembly line.
Here are a few example images of bottles with different caps:
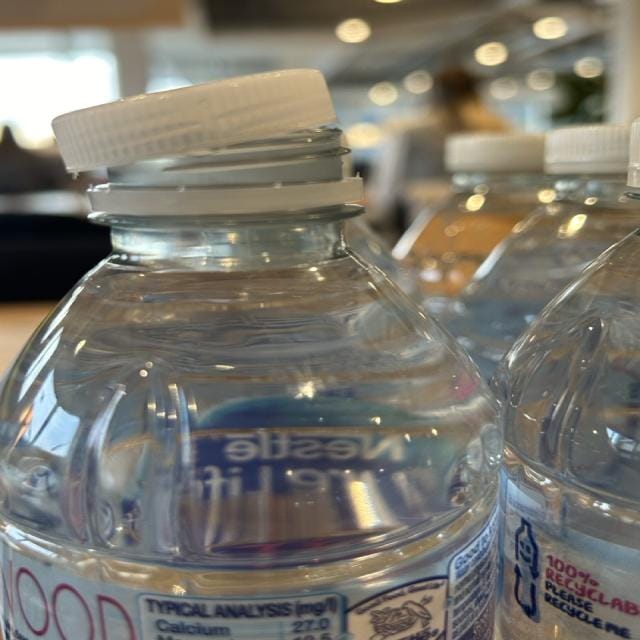
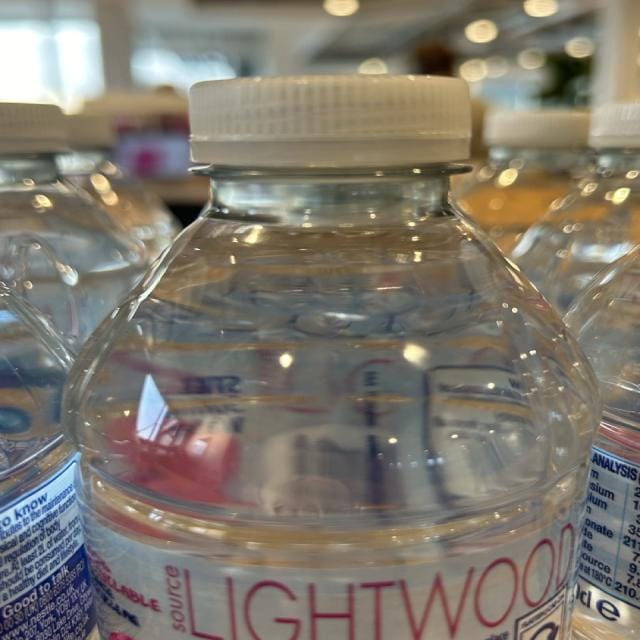
Left: A bottle with an unsealed cap. Right: A bottle with a properly sealed cap.
We recommend collecting 20-50 images that show all types of defects you want to identify for your first model. For this example, we have collected images that show:
- A sealed cap;
- A loose cap, and;
- A missing cap.
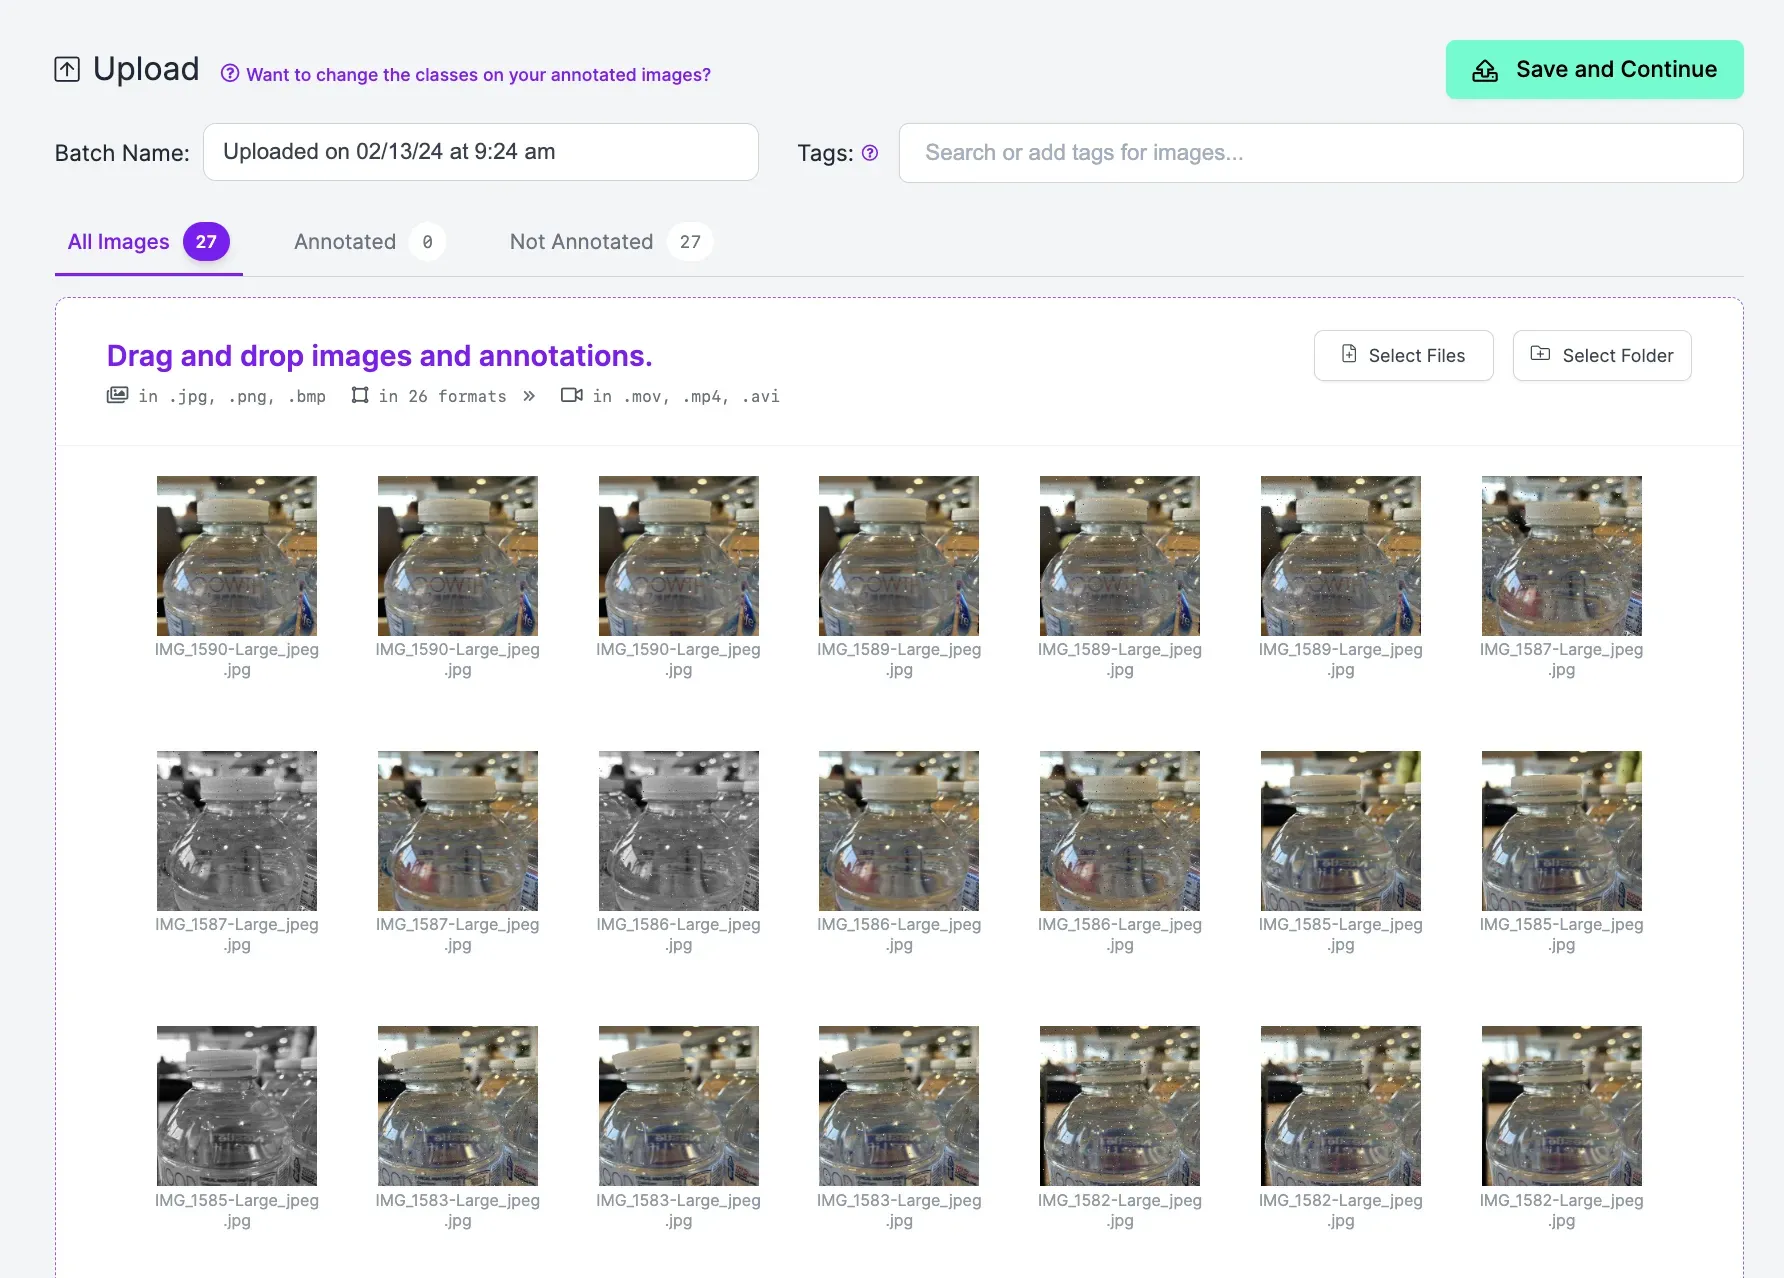
Once you have created a project, you will be taken to a page on which you can upload your data. To upload data, drag images onto the upload data page. Your images will be processed in your browser. Use the images from this tutorial if you don't want to collect your own.
Then, click “Save and Continue” to upload your images.
Step #3: Label Bottle Cap Images
You need to annotate your images to train your model to identify loose and sealed caps. This process is also known as labeling.
You can annotate your images with Roboflow Annotate. To get started, click Annotate in the left sidebar. Then, select an image to annotate. You will be taken to the labeling interface where you can label your data.
To create a label, first press “b” on your keyboard or click the box tool in the right sidebar. This will toggle the bounding box tool for use in drawing object detection labels.
Click where you want to start drawing your label on the image then drag your cursor around the object of interest. When you have surrounded the region of interest – a full or loose cap – with a box, stop clicking. You can then select a class to assign to your label.
Label all bottle caps in the images you uploaded to Roboflow.
Step #4: Generate a Dataset Version
With all of the images labeled, you can generate a dataset version. A dataset version is a snapshot of your labeled images. You can apply preprocessing and augmentation steps to prepare your model for training and improve model performance, respectively.
To generate a dataset, click “Generate” in the sidebar. You will be taken to a page on which you can configure your dataset version.
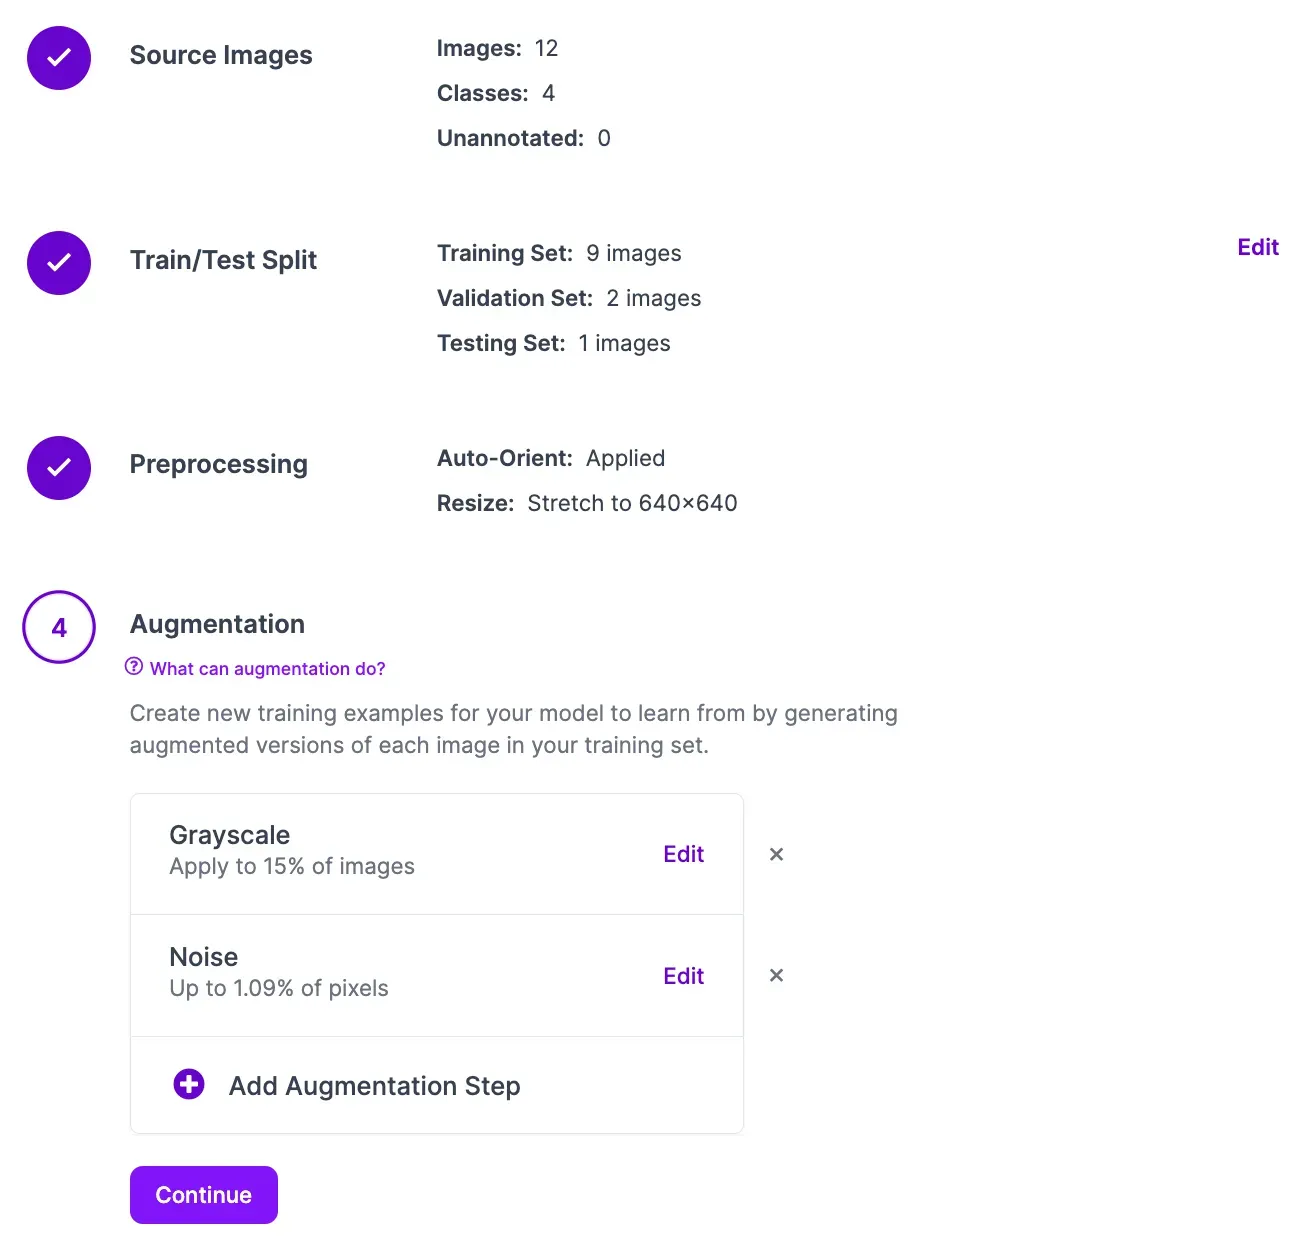
For your first dataset version, we recommend leaving the preprocessing steps as the default. We recommend applying the following augmentations for your first version:
- Greyscale
- Noise (up to 1% of pixels)
You should only apply a greyscale augmentation if bottle cap color does not matter. If you need to verify the color of a bottle cap, do not apply a greyscale augmentation.
Click the “Create” button under the “Generate” step at the bottom of the page to create your dataset version.
Step #5: Train a Bottle Cap Inspection Model
With a dataset ready, you can train a model to inspect bottle caps.
To start training a model, click the Train with Roboflow button on your dataset page.
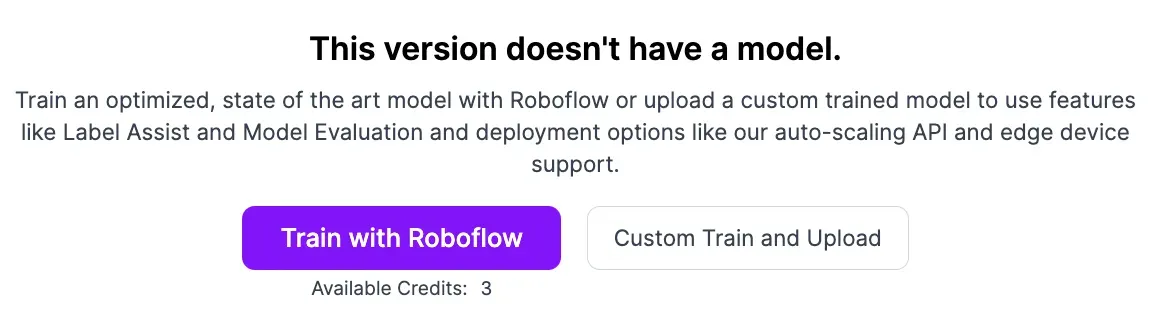
A pop up will appear in which you can configure your model training job. From this pop up, select “Fast” training. Then, select the option to train from the Microsoft COCO Checkpoint. Once you have configured your training job, an estimate will appear that shows roughly how long it should take to train your model.
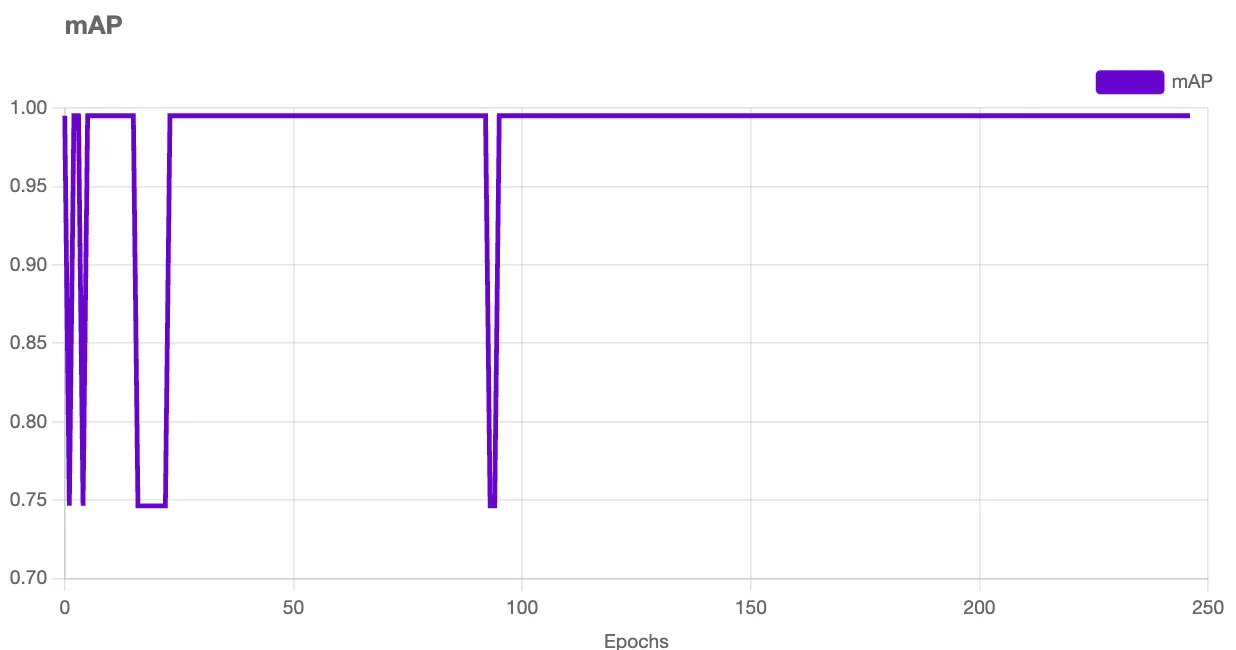
You can monitor your training job in real time from your dataset page. Once your training job has been allocated to a machine, a graph will appear that shows the performance of your model as it trains.
You will receive an email once your model has trained.
When your model has finished training, you can test it from the .Visualize tab available in the sidebar of your project.
Here is an example of our model running to identify a sealed cap:
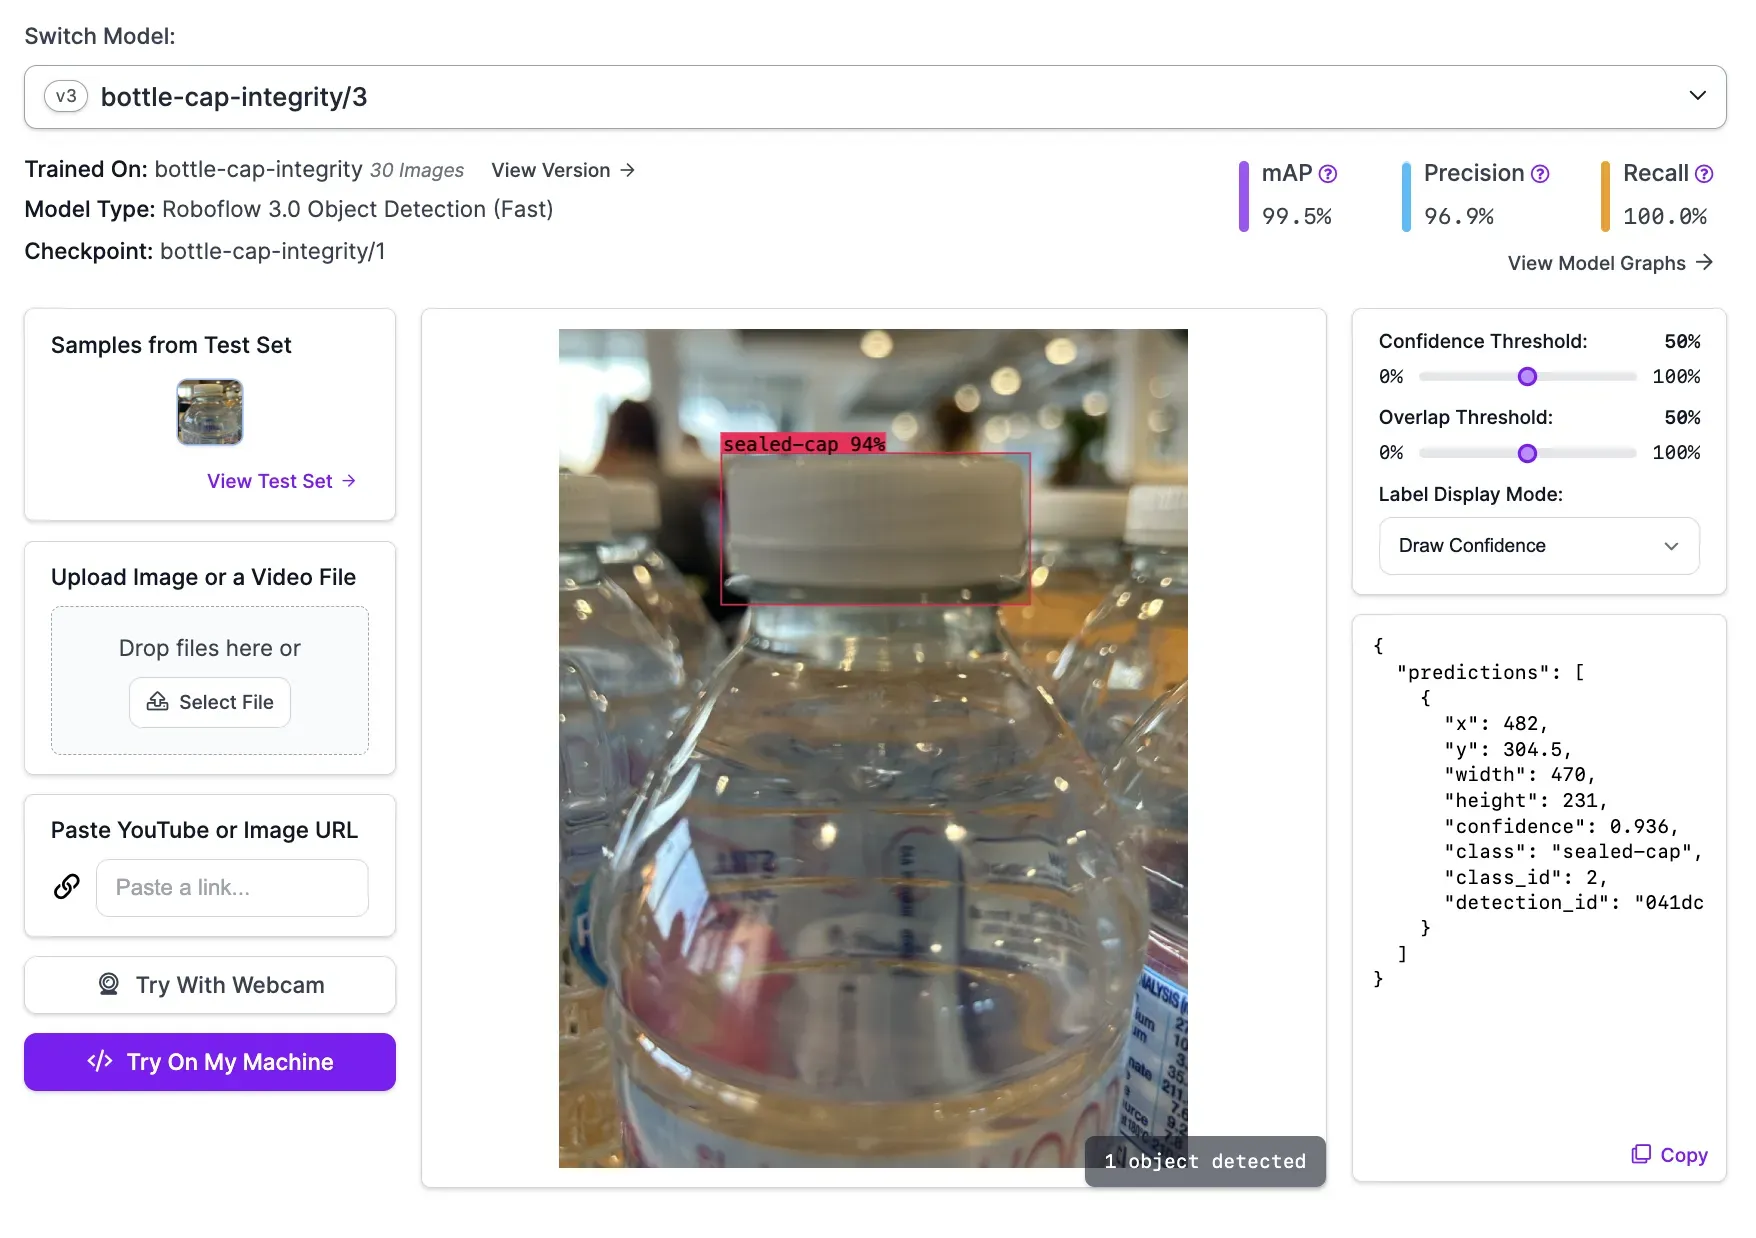
Our model successfully identified that a bottle cap is properly sealed.
Step #6: Deploy the Bottle Cap Inspection Model
With a model ready, you can deploy it on your own hardware using Roboflow Inference. Roboflow Inference is high-performance software that lets you run computer vision models on images, videos, live camera streams, and RTSP streams.
For this guide, we will test our model on an image. Refer to the Inference documentation to learn how to deploy a model on a camera stream in real time.
To get started, we need to install Inference. We also need to install supervision, a Python package with utilities for working with computer vision models.
To install the required dependencies, run the following command:
pip install inference supervisionNext, you need to export your Roboflow API key into your environment. To do so, set an environment variable called ROBOFLOW_API_KEY:
export ROBOFLOW_API_KEY="key"Learn how to retrieve your Roboflow API key.
Next, create a Python file and add the following code:
from inference import get_roboflow_model
import supervision as sv
import cv2

image = cv2.imread("image.jpg")

model = get_roboflow_model(model_id="bottle-cap-integrity/3")

results = model.infer(image)

labels = [i.class_name for i in results[0].predictions]
detections = sv.Detections.from_inference(results[0].dict(by_alias=True, exclude_none=True))

bounding_box_annotator = sv.BoundingBoxAnnotator()
label_annotator = sv.LabelAnnotator()

annotated_image = bounding_box_annotator.annotate(
    scene=image, detections=detections)
annotated_image = label_annotator.annotate(
    scene=annotated_image, detections=detections, labels=labels)

sv.plot_image(annotated_image)
Above, replace bottle-cap-integrity/3 with your model ID and version number. Learn how to retrieve your model ID and version number. Replace image.jpg with the name of the image on which you want to run inference.
When this code first runs, our model will be downloaded to our device. This can take a few moments. Then, our model will run on an image. The results from our model will be plotted onto our image interactively, allowing us to make sure our model is working as expected.
Let’s run the code on an image where a bottle cap is not properly sealed. Here are the results:
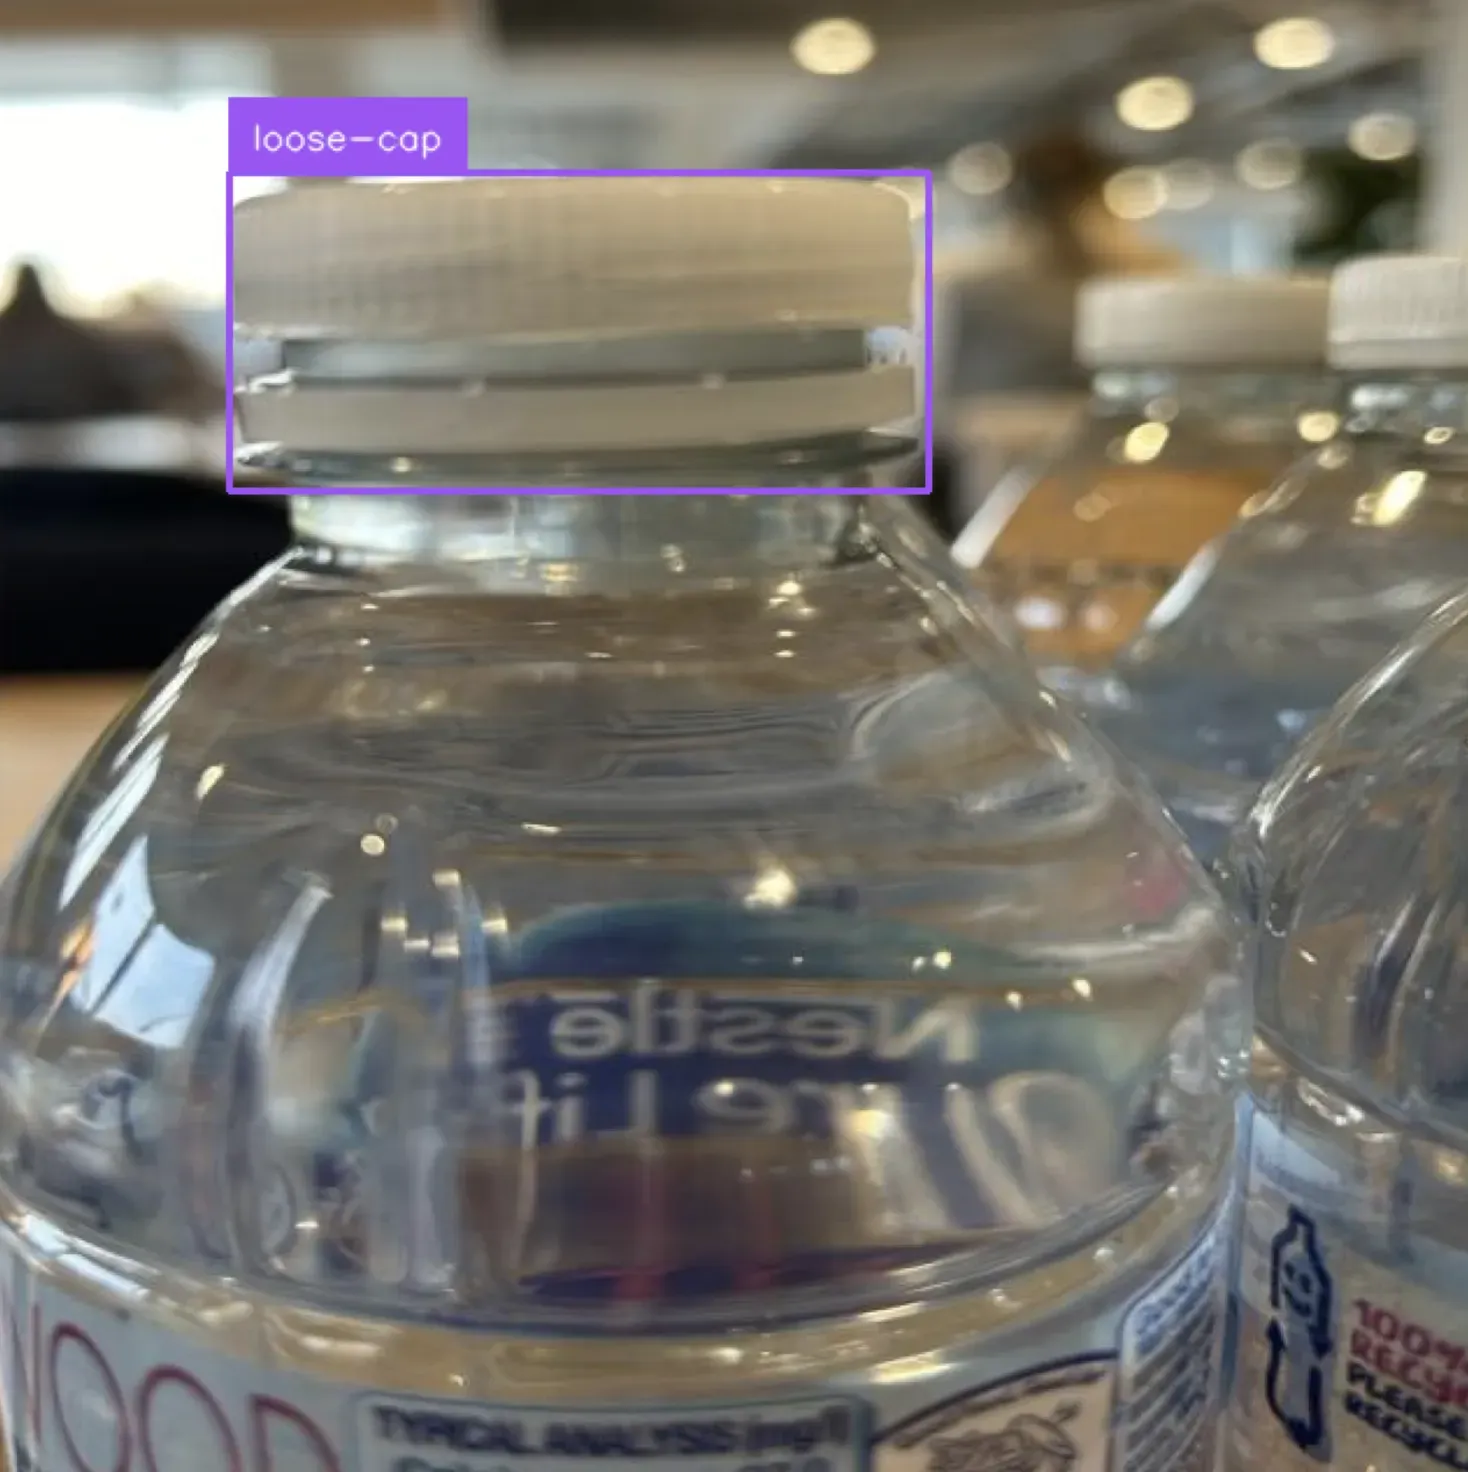
Our model successfully identified that the bottle cap was not properly sealed.
You can integrate this system into your business logic. For example, you can automatically reject bottles whose caps are not properly sealed. You can count the number of bottles whose caps were not properly sealed or were missing each day to monitor defect rates over time.
Conclusion
In this guide, we built a bottle cap inspection system with computer vision. Our system was trained to identify properly sealed bottle caps, bottle caps that are not properly sealed, and bottles that are missing caps. To do this, we gathered images showing these bottle cap statuses, labeled them, then trained a vision model.
We then deployed our system onto our own hardware using Roboflow Inference.
Learn more about identifying the presence of bottles in multipacks before they are packaged, refer to the Roboflow missing item inspection guide.
To learn more about building industrial inspection systems with computer vision, contact the Roboflow sales team. The Roboflow sales team are experts in architecting solutions to identify defects on assembly lines.