You can use computer vision to build an appearance inspection system that identifies visual absences, variations, or flaws in a product.
For instance, you could build a system that identifies chips or burrs in metal, a defect that may result in rejection of products. You could identify scratches in plastic or glass, stains in clothes, or another visual defect.
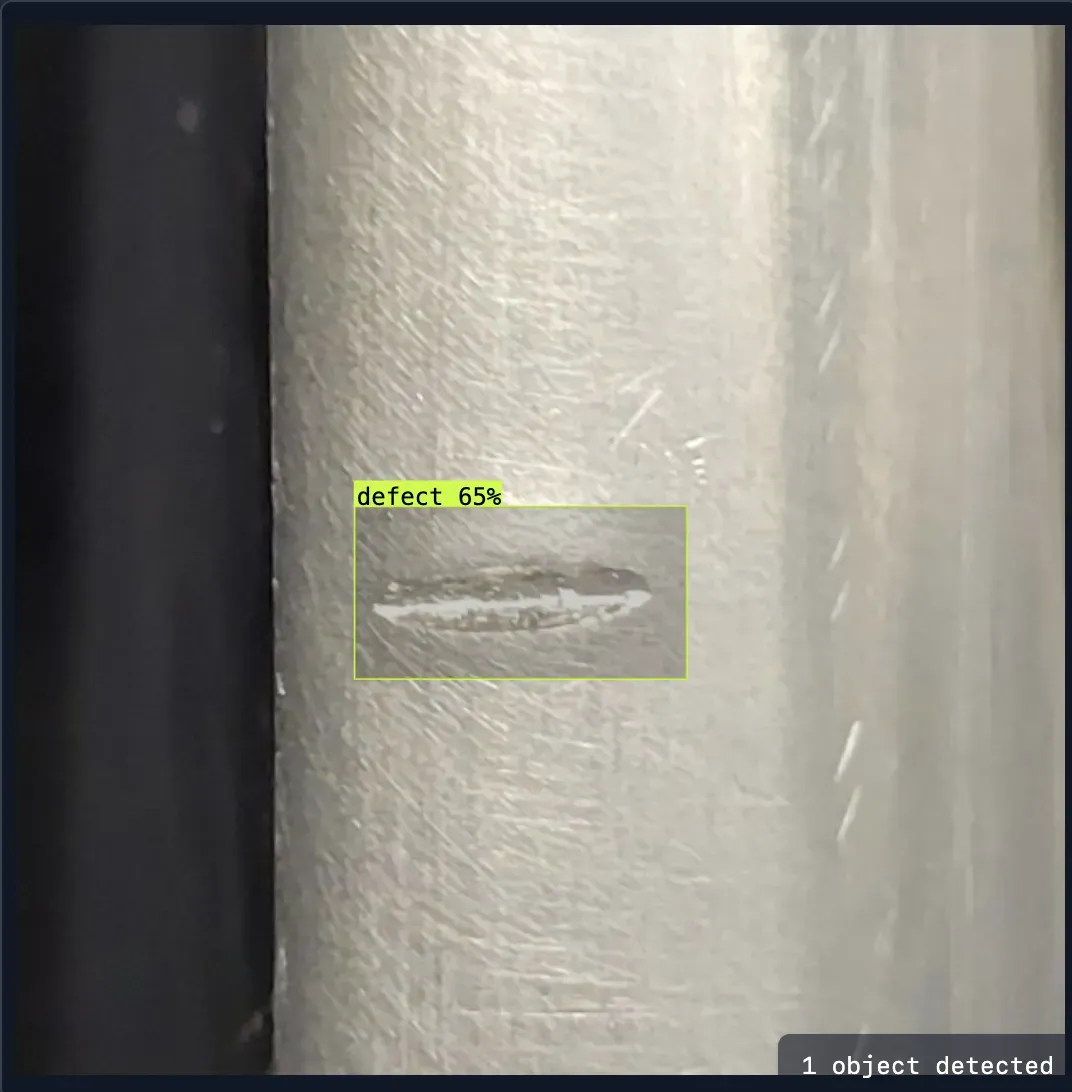
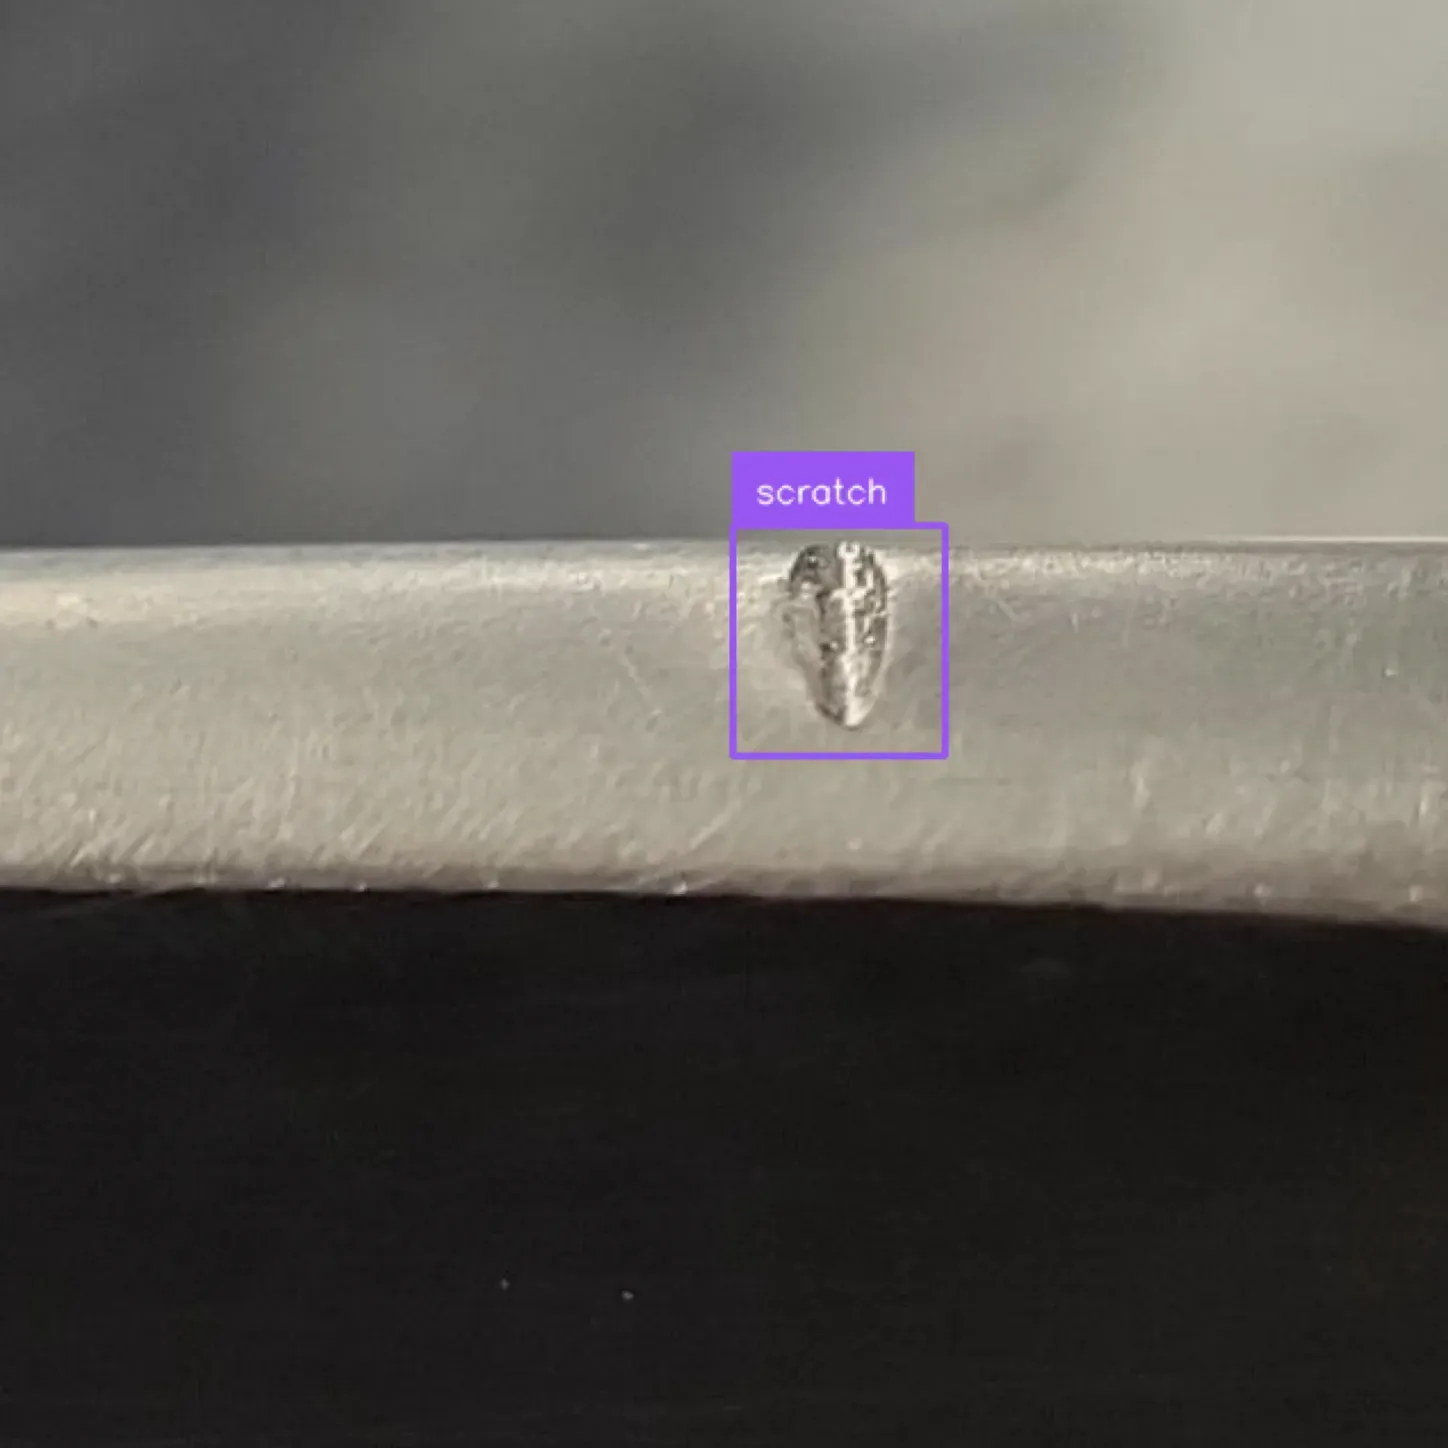
Here is an example of an appearance inspection system identifying a scratch on a piece of metal:
In this guide, you will learn how to build an appearance inspection system with computer vision. We will build a system that identifies scratches in metal and then deploy the model onto your own hardware using Roboflow Inference.
To build the system, we will:
- Create a project in Roboflow
- Collect data
- Label defects of interest
- Train a model
- Deploy the system
By the end of this guide, you will have a complete appearance inspection system ready for testing in your manufacturing facility.
Without further ado, let’s get started!
Step #1: Create a Project
First, create a Roboflow account. Then, click the “Create a Project” button on your Roboflow dashboard. You will be redirected to a page where you can create your project.
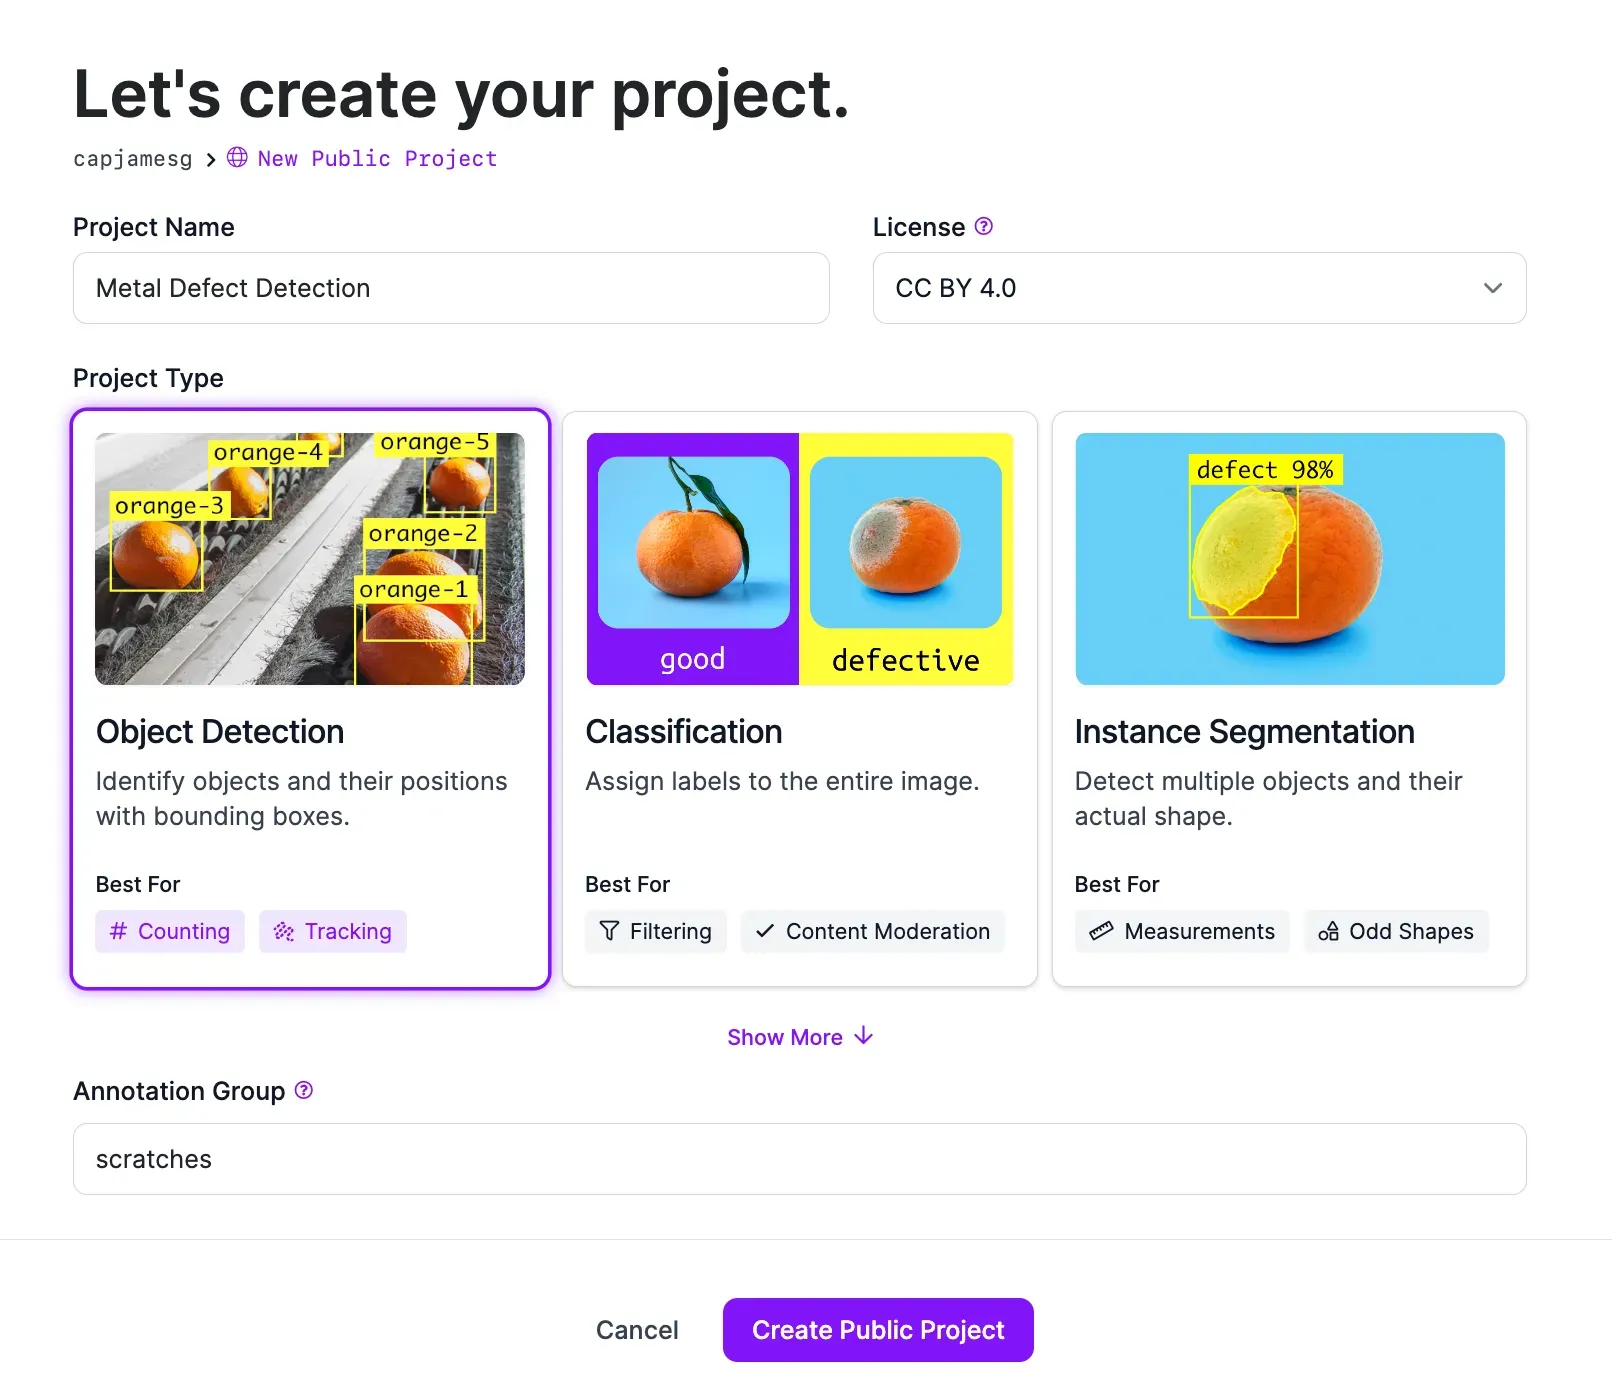
On this page, set a project name and choose the “Object Detection” project type. Once you have filled out all the fields on the page, click “Create Project”.
Step #2: Collect and Label Data
The key to a robust computer vision-powered appearance inspection system is using data that is well labeled and representative of your use case.
We recommend using data from your manufacturing facility to train a vision model. This will allow you to achieve the best performance. Once you have collected your data, whether videos or images, you can upload it to Roboflow. You can label and organize your data in Roboflow, then use your labeled data to train a vision model.
To upload data, drag images or a video into the Roboflow web interface. If you upload a video, you will be asked to configure how the video should be divided into images. This is because computer vision models are trained on labeled images rather than videos.
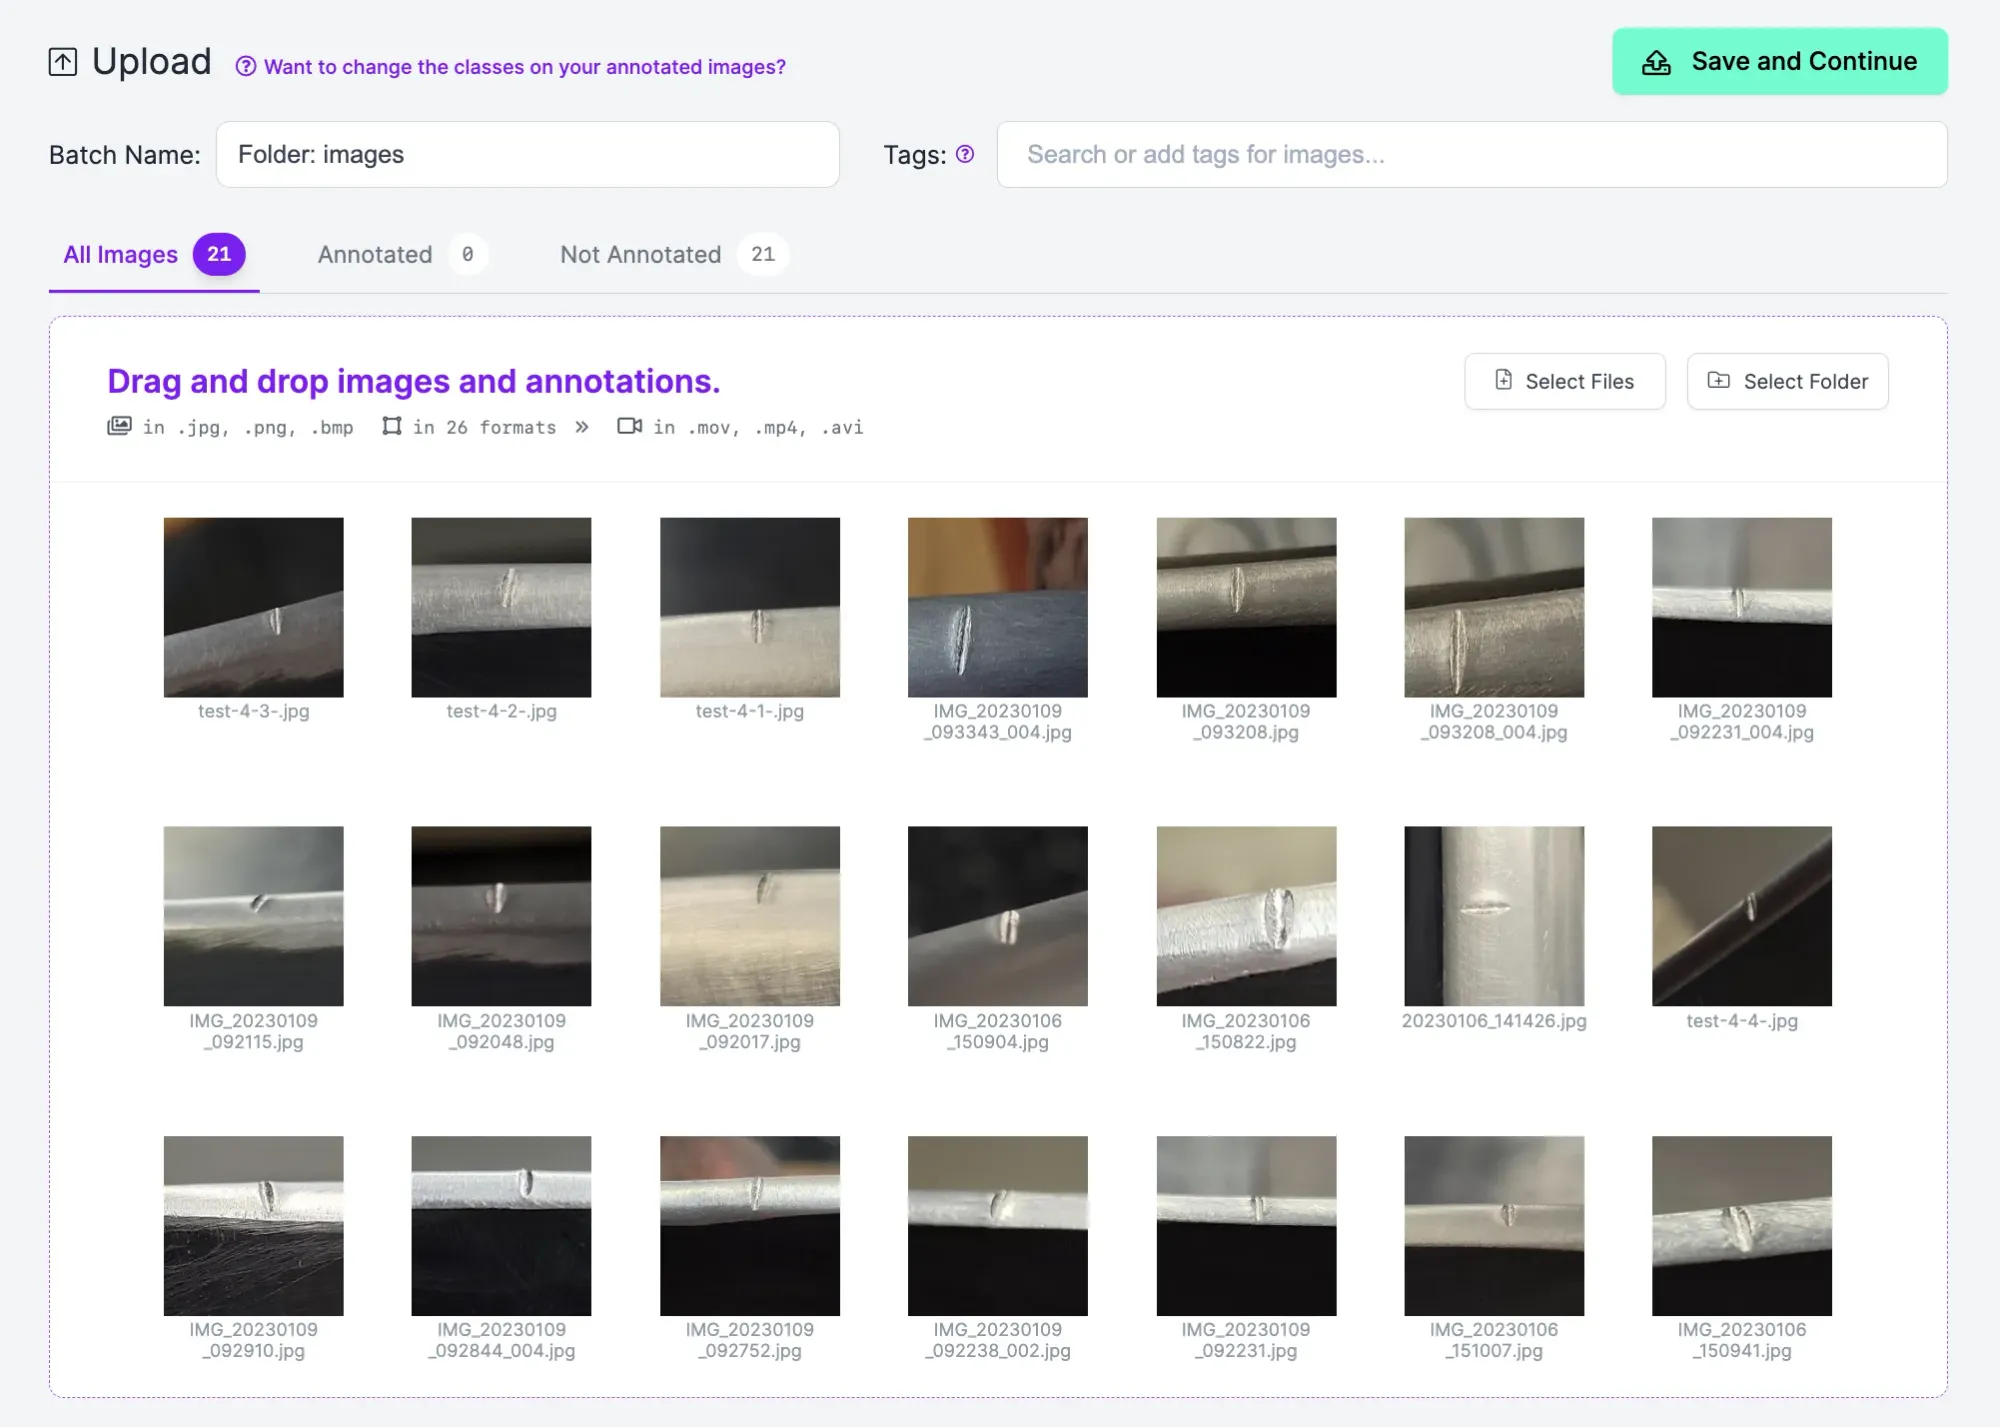
Once you have dragged your images into Roboflow, the data will be processed. After your data has been processed, a “Save and Continue” button will appear. Click that button to upload your data to Roboflow.
Step #3: Label Data
To train a vision model, you need to label the data with bounding boxes. Bounding boxes are boxes that denote a specific region of interest in an image. Models use bounding boxes with images to learn how to identify specific objects.
To start labeling images, click “Annotate” in the sidebar. Then, click on an image to label. You will be taken into the Roboflow Annotate web interface in which you can label your images.
Press “b” on your keyboard or click the box icon in the right sidebar to trigger the bounding box tool. Then, click on the point where you want to start drawing a box around an object of interest. For this guide, we will draw boxes around all of the metal defects.
Annotate all visual blemishes, defects, and abnormalities that you want your model to be able to identify. For this guide, we’ll focus on one: metal indents.
Step #4: Generate a Dataset Version
Once you have labeled all of your images, you are ready to generate a dataset version. A dataset version is a snapshot of your data on which you can train a model.
To start generating a dataset, click “Generate” in the Roboflow sidebar. On the dataset generation page, you can configure your dataset. You can set preprocessing steps, apply augmentations, and manage your dataset balance.
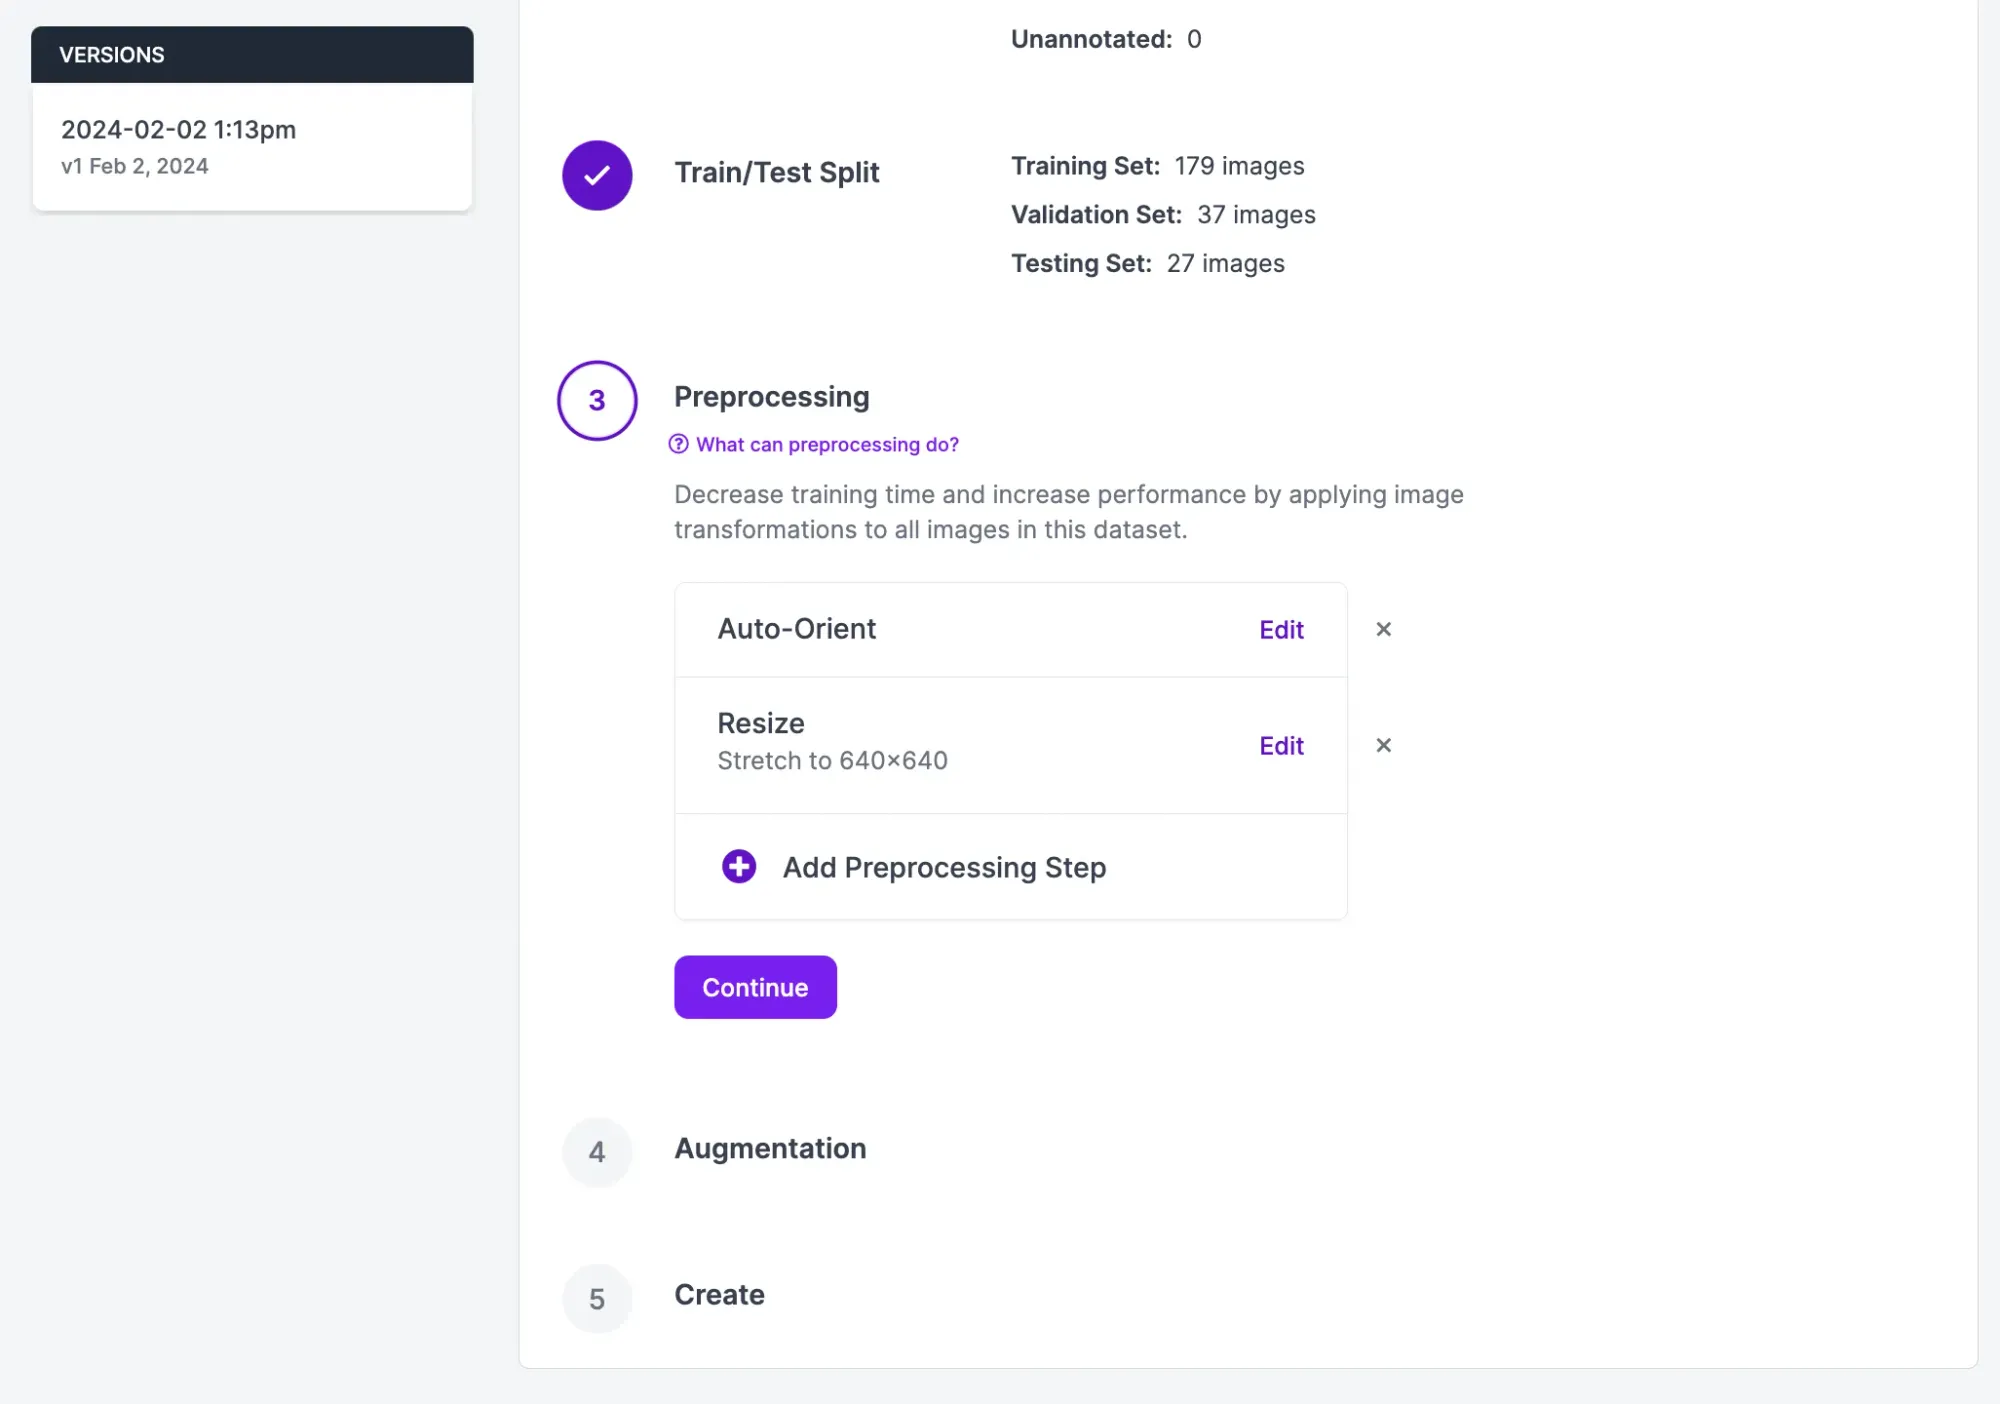
For the first version of your model, we recommend leaving the preprocessing and augmentation settings as their defaults. This will allow you to evaluate how your model performs on your raw data. Then, you can add augmentations and more preprocessing steps, if they are relevant to your project.
To learn more about preprocessing and augmentation, refer to our guide on image preprocessing and augmentation.
Once you have configured your dataset, click “Create”. Your dataset will be generated. This may take some time, depending on how many images are in your dataset and how many augmentation and preprocessing steps you have applied.
Step #5: Train a Model
When your dataset is ready, you can train a model. To train a model, click “Train with Roboflow”
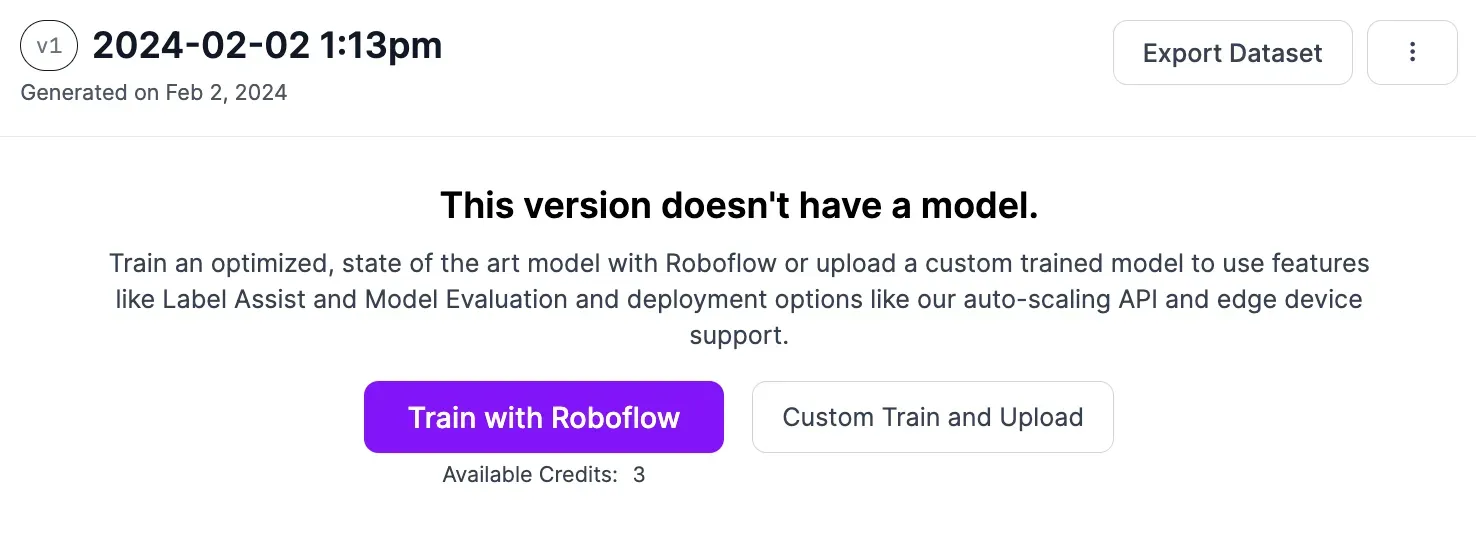
A window will appear in which you can configure your training job. Choose the “Fast” training option and train from the Microsoft COCO checkpoint.
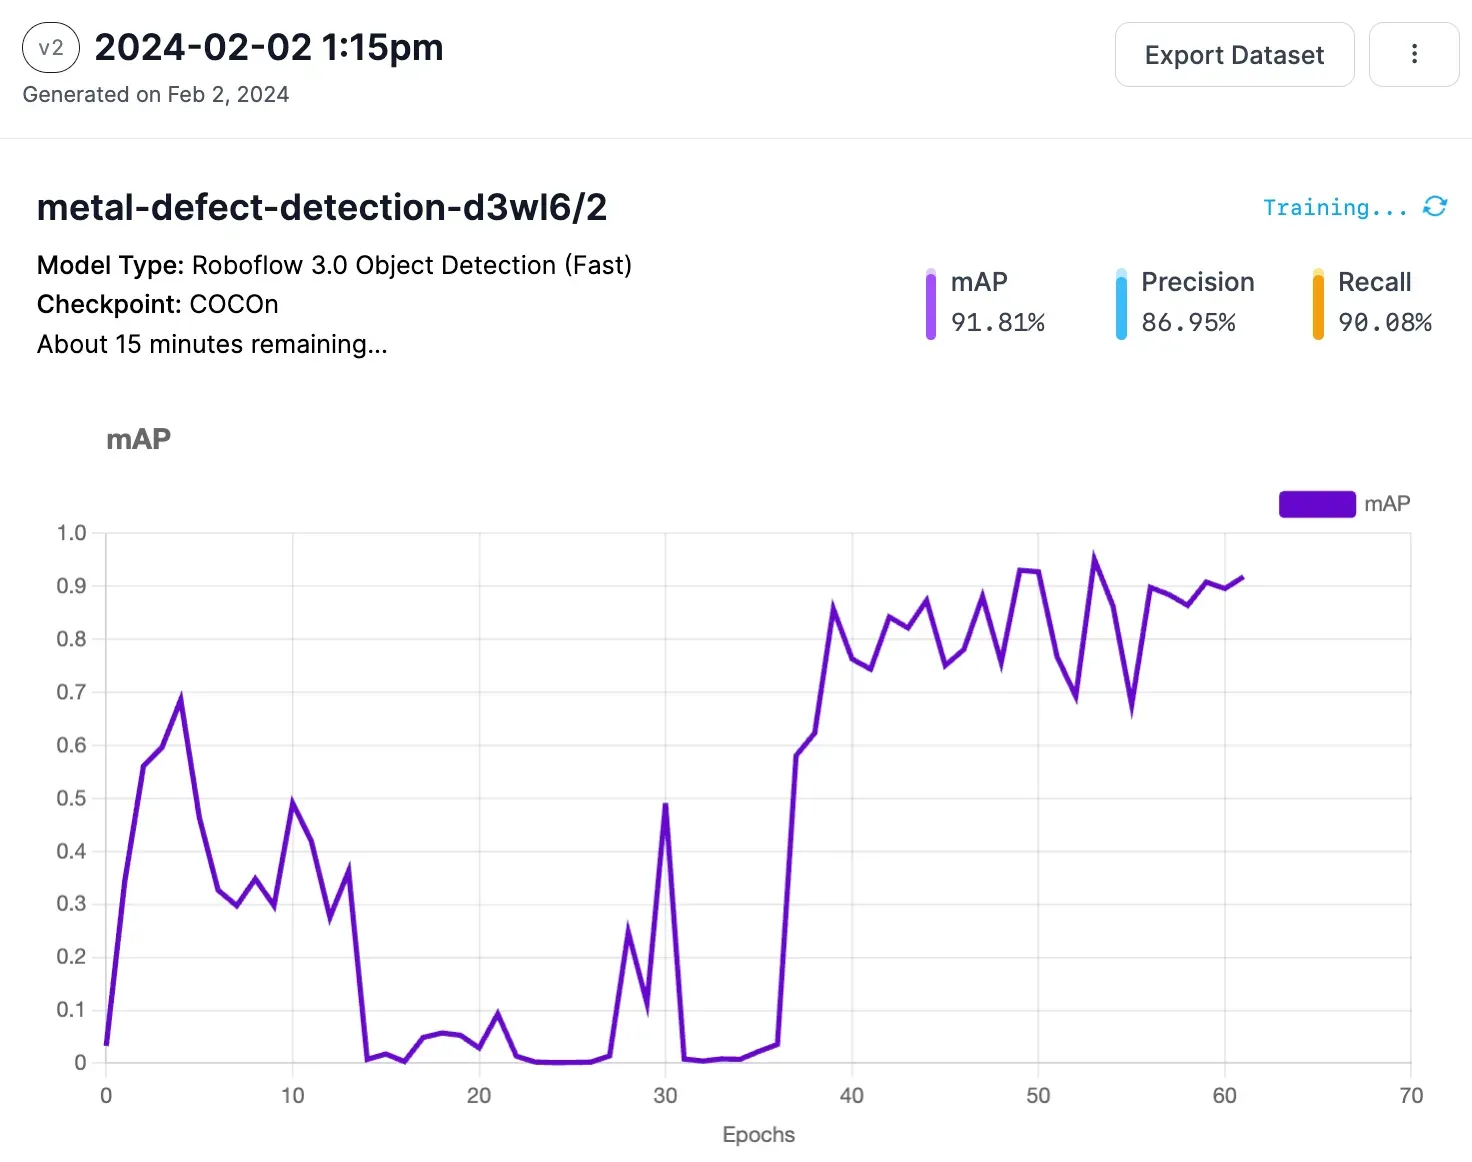
Once you have configured your training job, you will receive an estimate on how long the training job will take. Your training job will be allocated to a cloud GPU and start running.
You can see the live progress of your training job from the model page. You will receive an email notification when your model is ready to use.
You can test your model from the “Visualize” tab. The Visualize page allows you to upload an image or video and test your model. You can also select an image in your model’s test set to see how your model performs.
Here are the results for an image with a metal defect:
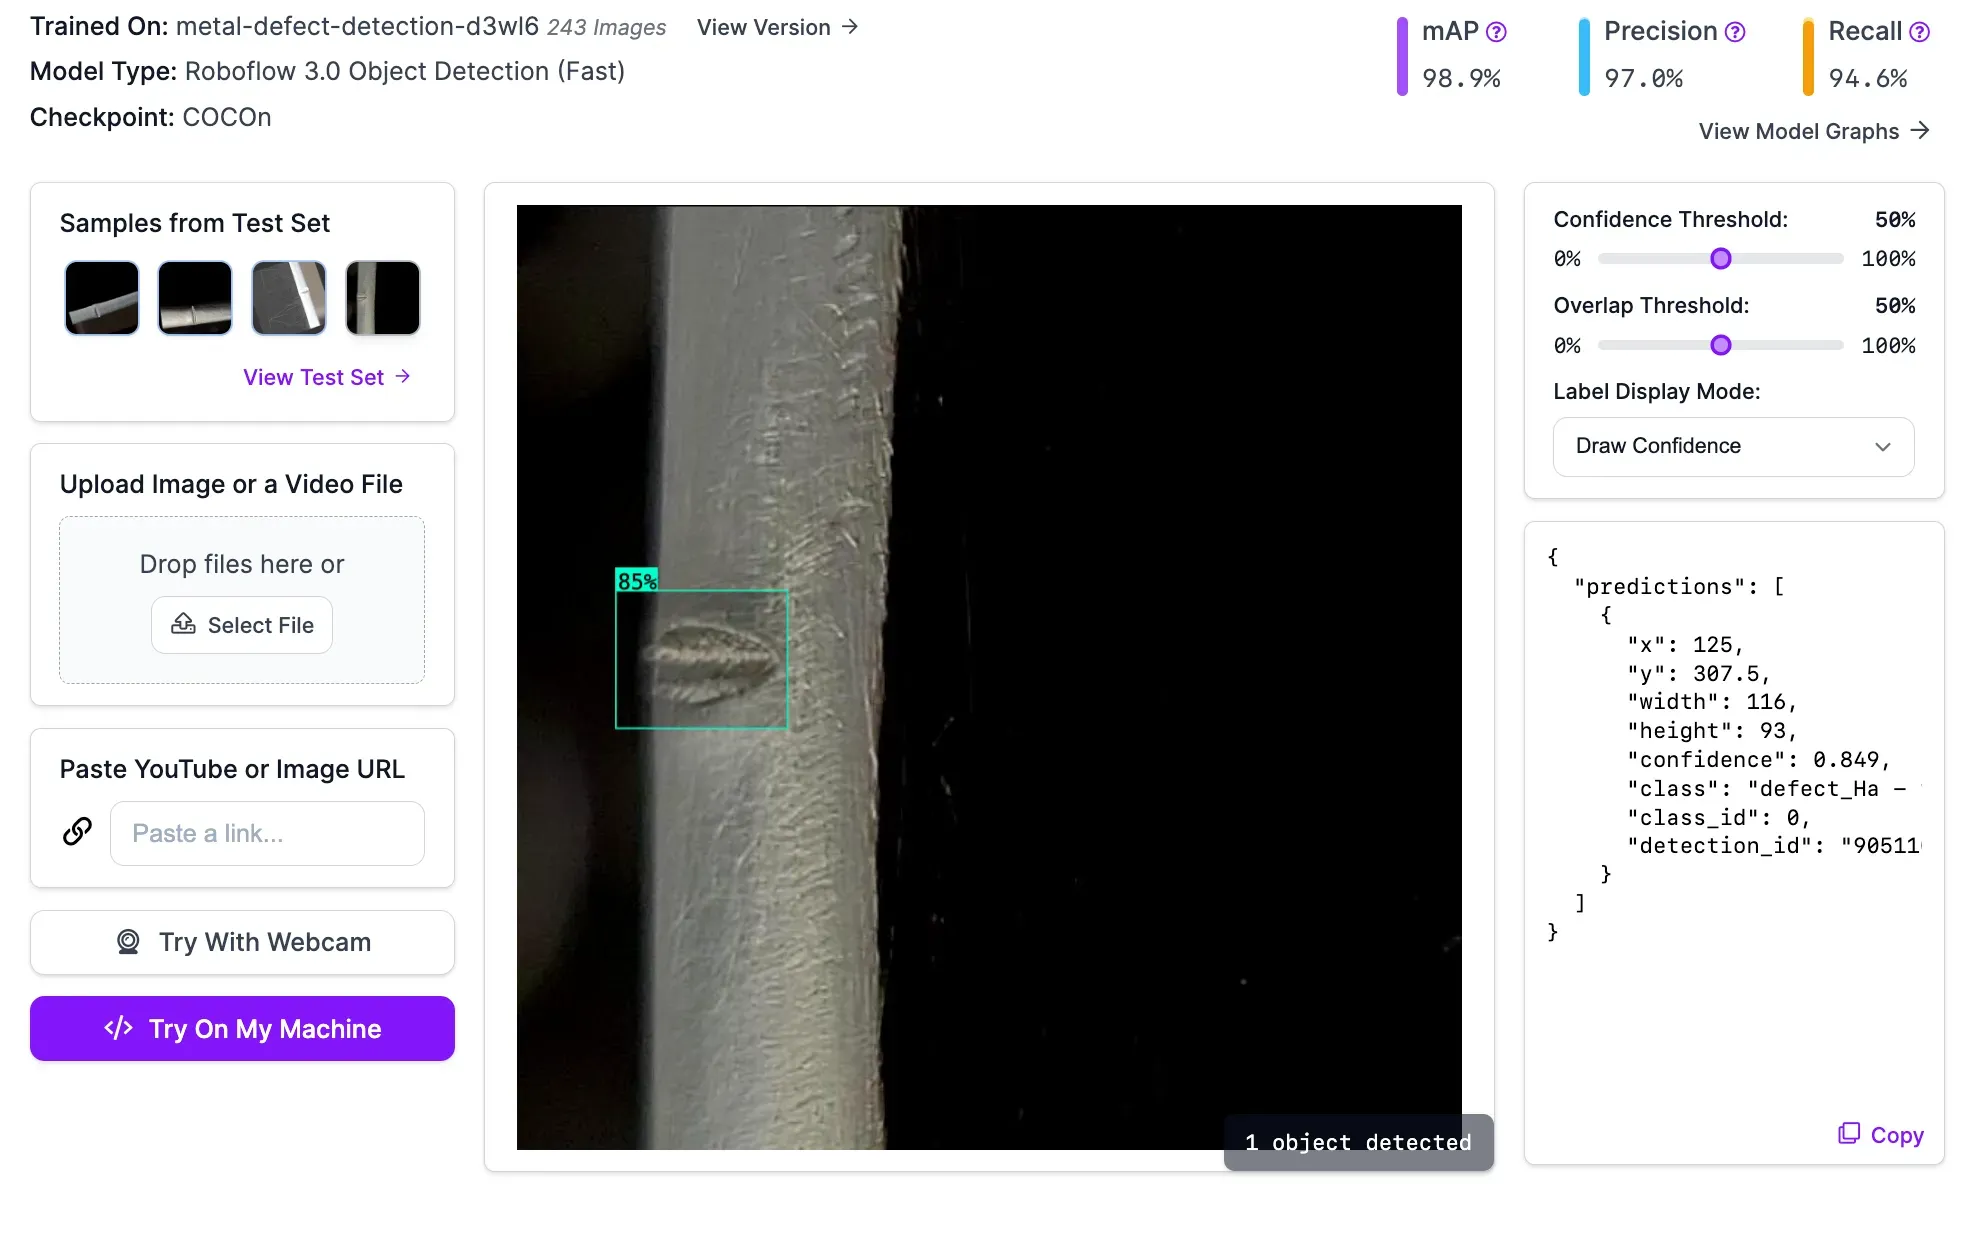
Our model successfully identified the visual defect.
Step #6: Deploy the Model
With a model ready, we can deploy our computer vision system.
To do so, we are going to use Inference, high-performance software that lets you run computer vision models. To install Inference, run:
pip install inferenceWe also need to install supervision, which we will use to process predictions from our model:
pip install supervisionCreate a new Python file and add the following code:
from inference import get_roboflow_model
import supervision as sv
import cv2

image_file = "image.jpg"
image = cv2.imread(image_file)

model = get_roboflow_model(model_id="metal-defect-detection-d3wl6/2")

results = model.infer(image)

detections = sv.Detections.from_roboflow(results[0].dict(by_alias=True, exclude_none=True))

bounding_box_annotator = sv.BoundingBoxAnnotator()
label_annotator = sv.LabelAnnotator()

annotated_image = bounding_box_annotator.annotate(
    scene=image, detections=detections)
annotated_image = label_annotator.annotate(
    scene=annotated_image, detections=detections)

sv.plot_image(annotated_image)
In this code, we run our model on an image with a metal defect. We then annotate the results from our model on the image. You will need to replace metal-defect-detection-d3wl6/2 with your model ID. Learn how to retrieve your model ID.
The first time you run the script, it might take a minute or so to see results. This is because your model weights need to be downloaded once before they can be used on your computer. Once your weights have been downloaded, you will be able to retrieve predictions much faster.
Let’s run our code. Here are the results on an image with a metal defect:
Our model successfully identified the visual defect. With this information, you can write business logic that takes an action. For example, you can reject defective products. You can also build an alerting system that logs when defects are detected and notifies a manager if more than a specified percentage of products contain defects.
Now that we have a working model deployed on our device, we can start writing more advanced logic. For example, you can deploy your system on a camera or an RTSP stream with the InferencePipeline.
Conclusion
You can build appearance inspection systems with computer vision.
In this guide, we walked through how to build an appearance inspection system that identifies visual defects on metal. You can use the instructions above to identify any visual defect, from blemishes in fabric to stains in paper to scratches in glass.
To build our system, we collected images, labeled those images in Roboflow, generated a dataset version, and trained a model. We then deployed our model with Roboflow Inference.
If you need assistance training your own vision model, contact the Roboflow sales team. Our sales team are experts in developing custom computer vision solutions for manufacturing and quality assurance use cases.