Using computer vision, you can accurately track intermodal containers in a yard. For example, by adding a camera to any hostler truck, you can passively collect container location data for a continuous stream of real-time information. The footage from this camera can then be processed to retrieve the chassis ID, container ID, container brand, and any other visual information you need to record.
In this guide, we are going to discuss how to build a yard management system with computer vision. Here is a video that shows the model we will build in use on footage from an intermodal container yard:
Computer vision refers to modern machine learning techniques that identify the location of objects in images. When we can identify the location of objects – for example, ID numbers – we can apply custom logic, such as OCR, counting the number of containers present, and more.
By the end of this guide, you will have a system that can identify the location of containers, container IDs, chassis IDs, and logos on shipping containers. We will also discuss how to run OCR to retrieve characters in container and chassis IDs.
Here are the steps we will follow to build our solution:
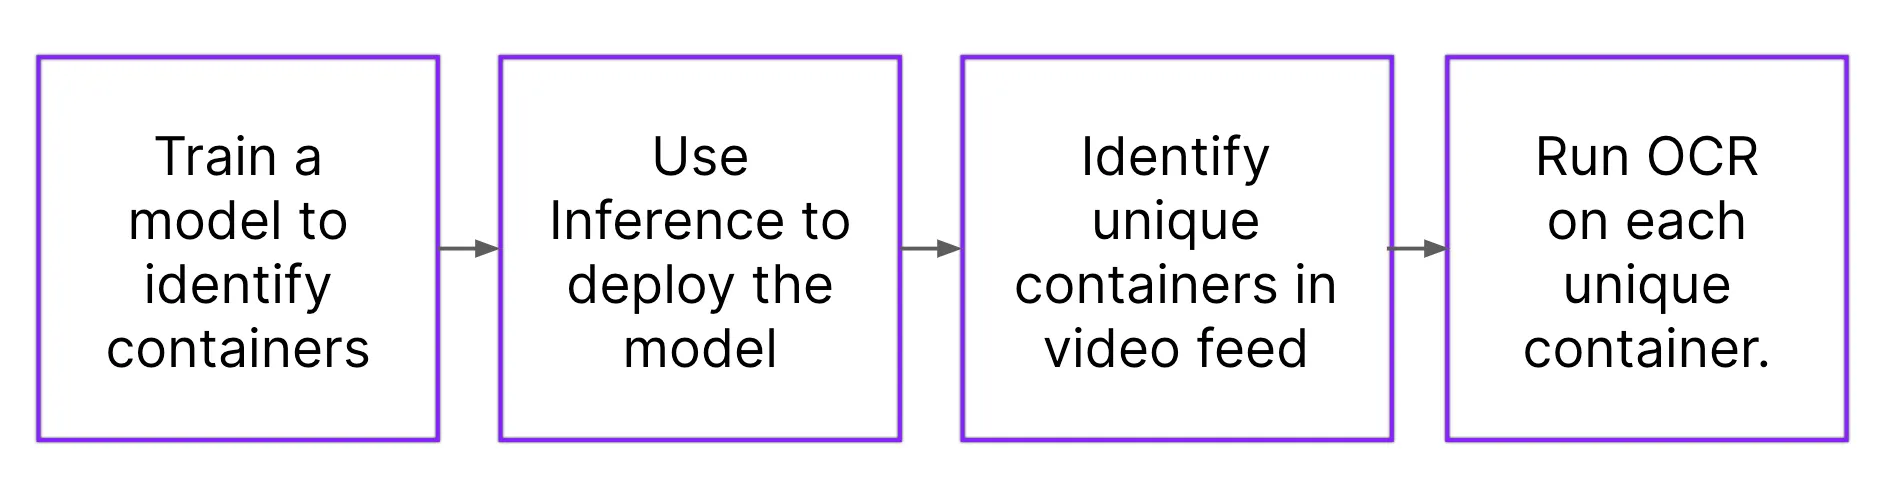
Without further ado, let’s get started!
Step #1: Collect and Upload Data
Computer vision systems are “trained” using labeled images. The labels on an image correspond with objects of interest. For example, you can label chassis IDs to help a model learn how to identify that particular part of a shipping container.
Before we can label images, we need to collect and gather data. We recommend training your first model iteration with ~50-100 images.
For the best performance, we recommend recording videos in the environment in which you are going to use this vision system. For example, you could use an iPhone to record footage of shipping containers in a yard you manage. You can divide videos into images in Roboflow.
Once you have collected images, you can start labeling them in Roboflow.
First, create a free Roboflow account. Follow the on-screen instructions to set up your workspace. Then, click “Create New Project”.
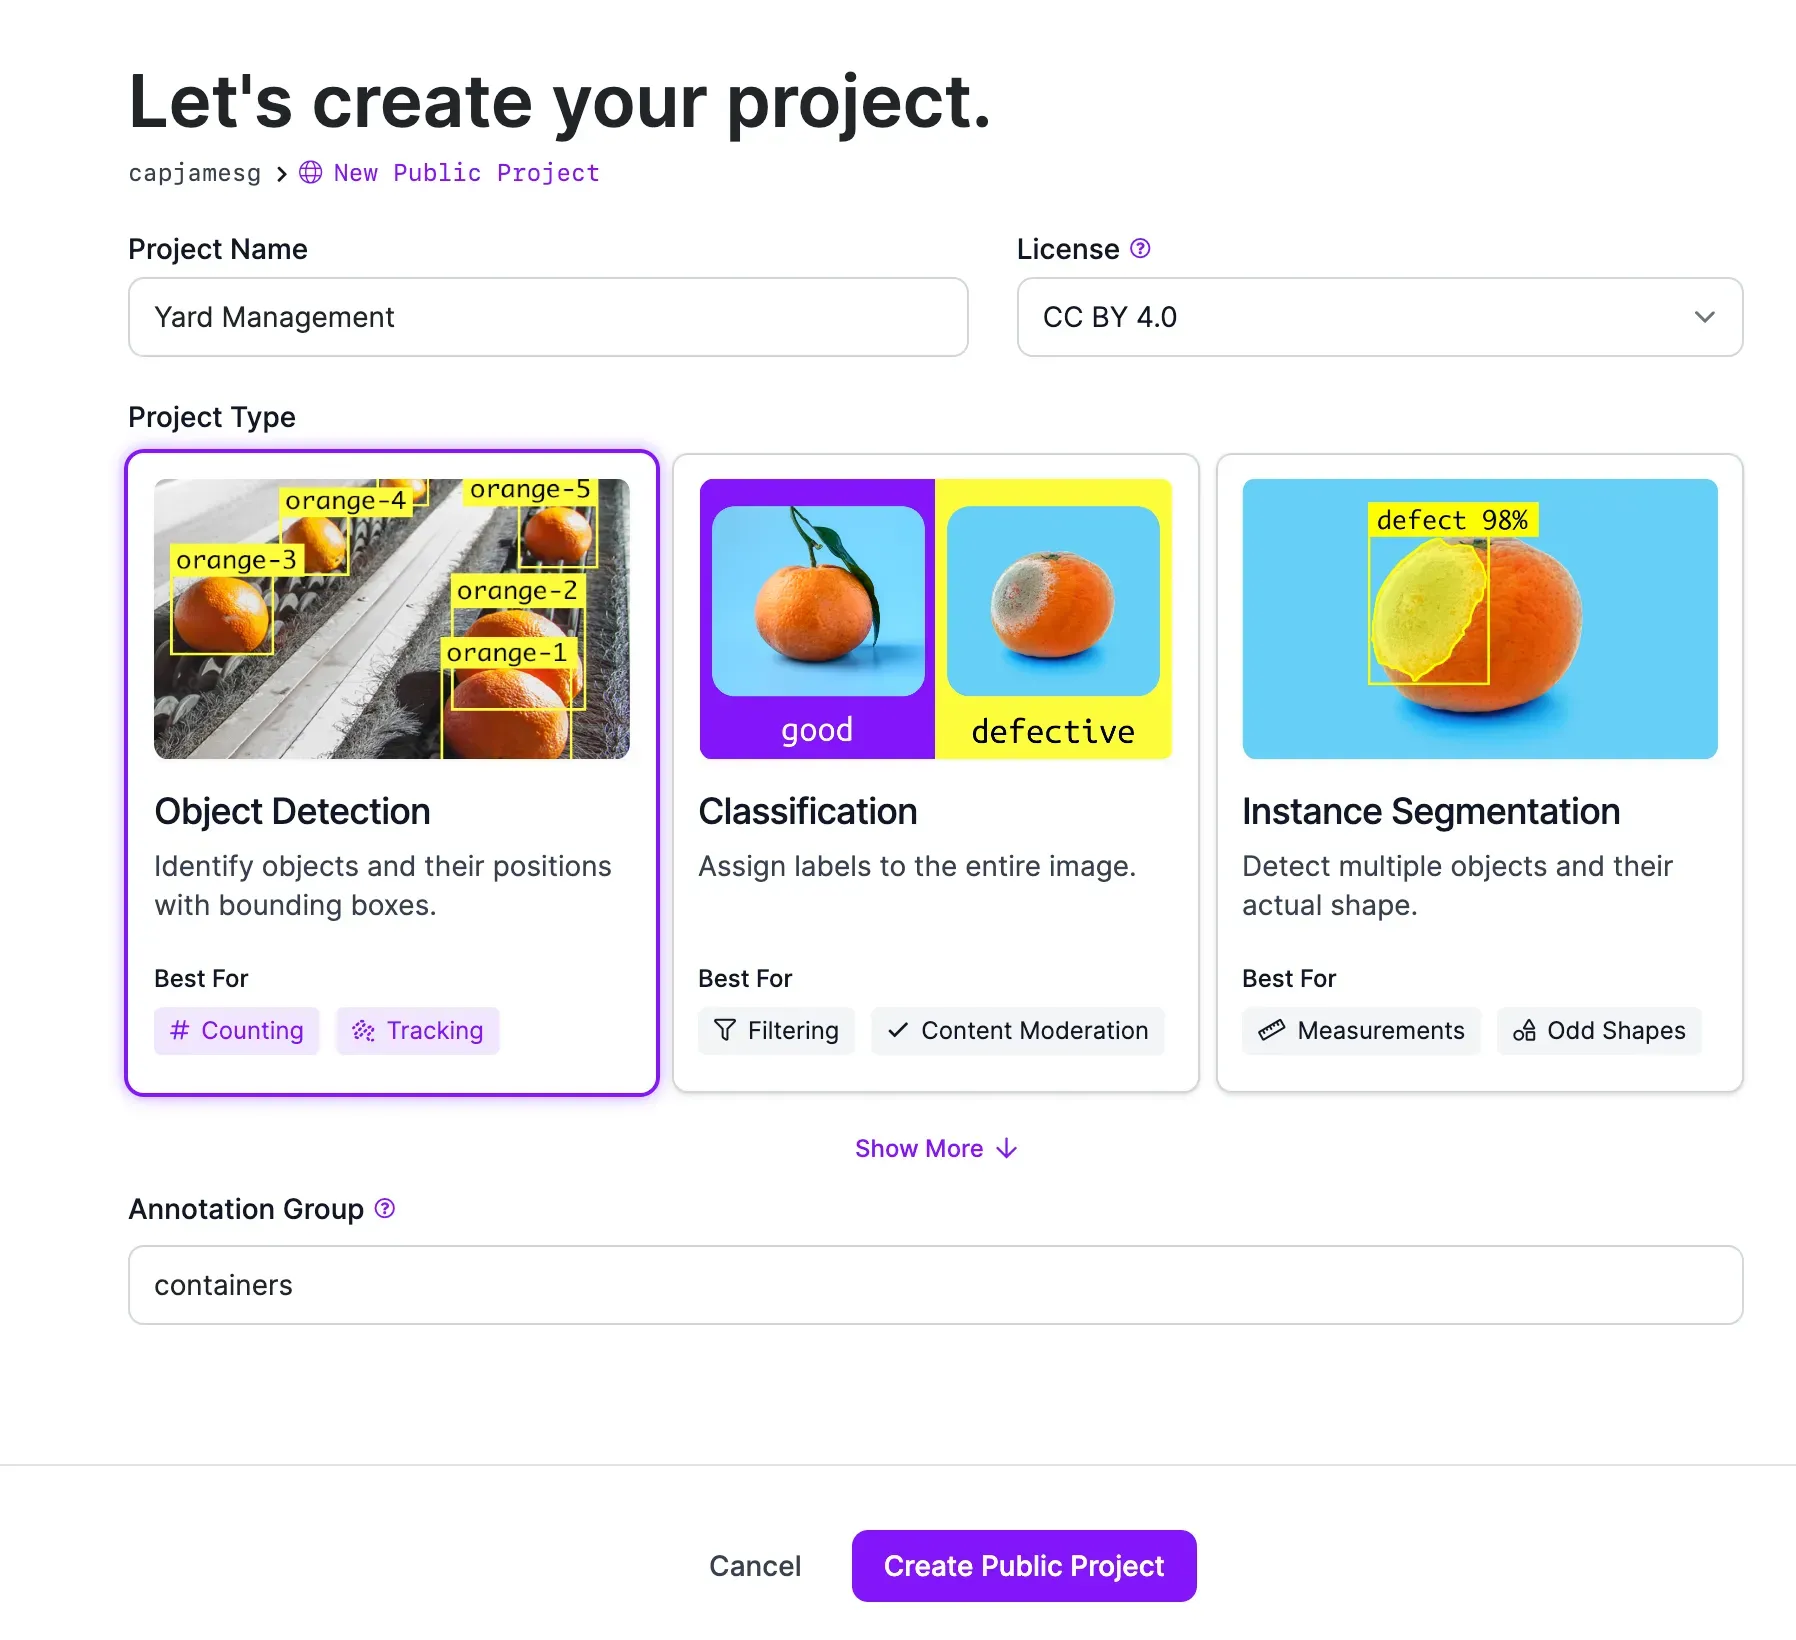
You will be taken to a page with a few fields to fill out. When asked to choose a task type, select “Object Detection”. Choose a name for your project. Training data is open source for Public plans or you can sign up for a paid Roboflow plan to store images privately.
Once you have configured your project, click “Create Project”.
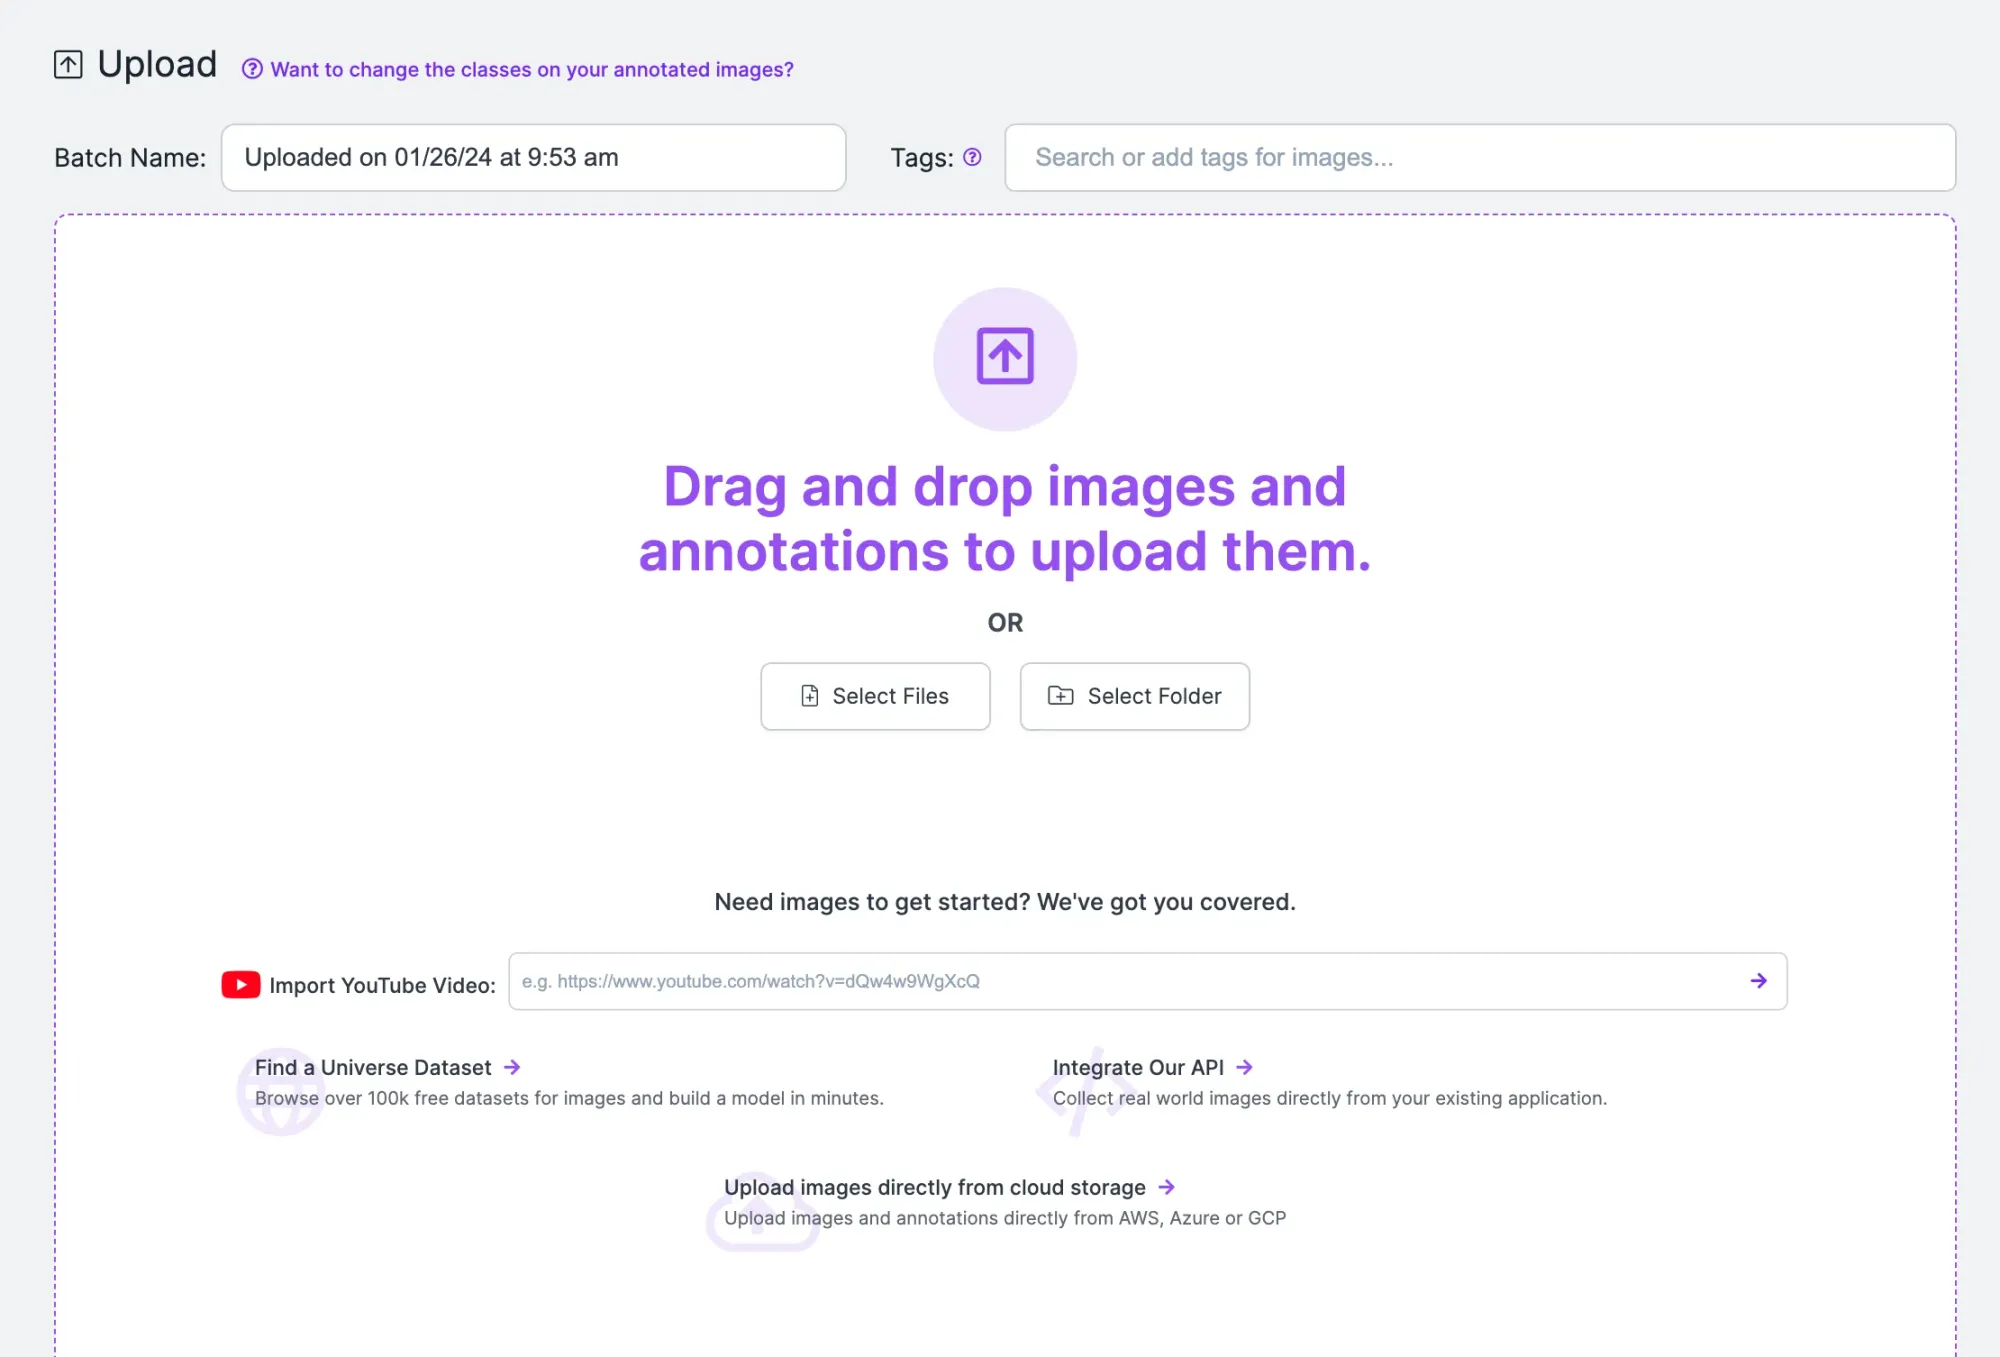
You will be redirected to a page where you can upload images you want to label. Drag your images into the box on the web page to upload them to your project. When the images have been processed, click “Save and Continue” to complete the upload process.
Step #2: Label Objects of Interest
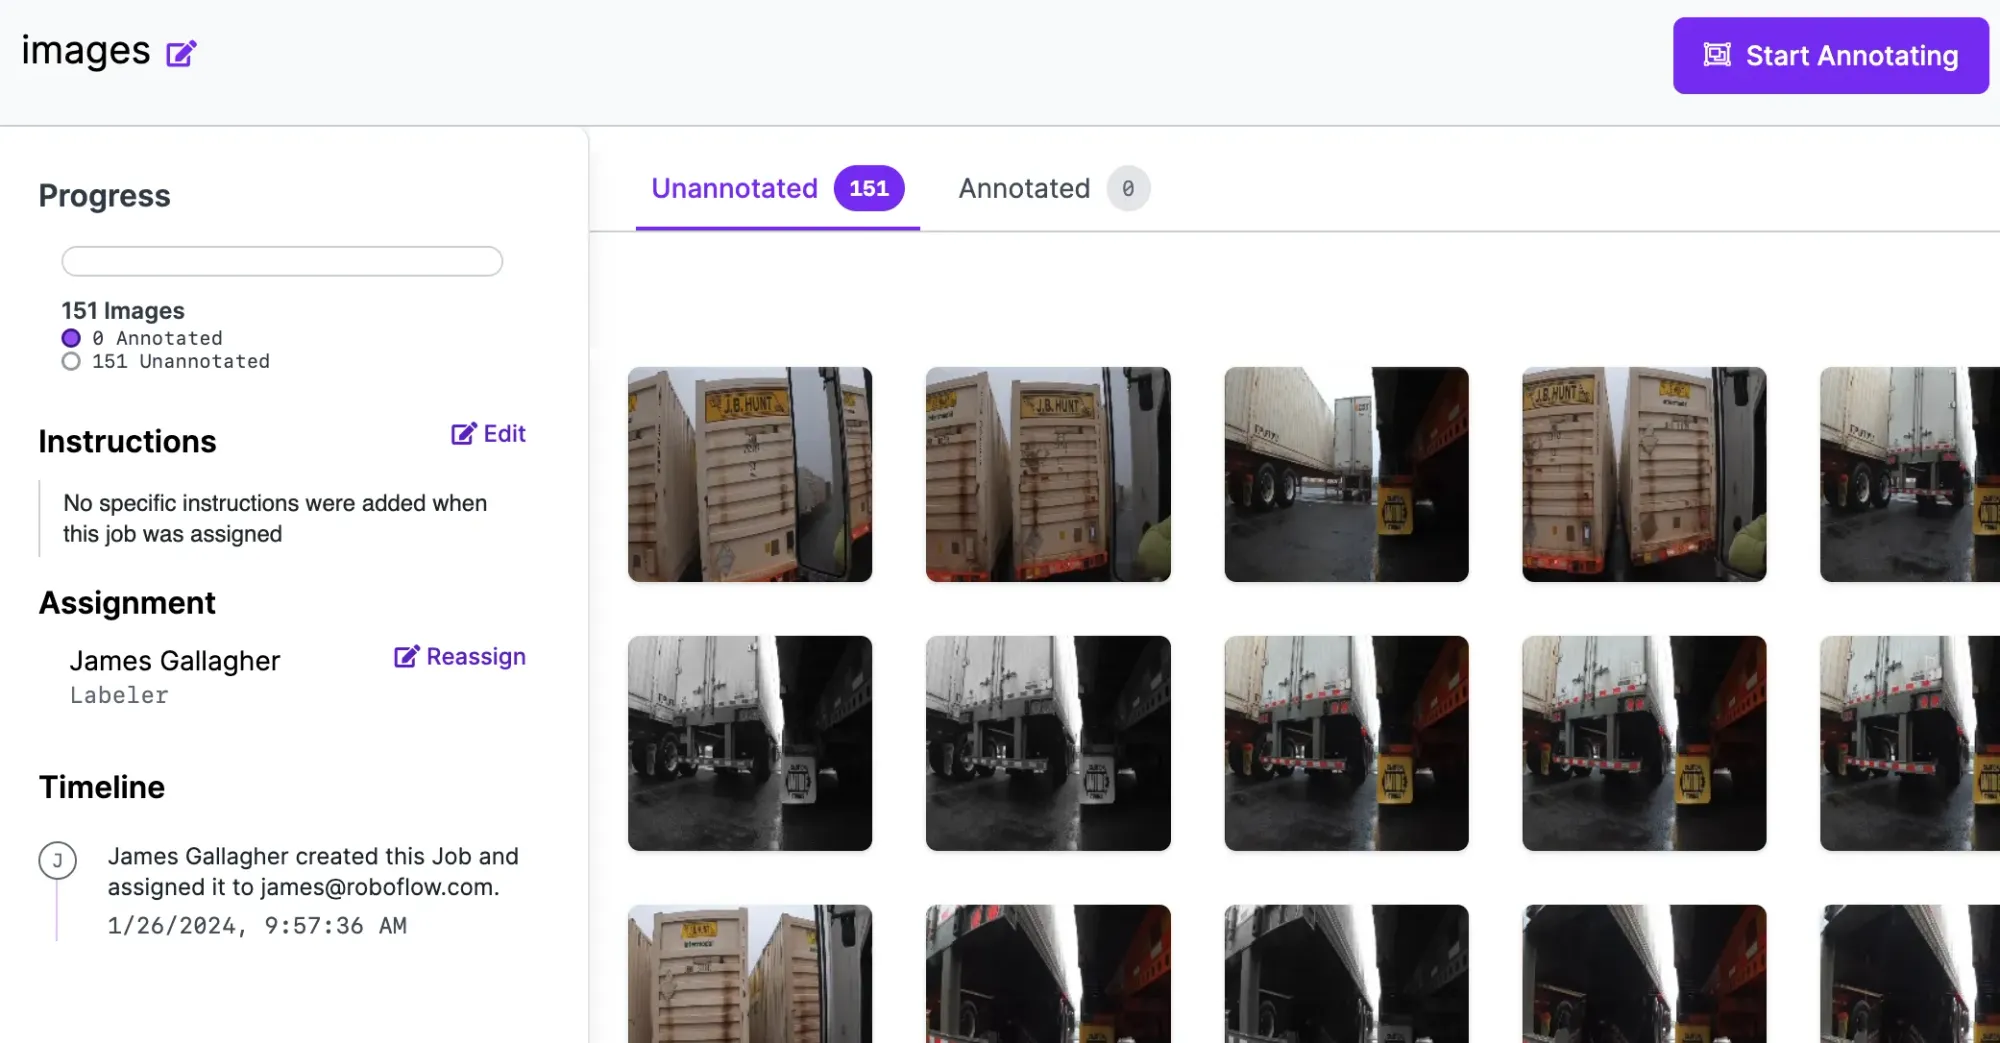
After uploading your data, you will be taken to a page where you can assign images to colleagues to label. With images in Roboflow, you can start labeling data.
Once you have images uploaded, select an image to label.
When you select an image, you will be taken to Roboflow Annotate. Roboflow Annotate provides an extensive suite of tools for use in image annotation. For this guide, we will use the bounding box annotation tool. Once you have trained the first version of your model, you can use our model-assisted labeling to use your existing model version to auto-label data.
A bounding box, combined with a class name, is a label that describes a region of an image. To draw a bounding box, press “b” on your keyboard, click where you want to start your box, and drag until you have annotated the region of interest. Then, select a class from the list of classes that appear, or add a new class.
Label every image in your dataset with the objects you want to identify. For example, you might want to identify containers, chassis IDs, and container IDs.
Once you have labeled all of your data, you can generate a dataset version.
Step #3: Generate a Dataset Version
A dataset version is a frozen-in-time snapshot of the data in your Roboflow project. You can apply augmentations and preprocessing steps to dataset versions and use Roboflow to manage each version of your dataset.
Here is an example of a greyscale augmentation:
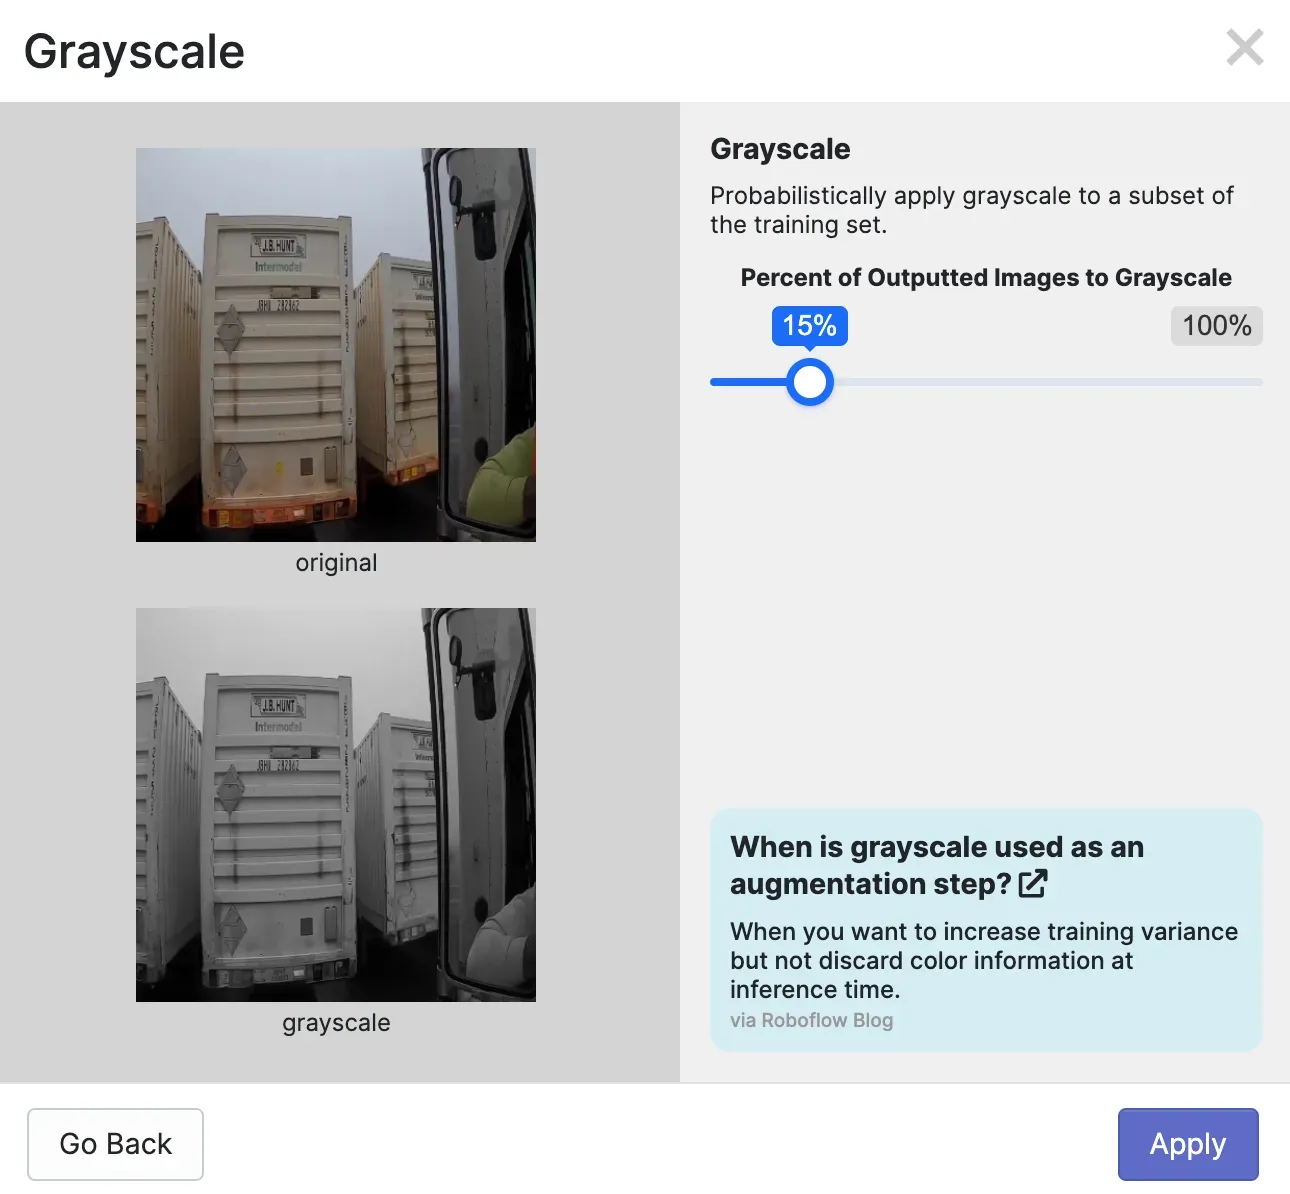
To create a dataset version, click “Generate” in the Roboflow sidebar. You will then be asked what preprocessing steps and augmentations you want to apply. For the first version of your model, we recommend leaving the preprocessing steps as they are and applying no augmentations.
This will allow you to acquire an understanding of the baseline performance of your model. If your model does well, you can apply augmentations. If your model performs poorly, there may be an issue with the quality of your data.
To learn more about best practices for preprocessing steps and augmentations, refer to our preprocessing and augmentation best practices blog post.
When you are ready, scroll down to the bottom of the page and click the “Generate” button. This will start the dataset generation process. The amount of time it takes for this process to complete depends on how many images are in your dataset.
Step #3: Train a Computer Vision Model
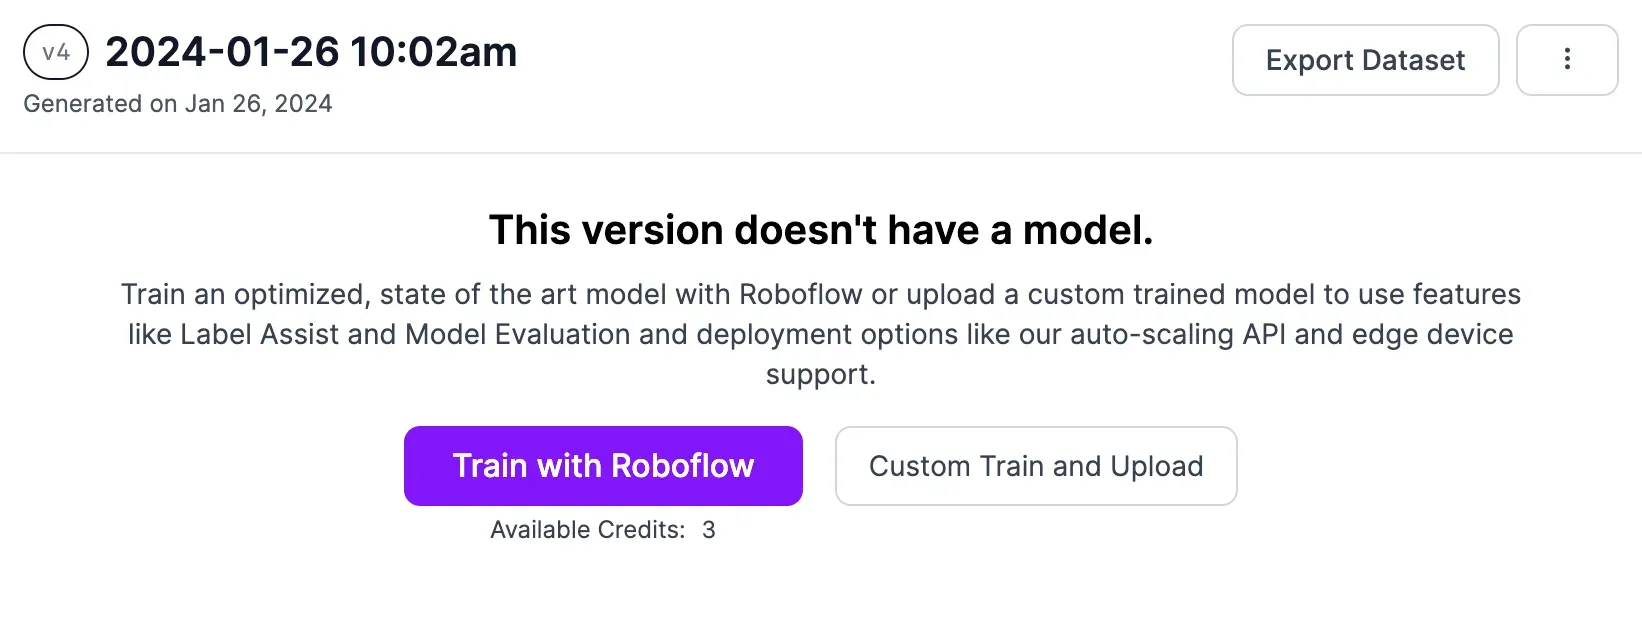
With a dataset version ready, we can train a yard management model. Click the “Train with Roboflow” button on the page to which you were taken after your dataset was generated.
Follow the on-screen instructions to configure your training job. We recommend training with the Fast training option for your first version. You should train from the COCO checkpoint for your first model version. Read more about transfer learning to see why that’s helpful.
Once you have configured your training job, a machine will be allocated to train your model. You can watch the progress of your training job live in the Roboflow dashboard.
For a model trained on less than 100 images, we expect training will take 30 minutes or less. You will receive an email once the training process completes.
Step #4: Test the Model
Roboflow has an in-app testing tool that you can use to interactively test your model on images and videos. When your model has trained, click “Visualize” on the left sidebar to enter into the testing interface. From here, you can upload an image, provide the URL of an image, or upload a video on which you want to run your model.
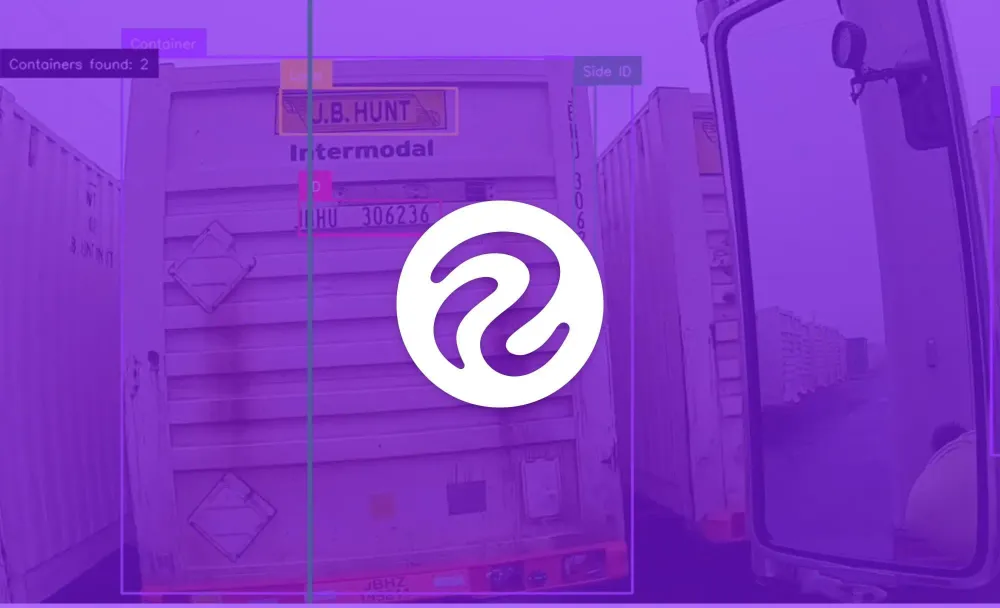
Here is an example of our model running on an image of a container:
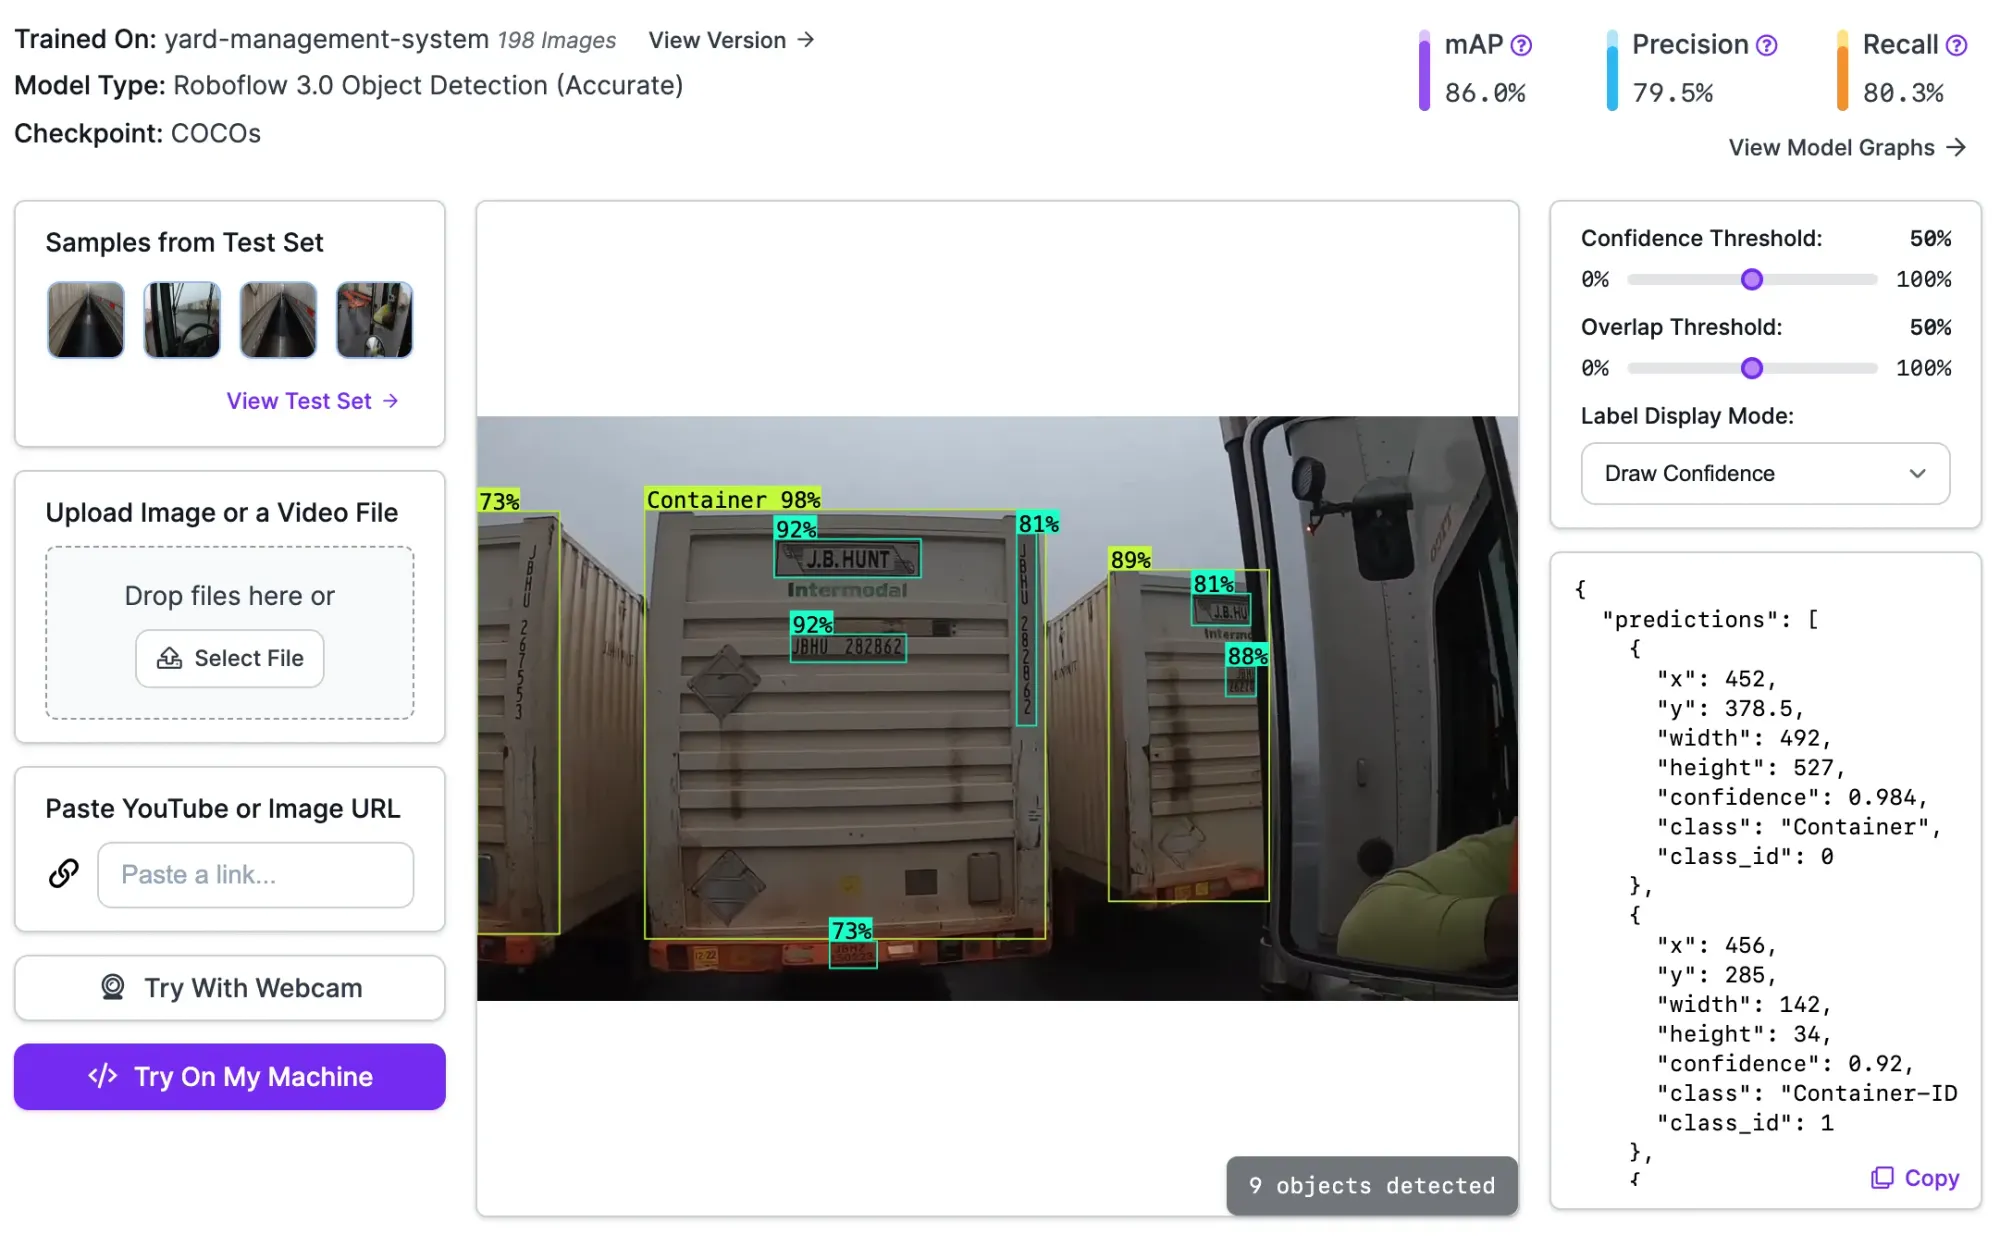
Our model successfully identifies containers, container IDs, chassis IDs, and logos in our video. Every object has a label, but some are hidden in the image so we can more easily see smaller boxes. You can see each label by clicking "Label Display Mode" and then "Draw Labels".
Step #5: Deploy the Model to the Edge
With a trained model ready, you can now deploy your model. Roboflow offers two main deployment options:
- Cloud, in which you send images or videos to Roboflow for processing, and;
- On-device, in which you run models on your own hardware.
For yard management, we recommend running models on-device. This will allow you to run models in real time as you operate vehicles across your yard. For example, you could have a camera attached to an NVIDIA Jetson that captures footage from a vehicle driven down your yard.
To deploy your model on your own hardware, you can use Roboflow Inference. Inference is a high-performance inference server through which you can run your own vision models as well as foundation models like CLIP (classification) and DocTR (OCR).
To run your model, first install Inference on the device on which you want to run your model. You can install Inference using the following command:
pip install inferenceThen, create a new Python file and add the following code:
from inference import InferencePipeline
from inference.core.interfaces.stream.sinks import render_boxes

pipeline = InferencePipeline.init(
    model_id="yard-management-system/1",
    video_reference=0,
    on_prediction=render_boxes,
)
pipeline.start()
pipeline.join()
Above, replace yard-management-system/1 with your Roboflow model ID. Learn how to retrieve your model ID.
The video_reference value lets you specify what device you want to use to run inference. Your default camera should be 0. You can also specify RTSP stream URLs if you want to run inference on frames from an RTSP stream. You can also specify a video file on which you want to run inference.
The on_prediction callback lets you specify a custom processing function for frames from your video stream. In this code, we use the render_boxes method. This method lets us visualize predictions from our model out of the box. We will talk more about adding business logic to our system in the next step.
Run the code above. A window will appear in which you can see the results from your model.
You can also run your model in the cloud. To learn more about cloud deployment, refer to the Roboflow API documentation.
Step #6: Configure Business Logic
After you have a model running, you can start writing logic that connects your model to your internal systems. For example, you could:
- Build a system that runs OCR on the license plate and container ID when a truck enters the yard.
- Identify open locations for incoming trucks.
- Monitor how long different containers spent in their parking space.
For this guide, let’s focus on the first use case: running OCR when a new container ID is identified.
To build this application, we will need to write logic that assigns each container a unique ID number. We can then capture the region of a container in the camera feed and run OCR on that region.
For this, we are going to use a pre-written script in the supervision Python package. Run the following commands to download the script, navigate to the project directory, and install the required dependencies:
git clone https://github.com/roboflow/cookbooks
cd cookbooks/yard-management
pip3 install -r requirements.txt
In the app.py file, we use tracking features in the supervision Python package to track predictions. New objects are assigned their own IDs. This allows us to track objects frame-to-frame.
We use the supervision DetectionsSmoother to smooth detections on each frame. When a container crosses the first third of the video, the container is captured and saved in a folder called “results”. We can then run OCR on that folder when we have finished recording.
We recommend running OCR on a separate system for optimal performance. This is because OCR can take a few seconds to run. Running OCR synchronously would impact the performance of our camera recording.
You will need to export your Roboflow API key into your environment so you can authenticate with Roboflow and run the script.
To export your API key into your environment, run:
export ROBOFLOW_API_KEY="key"To run the script, run:
python3 app.py --video=video.mp4 --model-id=model/1 --output=output.mp4Above, replace:
video.mp4with the name of the file on which you want to run inference.model/1with your Roboflow model ID. Learn how to retrieve your model ID.output.mp4with the name of the file you want to create that shows all your predictions.
The script will save an annotated version of your video to the file output.mp4.
Here is the output.mp4 file generated by our script:
Every unique shipping container is saved in the results folder. Here are a few:
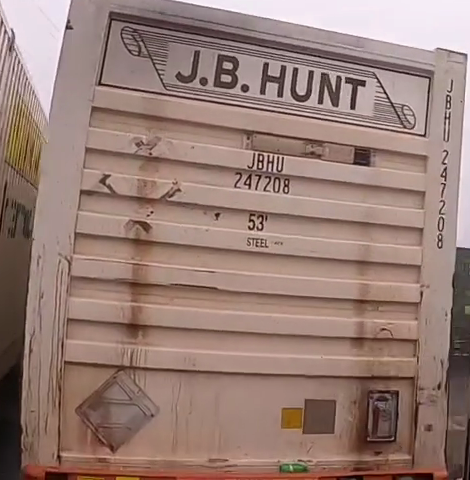
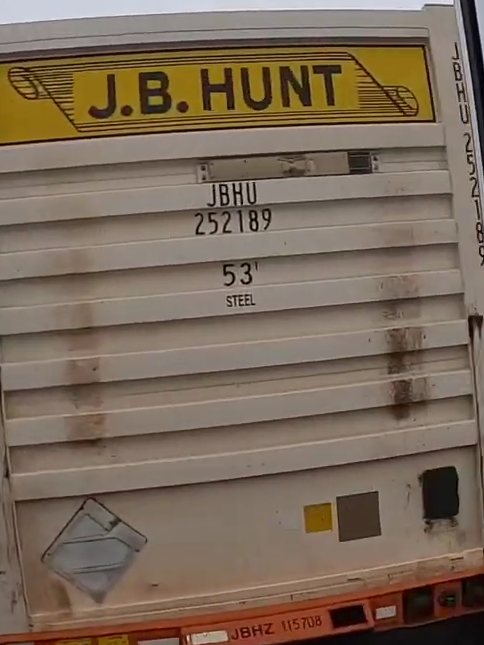
Results from OCR will be saved in a file called ocr_results.json. Here are the results from the two containers above:
"J.B.HUNT | JBHU | 247208 | / | 53' | STEELare | "
"J.B.HUNT | JBHU | 252189 | 53' | STEEL | JBHZ115708 | "
The | character indicates the start of a new sequence of text.
In both instances, our script was able to read:
- The logo
- The container ID (i.e.
JBHU 252183).
In the second image, the chassis ID (JBHZ115708), visible in the image, was also read accurately.
Conclusion
You can use computer vision for yard inventory management. In this guide, we walked through how to build a yard management system with computer vision. We trained a model to identify objects of interest. These included shipping containers, container IDs, and chassis IDs.
We then tested the model on an image. After testing our model, we used a script to identify unique containers in a video and run OCR on those containers. This OCR logic could be integrated with your internal system for tracking the location of containers.
If you need assistance integrating Roboflow into your yard management system, contact the Roboflow sales team. The Roboflow team has expertise working with critical infrastructure providers on needs from safety to inventory management.