Vacuuming is one of those household tasks we can't escape. Whether you're the human behind the vacuum or you've outsourced the job to a robotic helper, the end goal is the same: a cleaner space. But what if you could not only clean your floors but also analyze how well you're doing it? Enter this project, designed to make the routine task of vacuuming a bit more insightful and a dash more optimized.
This project uses the magic of computer vision and data analysis to turn the simple act of vacuuming into a treasure trove of insights. It's not just about a cleaner floor; it's about doing it the smartest way possible. Real-time tracking, coverage metrics, heatmaps—these are just a few features that elevate your standard vacuuming session into a masterclass of efficiency. So, if you ever wondered if your vacuuming technique (or your robot's) is up to par, you're in the right place.
How It Works
My application runs through the following steps to help me test my vacuuming skills:
- Video Input: First things first, a camera captures the area being vacuumed. This overhead view serves as the raw data for the entire process.
- Object Detection: Next, we deploy our custom-trained machine learning model (more on this later) to recognize the vacuum in action. This works for both robotic vacuums and your old-fashioned, manual ones.
- Tracking and Mapping: As the vacuum moves along, its path and coverage are tracked in real-time. This is where computer vision shines—converting pixel data into meaningful insights about the vacuum's efficiency.
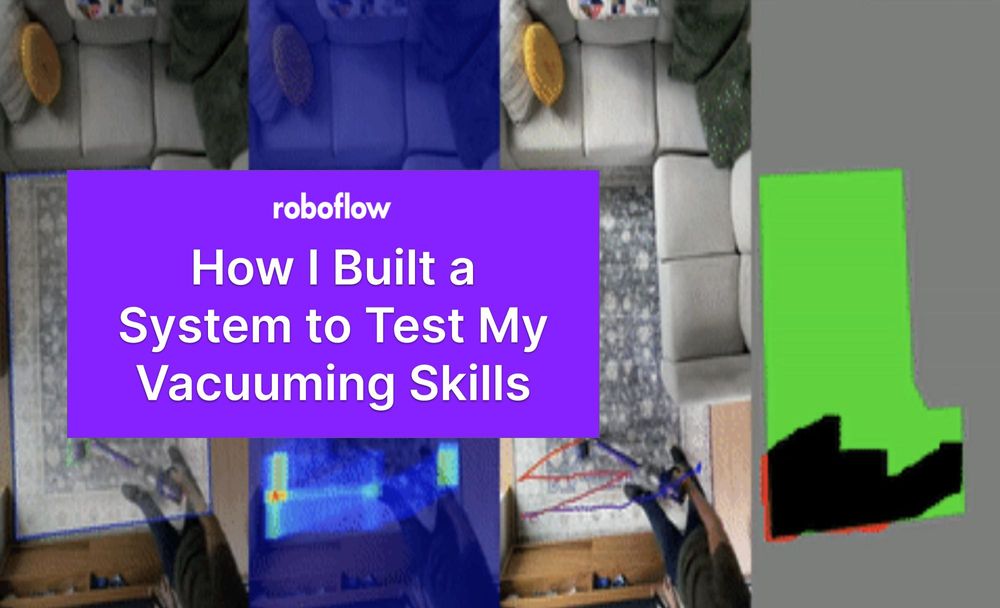
- Heatmaps and Paths: The tool generates a few different visual outputs. You'll see a path that traces the vacuum's journey and a heatmap that shows areas of higher and lower concentration. For the particularly detail-oriented among us, there's also a binary mask to indicate which areas are yet to be covered.
- Analysis: Finally, the program calculates a 'coverage score' to quantify how thorough the vacuuming has been. It's a straightforward way to measure the effectiveness of your cleaning.
In essence, we are taking something as ordinary as vacuuming and applying a layer of data-driven analysis to it. It's not just about clean floors anymore; it's about knowing how clean they really are.
Building A Custom Vacuum Tracking Model
One of the most key parts of this project is the ability to build your own custom vacuum detection model. This model is then used to track the position of a vaccum in an image. With the tracking information, we can calculate coverage showing how much of the carpet has been covered.
Below, I describe how you can build your own custom vacuum detection model.
Collecting Video Footage
First, you will need images – or a video, which you can split up into images – on which you can train a vision model. Position an overhead camera that can capture a clear view of the area you intend to clean. Use a web cam or even you phone!
Then, vacuuming the area, either manually or with a robot vacuum. Make sure to record this session with the overhead camera. The more diverse your vacuuming patterns, the better your model will be at object detection.
Uploading Video to Roboflow
With
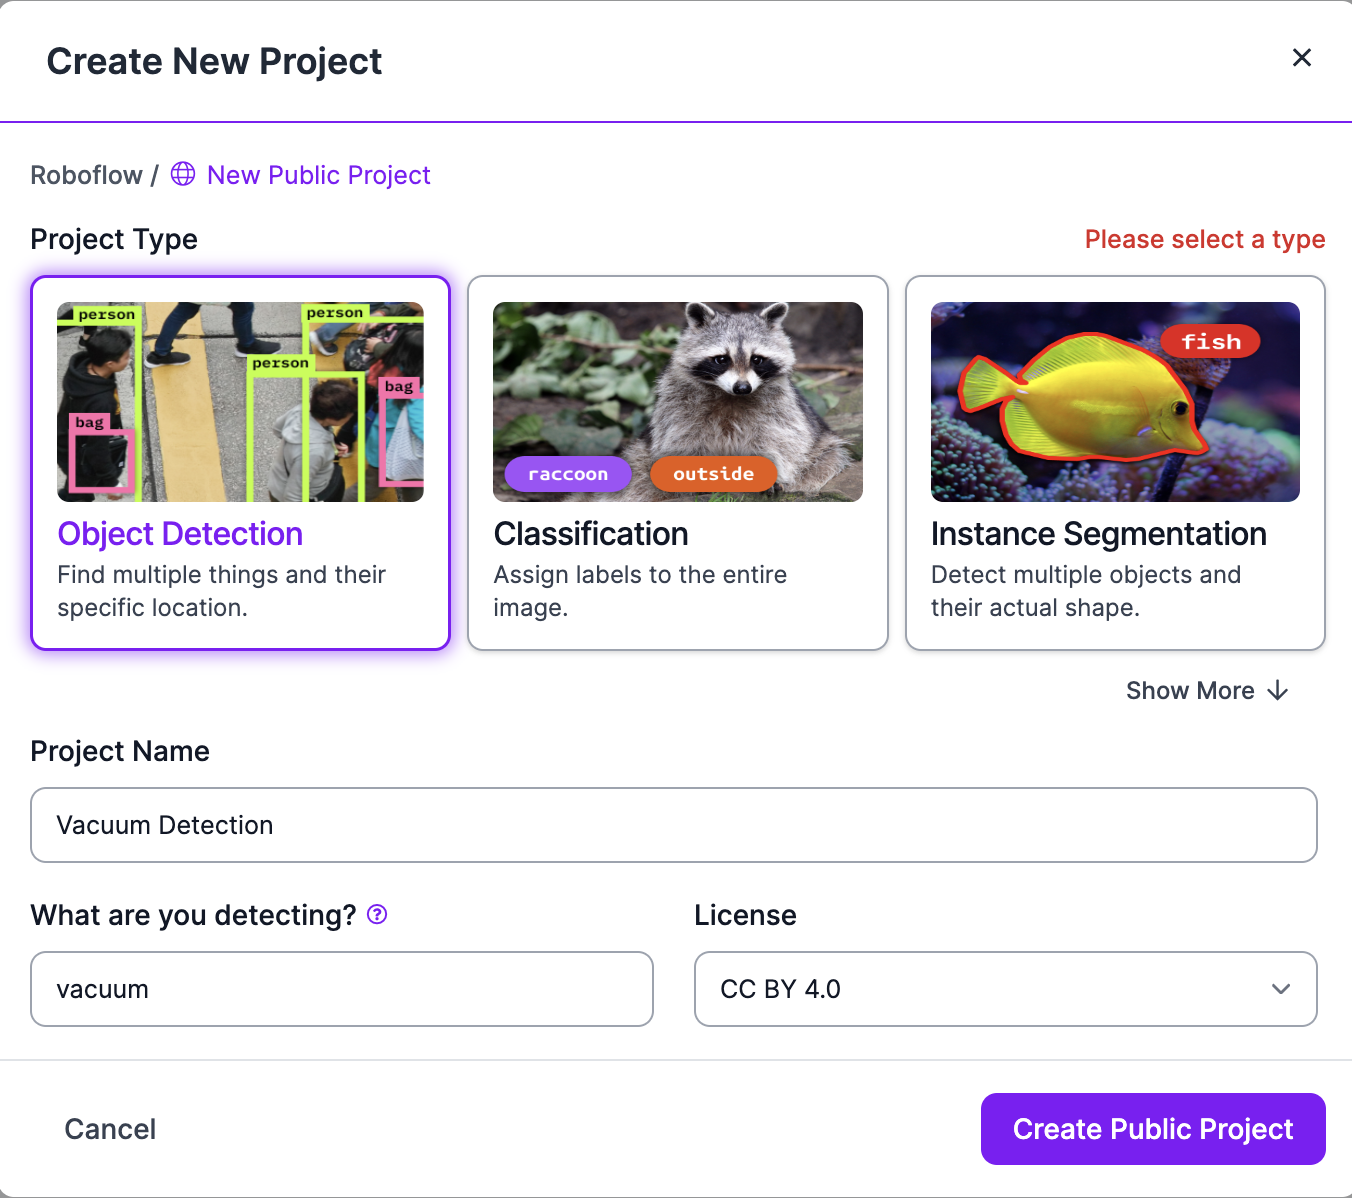
- Account Setup: If you haven't already, create an account on Roboflow. Now you can create a new project for Object Detection.
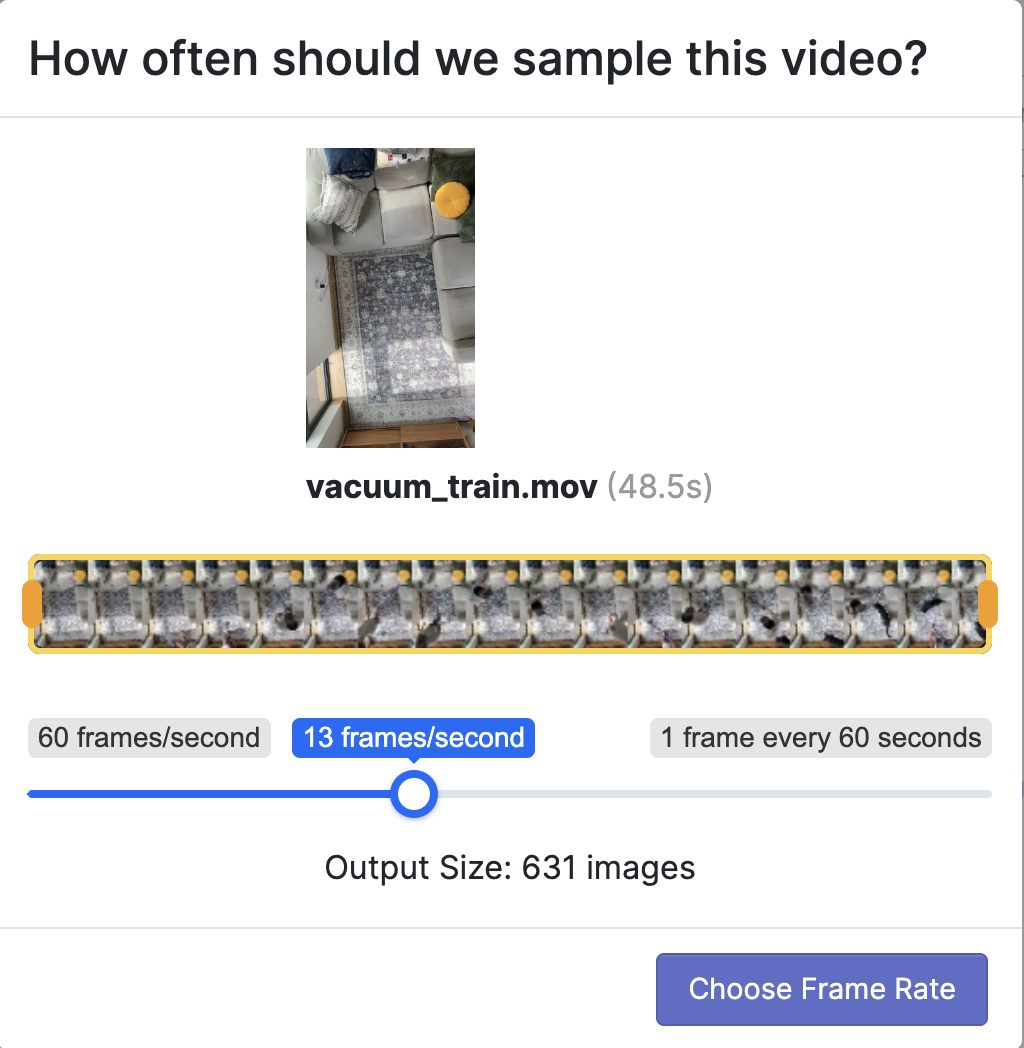
- Upload Video: Navigate to the "Upload" section of the project and upload your recorded video.
- Frame Extraction: Roboflow will give you an option to pull frames from the uploaded video. Choose a frame rate that provides a good balance between dataset size and model accuracy.
Labeling Frames
- Annotation: Once the frames are extracted, you will need to label them. Draw bounding boxes around the vacuum (robotic or manual) in each frame. You can find more information here.
Create Dataset Version
To create a dataset version, click "Versions" in the sidebar associated with your Roboflow project. Then, click "Generate New Version".
- Specify Image Preprocessing: Preprocessing ensures your dataset is in a standard format (e.g. all images are the same size). This step is essential to ensure your dataset is consistent before training a model. You can find more information here.
- Specify Image Augmentation: Image augmentation is a step where augmentations are applied to existing images in your dataset. This process can help improve the ability of your model to generalize and thus perform more effectively on unseen images. You can find more information here.
Training Object Detection Model
- Training: To train a computer vision model, go to the Versions page associated with your dataset. Next, click the "Start Training" button.
That's it! Roboflow's platform will take care of the rest, fine-tuning your chosen model with your labeled dataset. Once your model is trained, you'll receive an email notifying you. More information about Roboflow train can be found here.
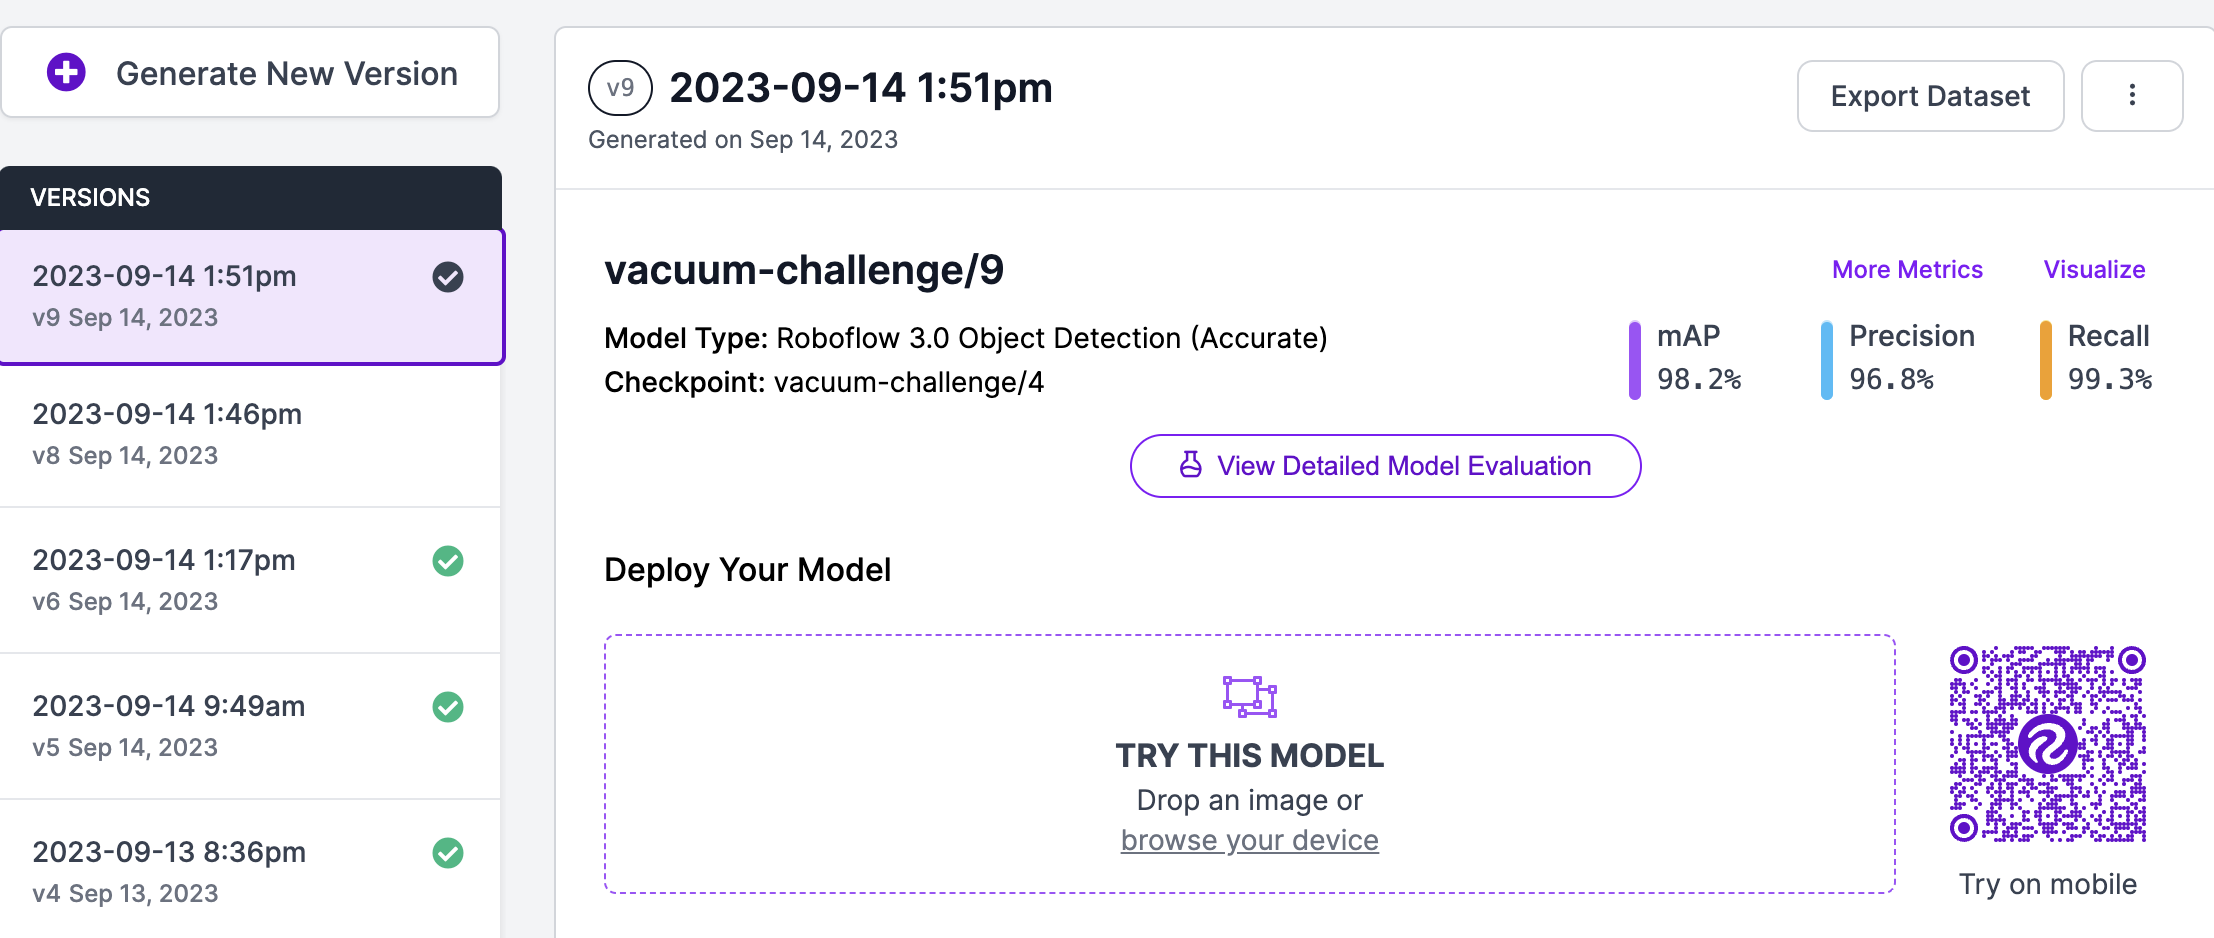
- Model Evaluation: Once the training is done, evaluate your model's performance through metrics like mAP, precision, and recall (which can be see in the Versions tab). If needed, you can always go back, add more data, and retrain.
By following these steps, you'll have a custom vacuum tracking model tailored to your specific needs.
Project in Action
Step 1: Setup the Program
Follow the Instructions on the GitHub page. This includes pulling the repository and installing dependancies.
Step 2: Configure Your Settings
Within the repository, you'll find a config.yaml file. This is where you can tweak settings to better suit your needs, whether you're manually vacuuming or using a robot. Just open the file in any text editor and change the parameters as needed.
Step 3: Run the Program
Navigate to the repository folder in your terminal, and run:
python main.py
This will kick off the program, and you should see a window displaying your cleaning space.
Step 4: Draw Vacuuming Your Space
Use your mouse to draw the section of the room you're going to vacuum. You can draw around couches, chairs, and other areas where you will not be vacuuming.
Step 5: Enjoy the Magic!
The program will start processing the video as you or your robot vacuum starts cleaning, watch how the program tracks your movement, creating a visualization of the vacuum, heatmap, path, and coverage area!
Beloiw are examples of myself and my robot vacuuming:
Conclusion
In summary, this project aimed to create a vacuum tracking system capable of detecting and analyzing both manual and robotic vacuums. Leveraging computer vision and machine learning, the system pulls frames from videos to create a dataset, labels the vacuum's position, and then trains an object detection model via Roboflow. The end result is a practical tool that can provide insights into cleaning patterns and efficiency, built on a foundation of accessible technologies and platforms.
While this project may seem specific in its application, it serves as a compelling example of how object detection models can be trained and deployed for everyday scenarios.