
Node-RED, a popular low-code visual programming tool, is already versatile, but today we release roboflow-red, an experimental extension to Node-RED, which allows computer vision tasks like object detection and classification to be easily integrated into various workflows in a modular way.
In this article, we’ll go over what Node-RED is, why it might be useful, and how to use it with Roboflow to create modular, extensible, and intuitive computer vision workflows. By the end of this guide, you’ll have a working Node-RED flow that locates license plates in images, crops the license plate, passes the license plate to a character recognition model, and turns the characters into text.

roboflow-red repo!Let’s get started!
What is Node-RED?
Node-RED is a platform for visual programming that allows users to create workflows – called “flows” – that integrate and tie tools, code, and APIs together. Applications and workflows that would usually require code to be put together can be done visually with significantly less effort and time using Node-RED.
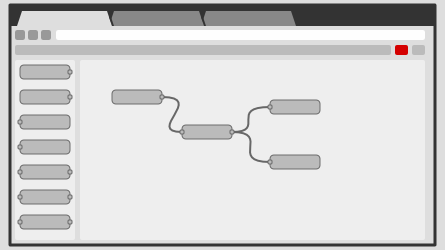
An illustration of the Node-RED interface (source)
Why Use Node-RED for Computer Vision?
Completing a task from the user input all the way to the desired output can sometimes be a much more involved process than just model training and deployment. Node-RED allows us to visually connect our inputs and outputs into our model, as well as visualize the pre-processing that is usually required for projects.
For example, we’ll use license plate detection and recognition, drawing inspiration from a previous blog post.
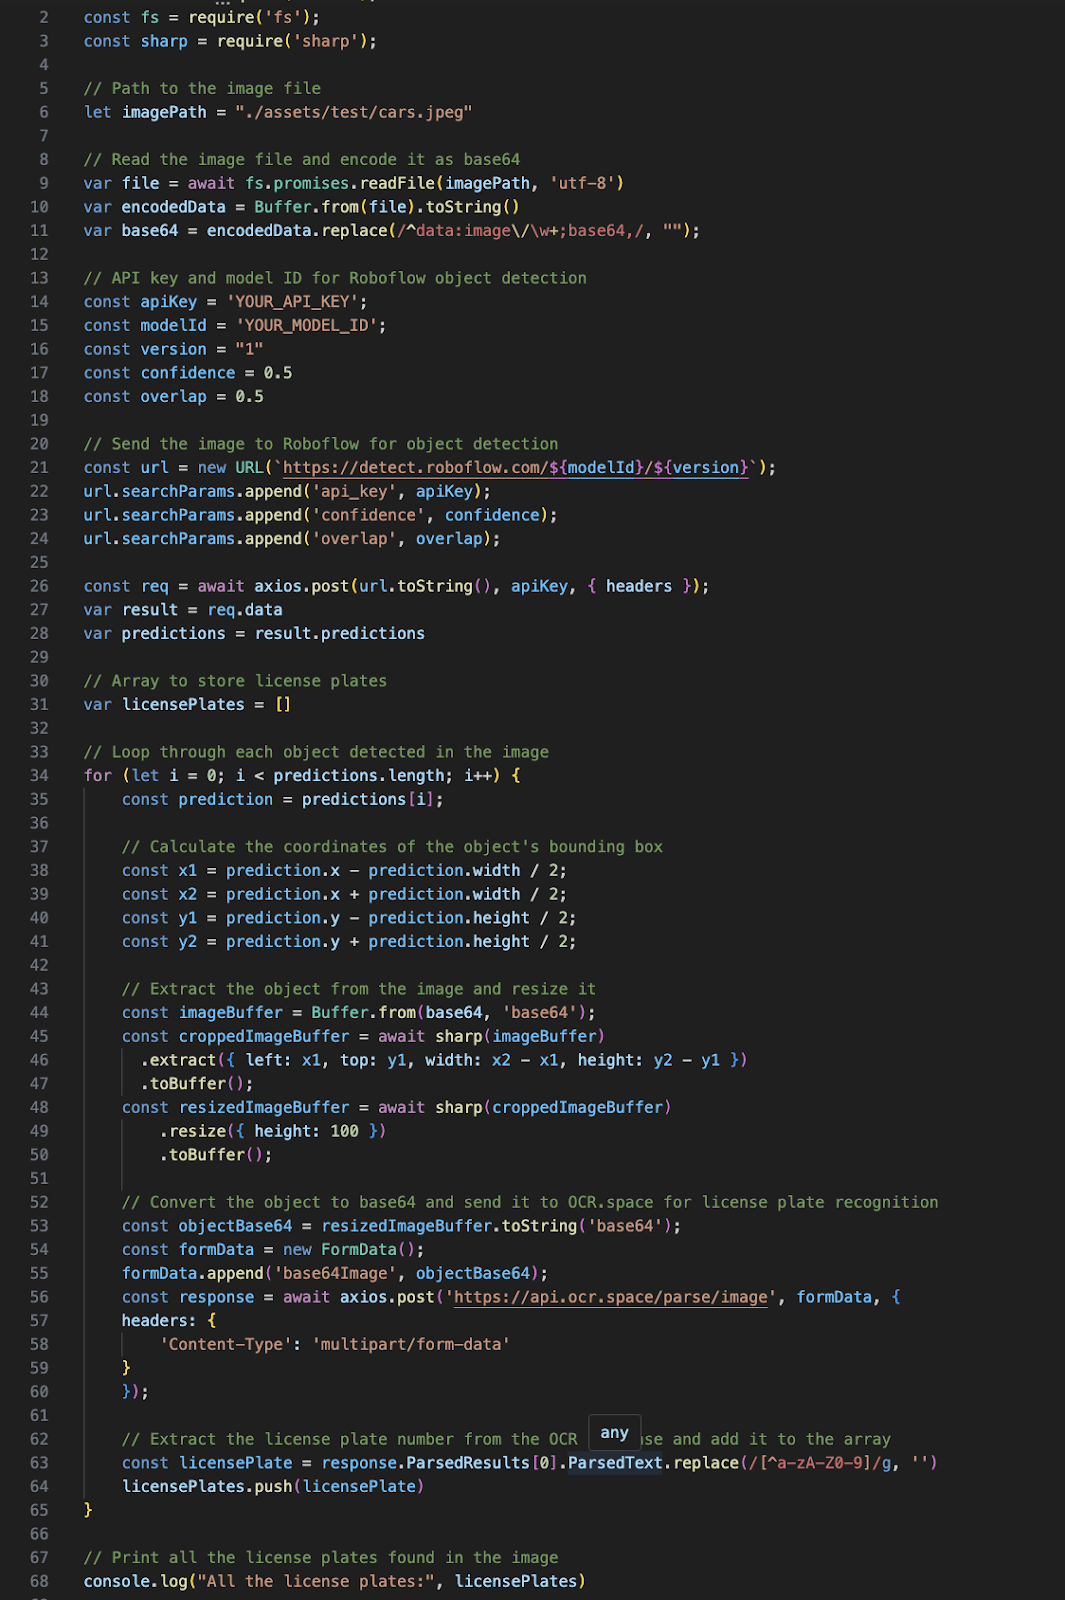
Even after we create a model to detect license plates, if we wanted to implement it in the real world, we would need to take an output from a camera, send it to the license plate detection model, process the outputs, separate each license plate in the image, run character recognition (OCR) for each license plate in the image, then process the output to get the license plate.
Node-RED allows us to develop this process visually, using intuitive blocks and line connectors. Changes are as easy as swapping blocks or changing the configuration. If we were to write that in code, it’d look something like this:
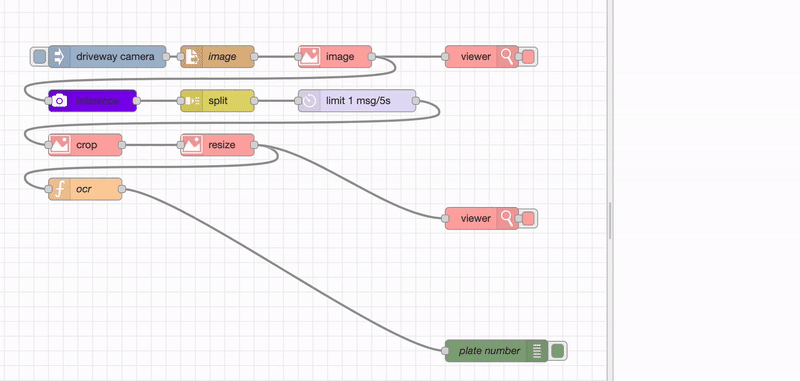
If we were to do that in Node-RED, it would look like this:
Let’s give it a try. For this example project, we’ll be using the license plate detection dataset from Roboflow Universe.
How to Use Node-RED with Roboflow
Step 1: Install Node-RED
The first thing we need to do is install Node-RED. The most up-to-date installation information will be on the Node-RED website and repo, but here are the basics.
Make sure you have Node.js and NPM installed. Then run:
npm install -g node-redStep 2: Getting Started
Now that you have Node-RED installed, let’s get set up. We will go over the basics of Node-RED, then how to use roboflow-red.
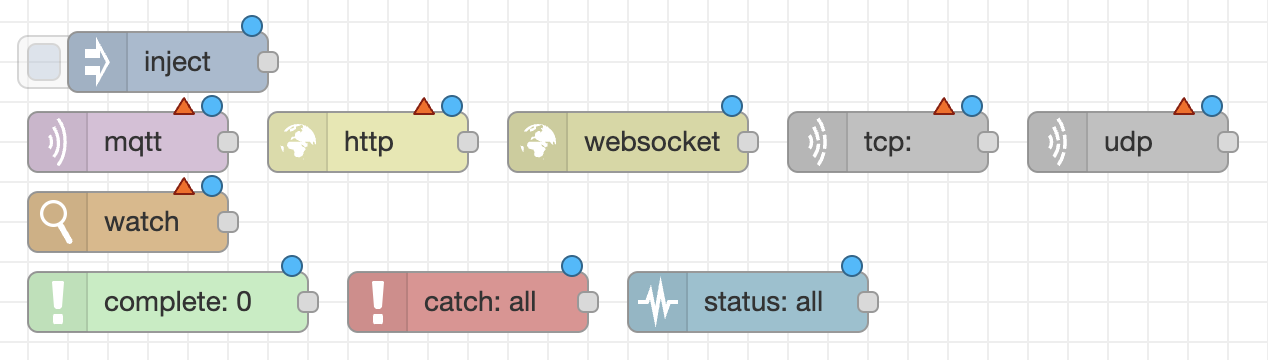
Node-RED helps you build “flows” by linking together blocks, called “nodes”. Almost all the nodes have at least one input and one output.
There are exceptions, like the nodes used to start the flow. You can trigger flows to start in several ways. That can be from a manual button (the inject node), network events, file changes (the watch node), or events in other flows (such as errors, completions, etc).
Once you start a flow, you can connect other nodes by dragging a line from the output end (right side) to the input (left side) of another node.

Node-RED flows work on a system of messages. All the nodes will provide a message and will move along the flow being carried along, modified, or replaced.
Debugging is a crucial concept in any programming language and that extends to Node-RED as well. You can add debug messages wherever helpful and it will show up in the side Debug menu.


A blue circle above a node signifies a change that has not yet been deployed. You can deploy using the red button in the upper right corner.
Node-RED has several native nodes preinstalled, but the usefulness of Node-RED comes in the extensions you can add to it, like roboflow-red. You can install extensions by going into the Manage palette menu.
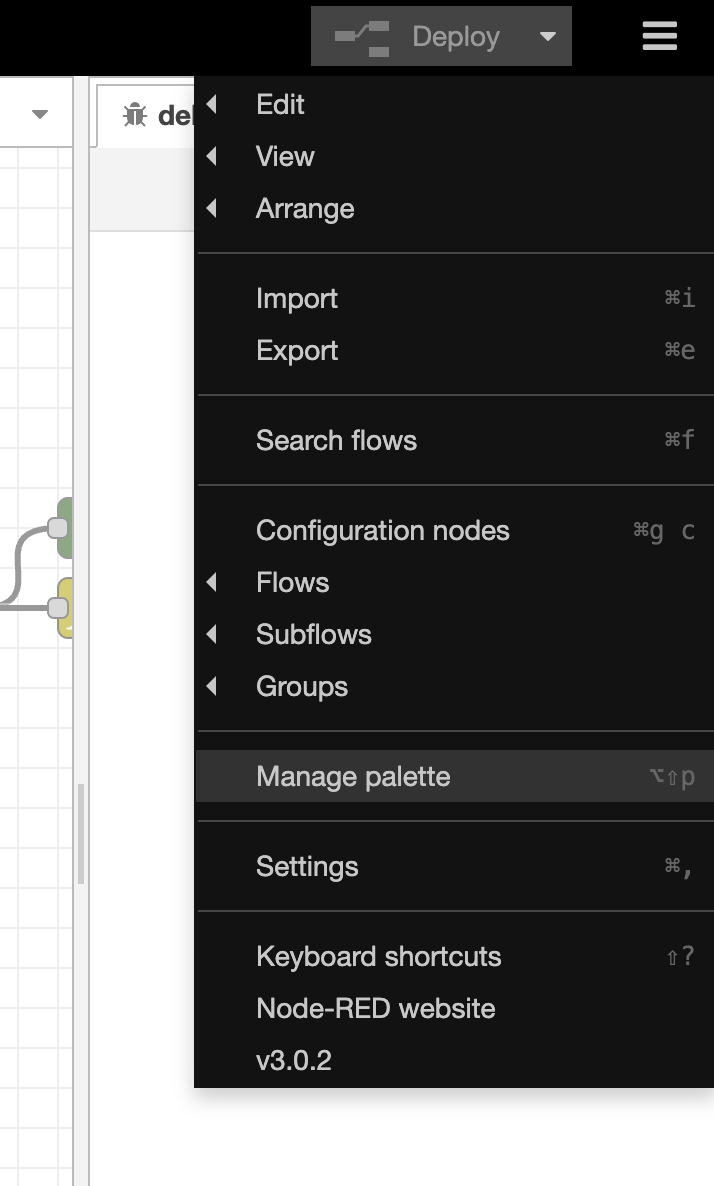
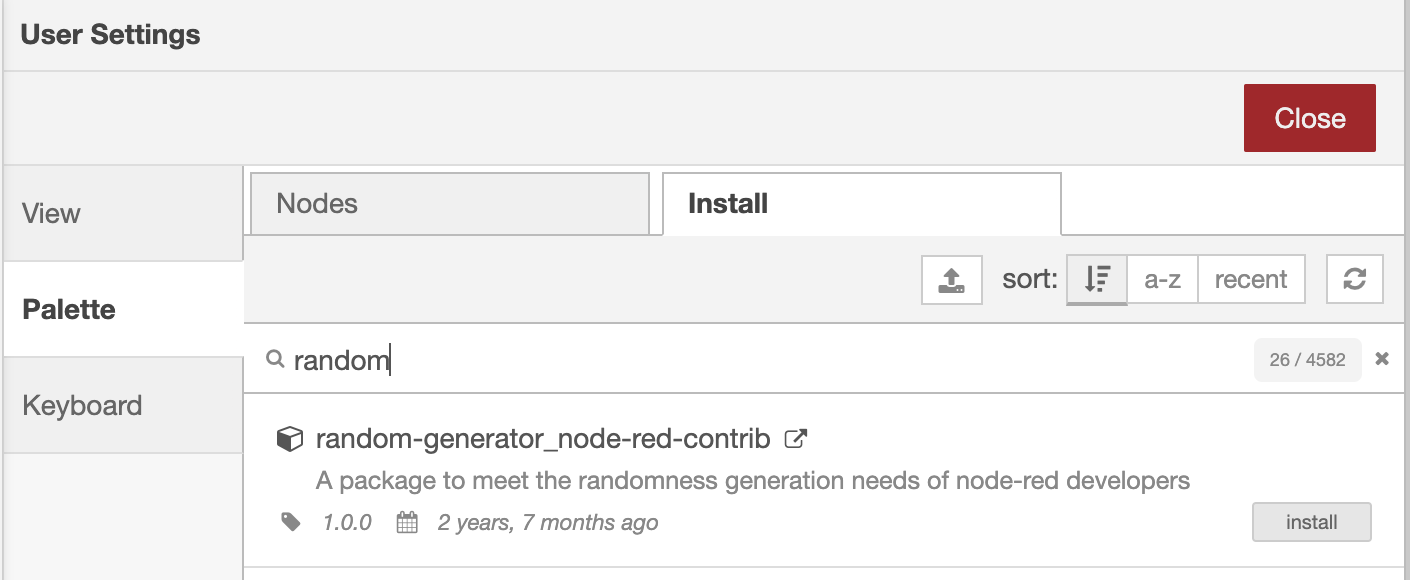
Then in the Install tab, you can search for packages and click Install.
Now that you know the basics, let’s get started.
Using roboflow-red
You can use roboflow-red for integrating computer vision into your flows. It adds several nodes on top of the existing set of nodes provided by Node-RED.
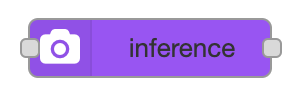
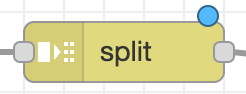
The main one is the inference node, which runs inference on your Roboflow model. It works similarly to the Hosted Inference API and is compatible with all model types and will return an array of predictions, which you can use with the built-in split node if you want to.

There’s also an upload node, which allows you to upload images back into your project to implement active learning. We’ll go into that deeper later in this article.
You can install roboflow-red like any other Node-RED extension by going into the menu in the upper right corner, clicking on Manage palette, in the Install tab searching for roboflow-red, and clicking Install.
Step 3: Build Your Workflow
Let’s get started with building out the flow! As we mentioned earlier, we’ll be using license plate detection and recognition as an example.
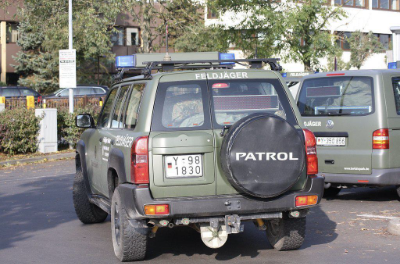
Let’s say that we are trying to keep track of which cars are parked in a specific location.
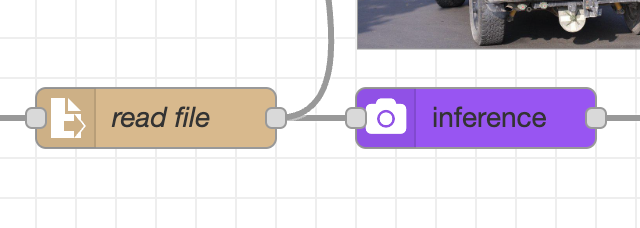
The first thing to do in Node-RED is to find a suitable start mechanism. We will use a manual “inject” node for our example, then read in our test image using the “read file” node.

If you use the viewer node from the image-tools module, you can see that our image is like this at the moment.
You can install this by searching for node-red-contrib-image-tools in the same place you used to install roboflow-red. The `viewer` node is an optional debugging step, but the package will be needed later.
We will then use Roboflow to detect the license plates from our image.
The roboflow-red inference node is attached to the previously created `read file` node
To use the node, you will have to import your API key and the model ID. You can also add the minimum confidence and maximum overlap configuration here.

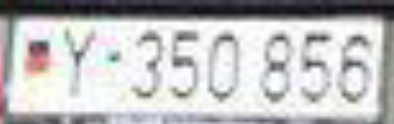
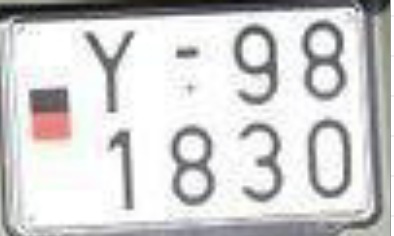
Once we have the detections we can crop the original image to get the images of the license plates.
Unlike the Hosted Inference API, which produces coordinates for the center of the detection, roboflow-red produces coordinates for the edges (x1, x2, y1, y2) and the center as center_x and center_y in msg.payload to make integrations with other nodes easier.
At the moment, the results of the model are in a single array. We’ll need to split them up into individual messages so that we can deal with each prediction. For this, we’ll use the native split node.

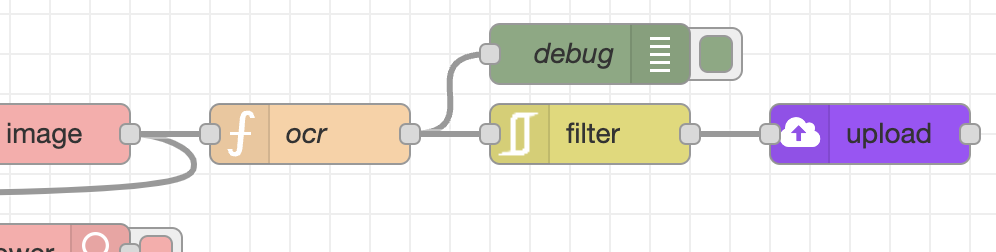
Now that each of our predictions is on its own message traveling along the flow, we can crop the image so that we can detect the characters on it. We’ll use the `image` node from image-tools

To configure the node, we need to make sure that the function setting is set to crop, the output is set to base64 so we can send it to an OCR service later. We also need to make sure your x, y, width and height are set to the correct variables in our previous message.

image node.Here, we can add another viewer node to check in on how the workflow is going:
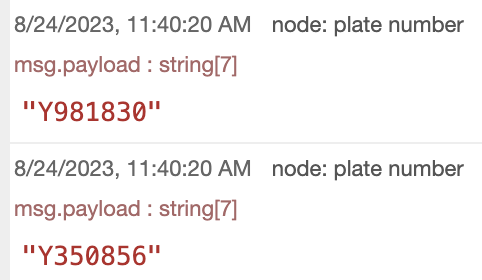
Finally, we can move on to our final step of running OCR, or Optical Character Recognition, to get the numbers and letters of the license plate. We’ll do this using the OCR.space API. This is the one part of this process that requires a tiny amount of code using the function node which we use to query the OCR API.
const {ocrSpace} = OCRSpace

const response = await ocrSpace(msg.image, { scale: true, OCREngine: 2, detectOrientation: true})

if(response.IsErroredOnProcessing) throw Error(response)

msg.payload = response.ParsedResults[0].ParsedText.replace(/[^a-zA-Z0-9]/g, '')

return msg
We attach the function node to the rest and add a debug node to see what the output is.

That’s it! We went from license plate image to text in six nodes.

The debug messages from the final debug node showing up in the side debug menu
Step 4: Active Learning
Going further, we can also implement active learning into this workflow right from Node-RED. Active learning is when we use real-life examples as training data to further improve and iterate on our model.
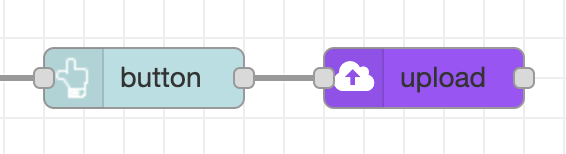
We can add the upload node from roboflow-red to wherever we want to upload the image. We have several options as to how we can implement active learning.
One option is to add it to our existing image prediction workflow, filtering images such as those with new locations, new times, or low confidence, and uploading those images:
Another could be to use a user input, like a button from node-red-dashboard:
Then you can go back into Roboflow and create a new version of your dataset based on real world examples.
Conclusion
We encourage you to use roboflow-node to integrate computer vision into your workflow and check out the full “flow” JSON template in the examples folder on the GitHub repo!
This relatively simple use case can be expanded to look license plates up, let you know of unfamiliar cars, etc. The best part about using Roboflow with Node-RED is that even with this fairly niche example, it could be taken and easily modified to fit any use case.
There are an infinite number of combinations to import, export, and modify data. Have fun building!