Following this guide, you only need to change a single line of code to train an object detection model on your own dataset.
In this post, we’ll walk through how to prepare a custom dataset for object detection using tools that simplify image management, architecture, and training.
In each section, we’ll first follow what I’ve done for a specific example and and then detail what modifications you’ll need to make for your custom dataset.
My recommendation is that you follow along step-by-step to duplicate my process before adapting these steps to your problem.
Object detection models and YOLO: Background
Object detection models are extremely powerful—from finding dogs in photos to improving healthcare, training computers to recognize which pixels constitute items unlocks near limitless potential.
However, one of the biggest blockers keeping new applications from being built is adapting state-of-the-art, open source, and free resources to solve custom problems.
Let’s start with a clear description of our process.
Any given machine learning problem begins with a well-formed problem statement, data collection and preparation, model training and improvement, and inference.
Often, our process is not strictly linear. For instance, we may find our model performs very poorly on one type of image label, and we need to revisit collecting more data on that example.
But, once we have a problem, how do we start working on a project? If you have never built a computer vision project before, this task may seem especially daunting. In the following sections, we're going to walk through how to train a YOLOv3 model for object detection. Let's begin.

What is YOLOv3?
YOLOv3 is an object detection algorithm in the YOLO family of models. Using a CNN with 106 layers, YOLO offers both high accuracy and a robust speed that makes the model suitable for real-time object detection. For example, you could use YOLO for traffic monitoring, checking to ensure workers wear the right PPE, and more.
How to train a YOLOv3 model for object detection
Chess is a fun game of wit and strategy. Improving your playing ability requires understanding where you’ve previously made notable mistakes and what move(s) a superior player to you may have made in the same situation.
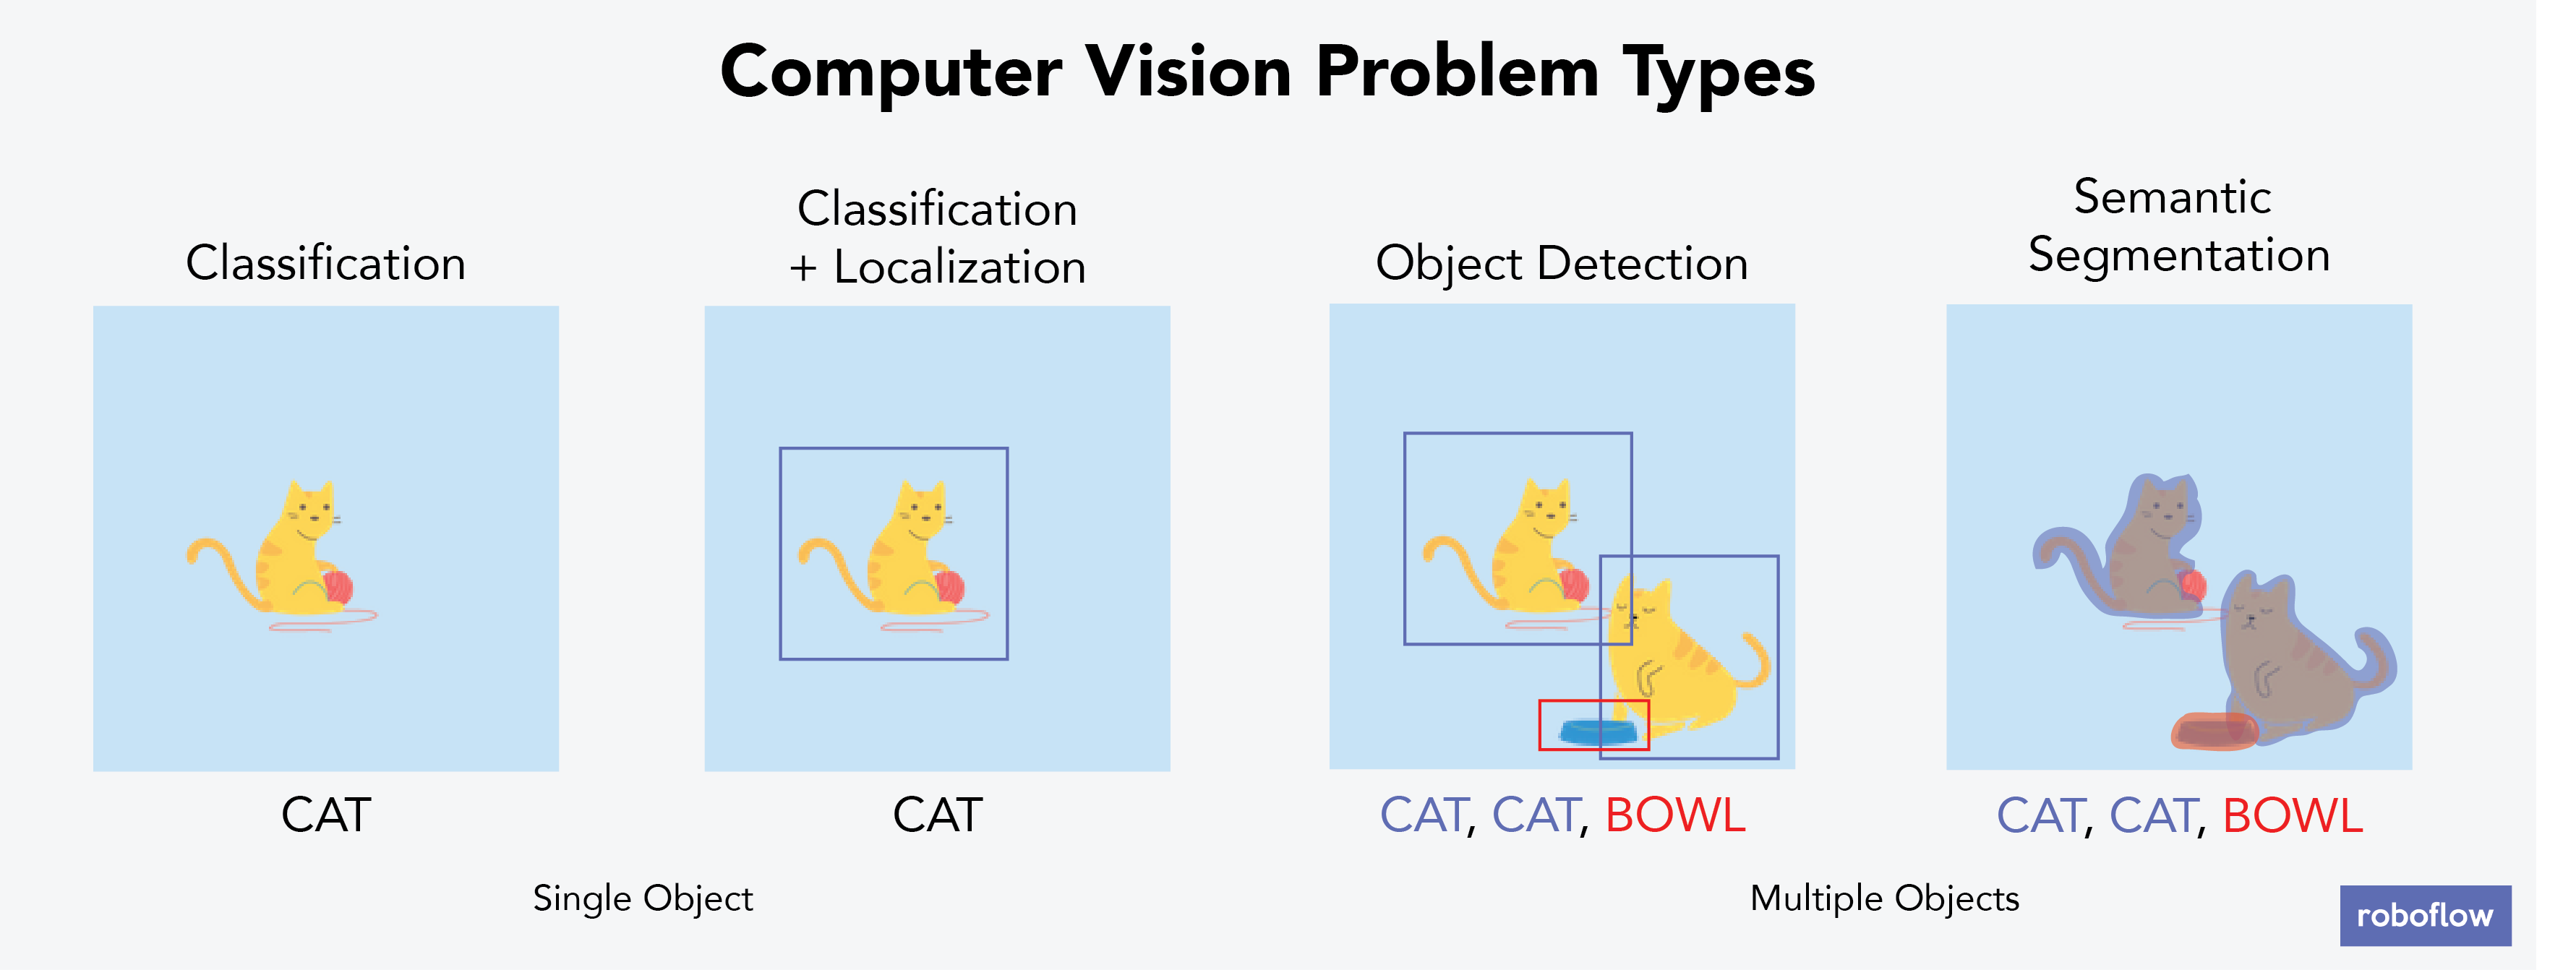
Thus, having a system that recognizes the state of the game and records each move would be valuable. This requires not just determining what a given chess piece is, but where that piece is on the board—a leap from image recognition to object detection.
For the purposes of this post, we will constrain the problem to focus on the object detection portion: can we train a model to identify which chess piece is which and to which player (black or white) the pieces belong, and a model that finds at least half of the pieces in inference?
For your non-chess problem statement, consider constraining the problem space to a specific piece. Moreover, consider the minimal acceptable criteria for the model’s performance. (In this example, we are constraining to just the identification of correct bounding boxes, and setting a relatively low bar for acceptable criteria. To be more rigorous, we may want to identify our model’s IOU or mAP - but that is for a different post.)
Data collection to train a YOLOv3 model
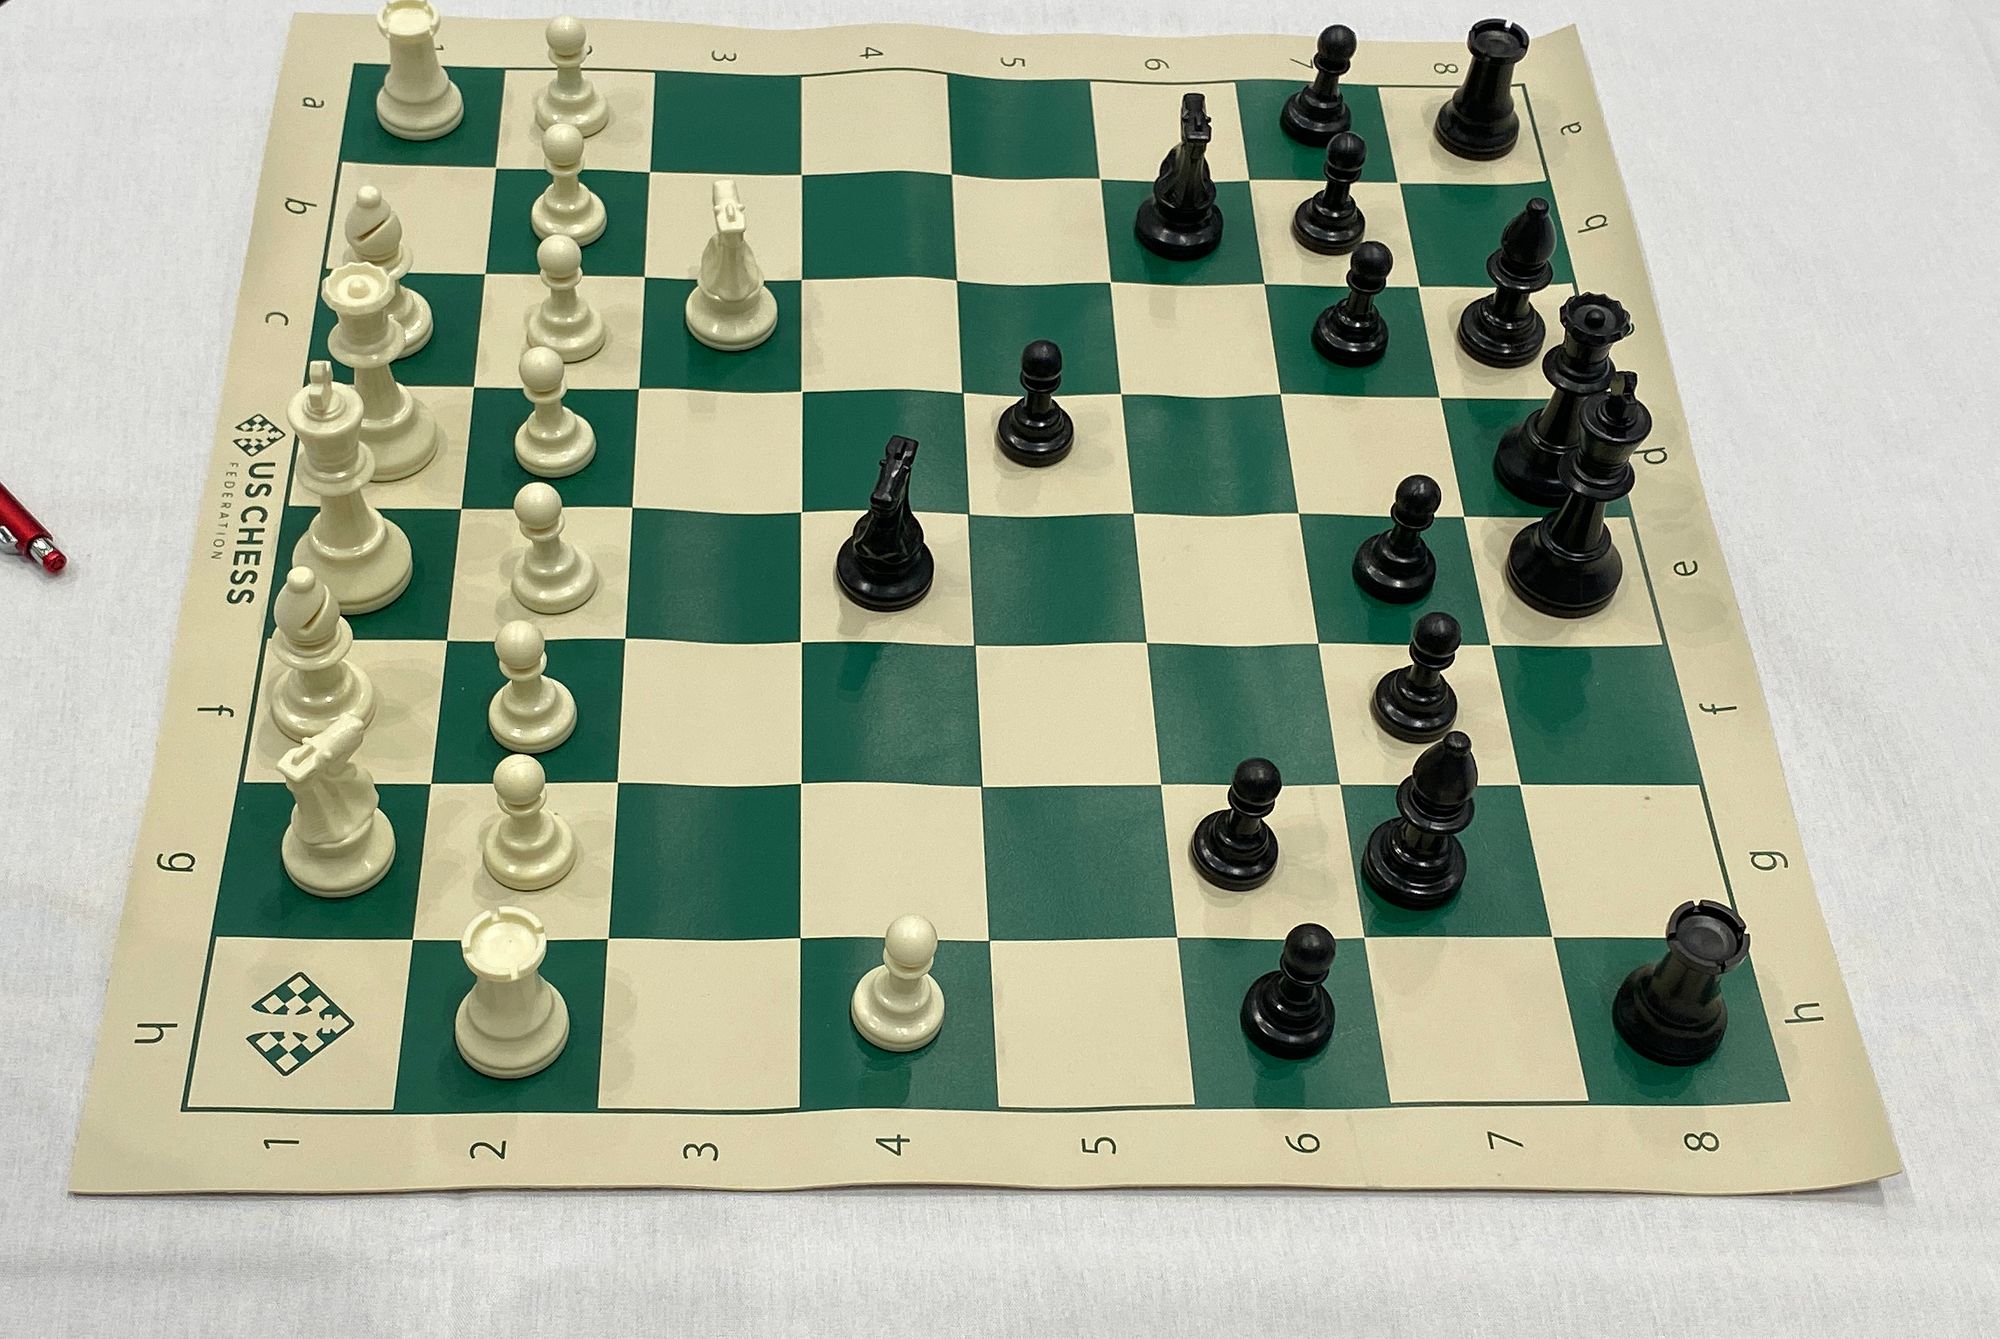
To identify chess pieces, we need to collect and annotate chess images.
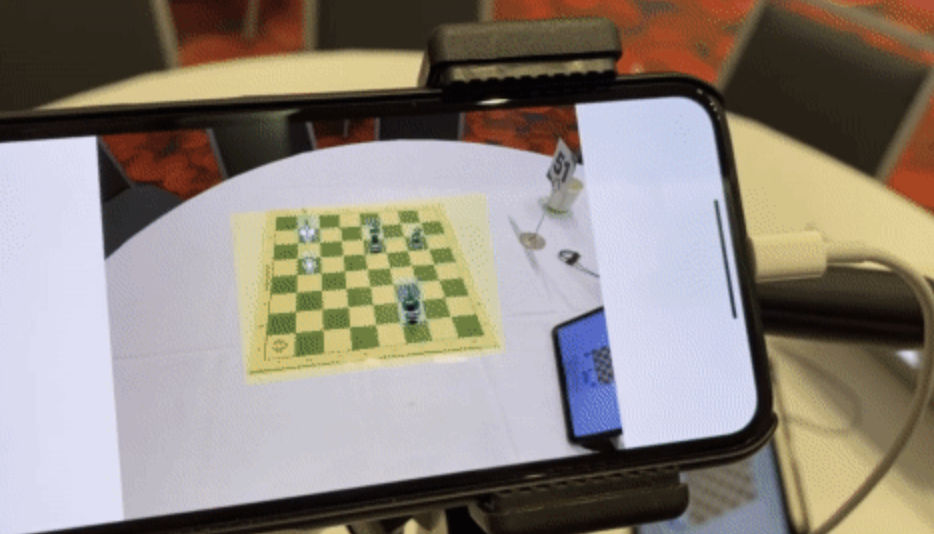
We made a few assumptions in my data collection. First, all my images were captured from the same angle. I set up a tripod on the table near my chess board.
Label and Annotate Data with Roboflow for free
Use Roboflow to manage datasets, label data, and convert to 26+ formats for using different models. Roboflow is free up to 10,000 images, cloud-based, and easy for teams.
For inference, this would require that my camera is at the same angle as the training data was captured — and not all chess players may be setting up tripods before their games. Second, I created 12 different classes: one for each of the six pieces times the two colors.
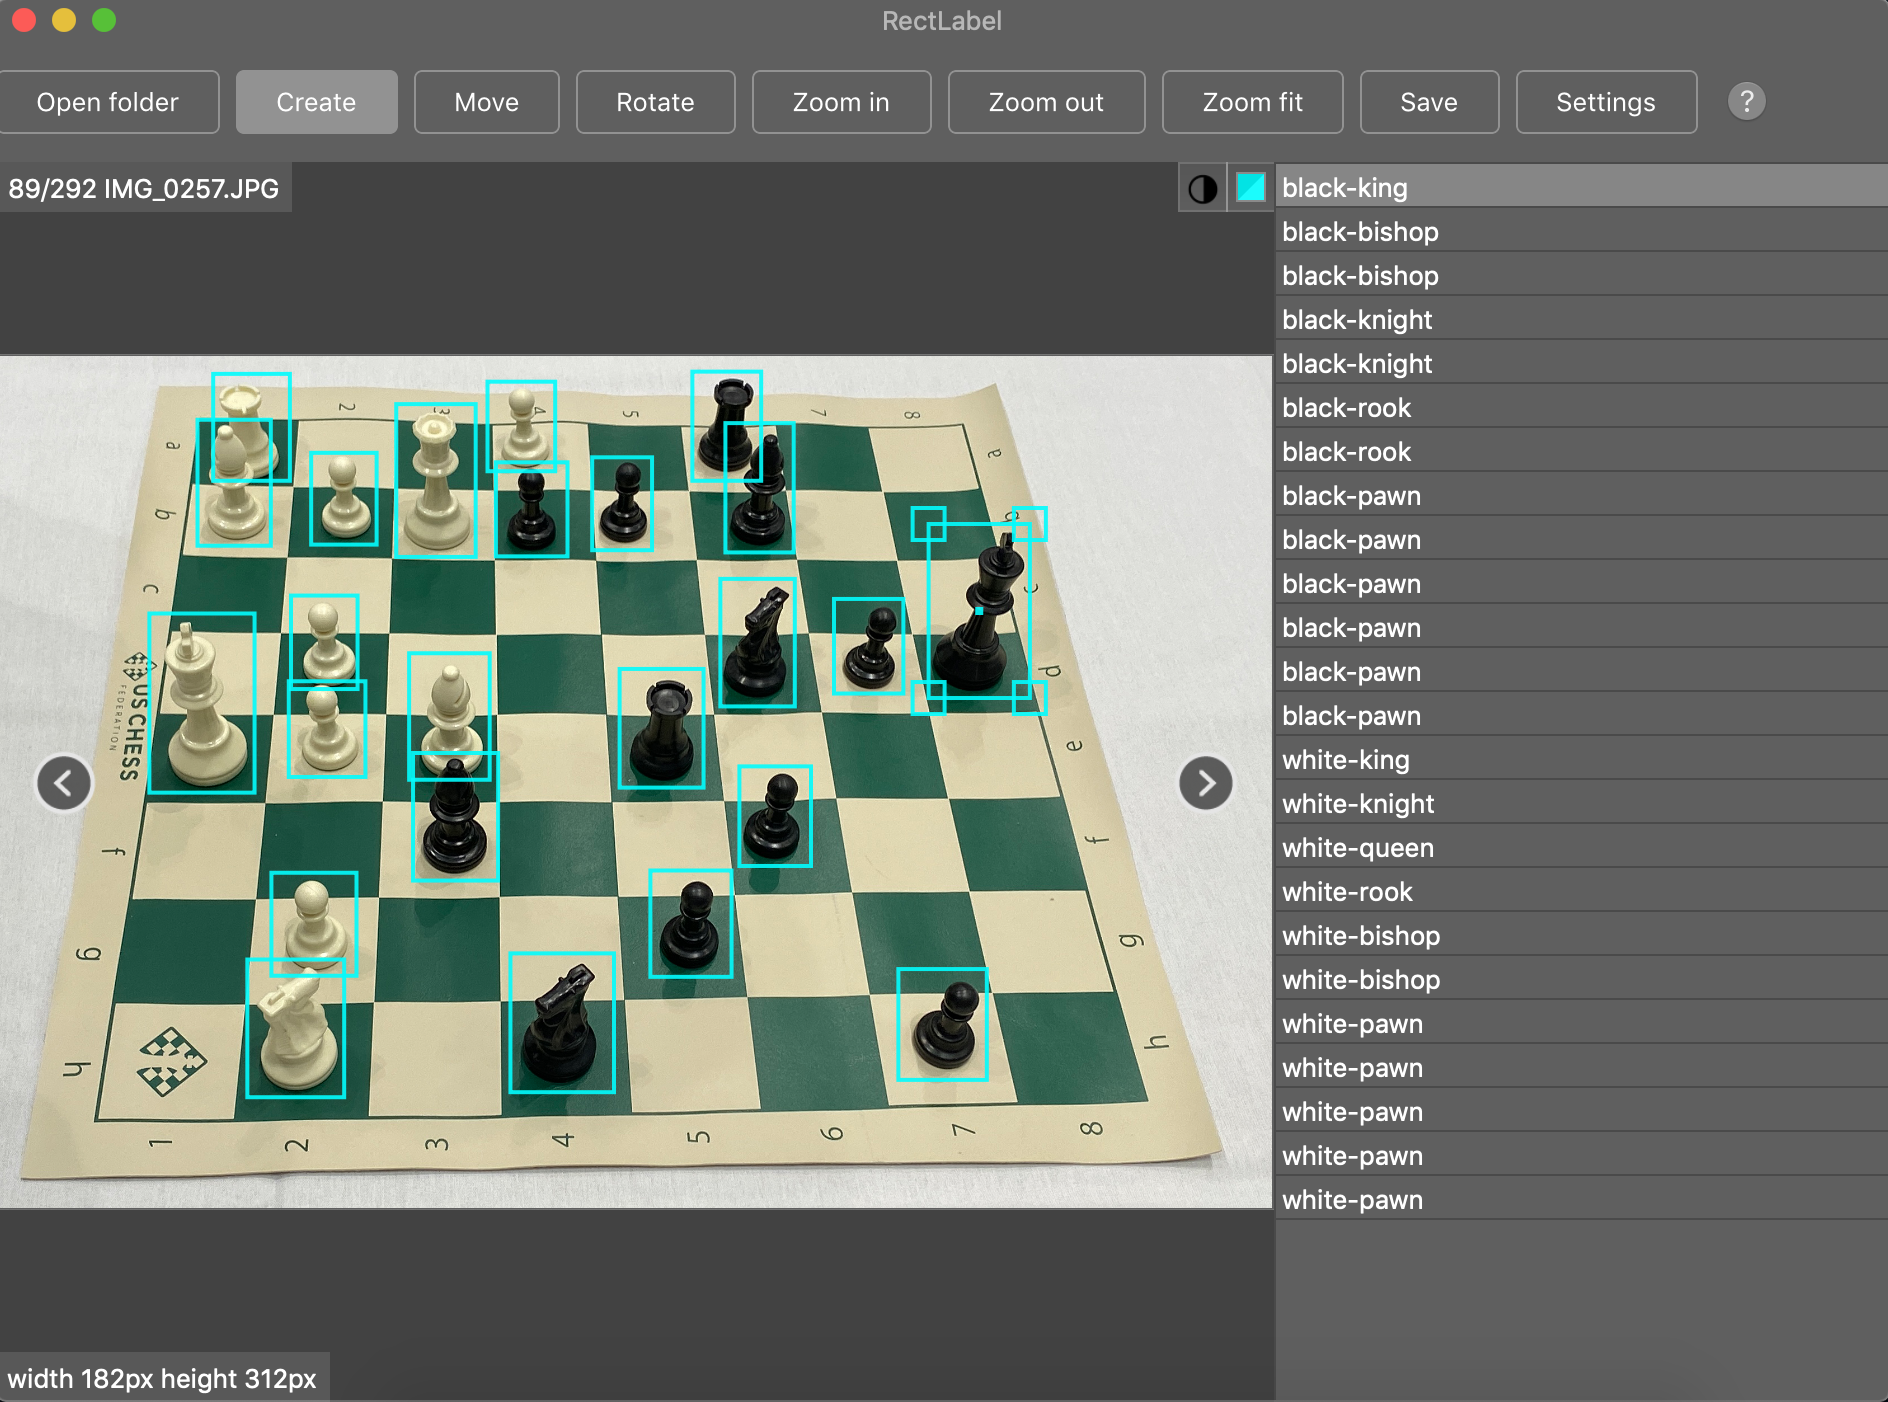
Ultimately, we collected 292 images. We labeled all the pieces in each of these images, totaling 2894 annotations. This chess dataset is publicly available on Roboflow Public Datasets.
For labelling, there are many high quality, free, and open source tools available like LabelImg as well as Roboflow Annotate.
For your non-chess problem, consider collecting images that are in-context of where your model will perform in production. This means ensuring you have a similar angles, lighting, quality, and objects in frame.
The more situations your training set takes into account that your model may encounter in production, the better its performance will be.
When labelling, it is best to draw bounding boxes that include the entirety of your objects, even if there’s a small amount of space between the object and the bounding box. Simply put, do not cut out any of the underlying object with your bounding boxes. If one piece blocks view (occludes) that of another, label as though you could see the full object (see the white-bishop and white-rook example above).
See our guide for labeling best practices for more in-depth suggestions.
If you’re seeking already annotated images, consider object detection datasets on sites like Roboflow Universe which hosts over 90,000 datasets of free, high quality labeled images.
Preparing your data to train YOLOv3
Going straight from data collection to model training leads to suboptimal results. There may be problems with the data. Even if there aren’t, applying image augmentation expands your dataset and reduces overfitting.
Preparing images for object detection includes, but is not limited to:
- Verifying your annotations are correct (e.g. none of the annotations are out of frame in the images)
- Ensuring the EXIF orientation of your images is correct (i.e. your images are stored on disk differently than how you view them in applications, see more)
- Resizing images and updating image annotations to match the newly sized images
- Various color corrections that may improve model performance like grayscale and contrast adjustments
- Formatting annotations to match the requirements of your model’s inputs (e.g. generating TFRecords for TensorFlow or a flat text file for some implementations of YOLO).
Similar to tabular data, cleaning and augmenting image data can improve your ultimate model’s performance more than architectural changes in your model.
Roboflow is purpose-built to seamlessly solve these challenges. In fact, Roboflow Annotate cuts the code you need to write roughly in half while giving you access to more preprocessing and augmentation options.
For our specific chess problem, our already preprocessed chess data is available on Roboflow.
We’ll be working with the Download version titled, “416x416-auto-orient”.
In the case of our tutorial, we’re using 416x416 images because (1) we want smaller images than the originally captured 2284 × 1529 dimensions for faster training and (2) for YOLOv3, multiples of 32 are most performant for its architecture.
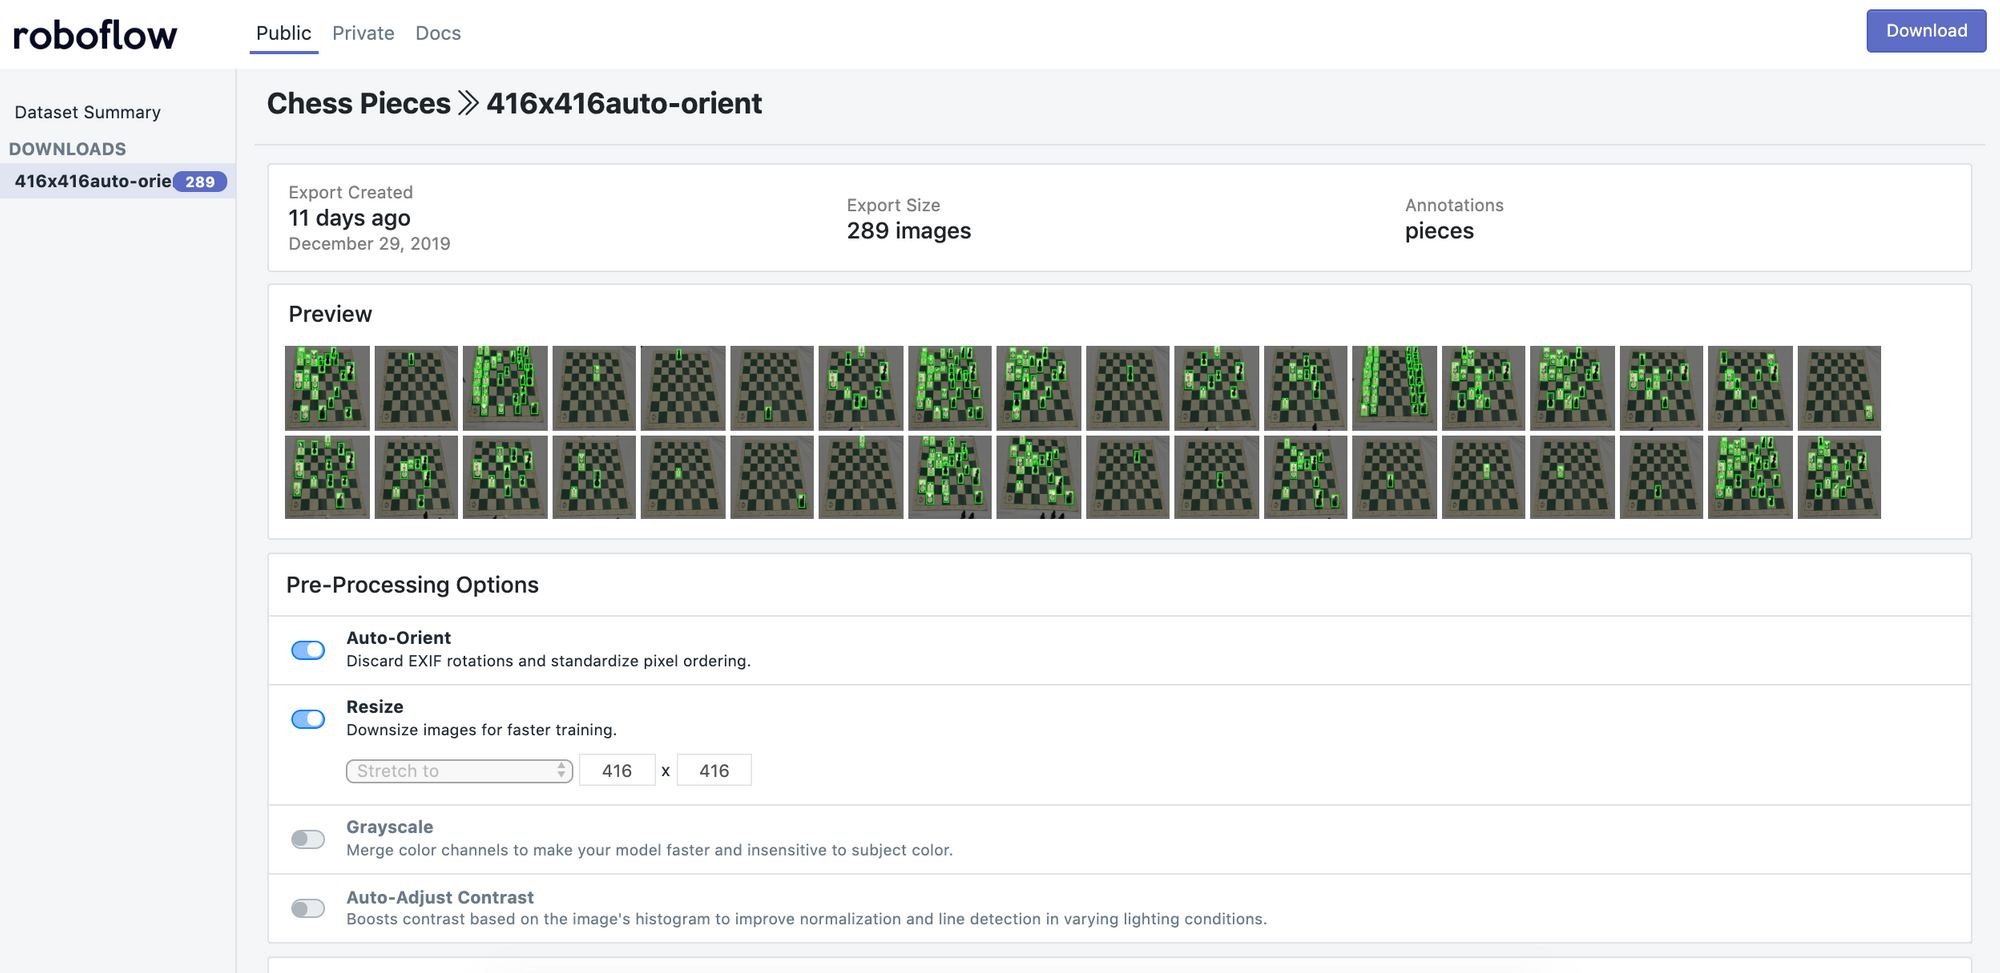
Our images also have had “auto-orient” applied to them, a Roboflow preprocessing step that strips the EXIF data of unintuitive orientations.
Auto-orient is important because images are sometimes stored on disk in different orientations than the applications we use to view them. If left uncorrected, this can cause silent failures in our models (see a discussion on HackerNews here). At Roboflow, we often default leave this option on.
To download this dataset, select “416x416-auto-orient”. Then, in the upper righthand corner, select “Download.” You’ll be prompted to create a free account, and redirected back to the chess public dataset page.
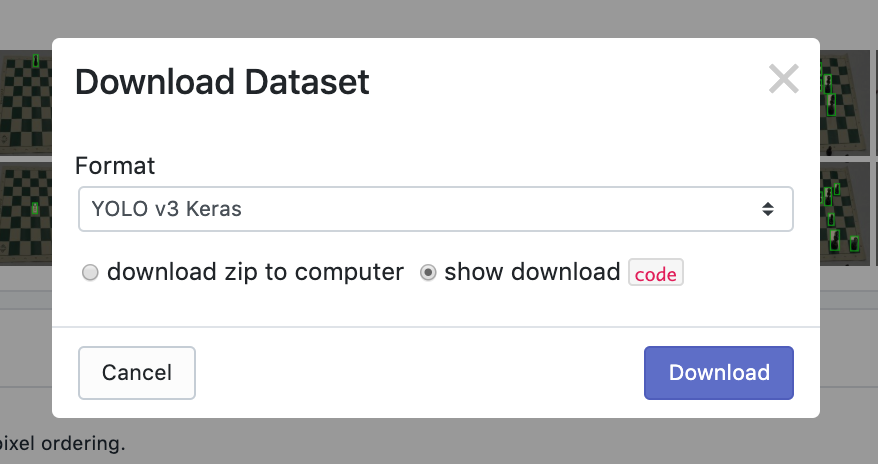
Now, Roboflow allows you to download your images and annotations in a variety of formats. You can also download them locally to your computer, or have Roboflow generate a code snippet you can use to download them directly to a Jupyter Notebook (including Colab) or Python script.
For our problem, we’ll be using a Keras YOLOv3 implementation that calls for a flat text file of annotations. We’ll also be making use of Google Colab for training, so select the “show download code” in the export options.
For your non-chess problem, you can create a free Roboflow account, upload images, preprocess, augment, and export them to any annotation format your model may require. To do so, follow our Quick Start.
Training your YOLOv3 model
The model architecture we’ll use is called YOLOv3, or You Only Look Once, by Joseph Redmon.
This specific model is a one-shot learner, meaning each image only passes through the network once to make a prediction, which allows the architecture to be very performant, viewing up to 60 frames per second in predicting against video feeds.
Fundamentally, YOLO is a convolutional neural network (CNN) that divides an image into subcomponents, and conducts convolutions on each of those subcomponents before pooling back to create a prediction. A recommended deeper dive on YOLO is available here.
Now, even though we’re training our model on a custom dataset, it is still advantageous to use another already trained model’s weights as a starting point. Think of this like we want to climb a mountain as quickly as possible, and instead of starting completely from scratch in creating our own trail, we’ll start with assuming that someone else’s trail is a better faster than us randomly trying to guess twists and turns to follow.
To power our model’s computation, we’ll be using Google Colab, which provides free GPU compute resources (up to 24 hours with your browser open).
In our notebook, we are predominantly doing six things:
- Selecting up our environment, model architecture, and pre-fit weights (someone else’s “trail”)
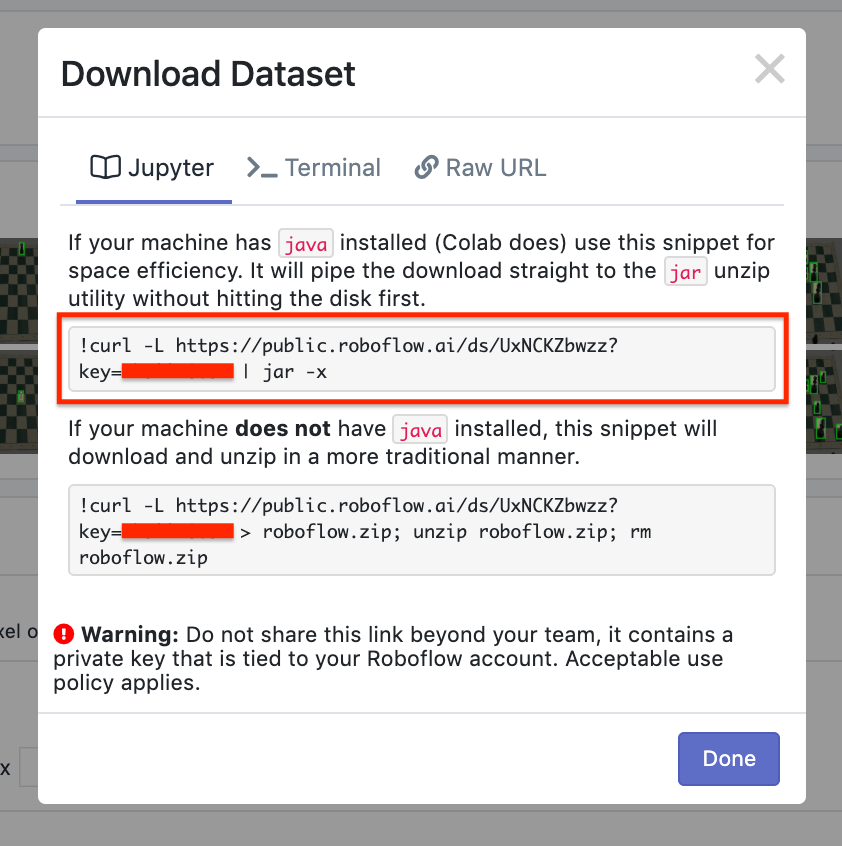
- Loading in our data via the Roboflow code snippet shared above
- Determining our model configuration, like how many epochs to train, training batch sizes, the size of our training vs test set, and our learning rate
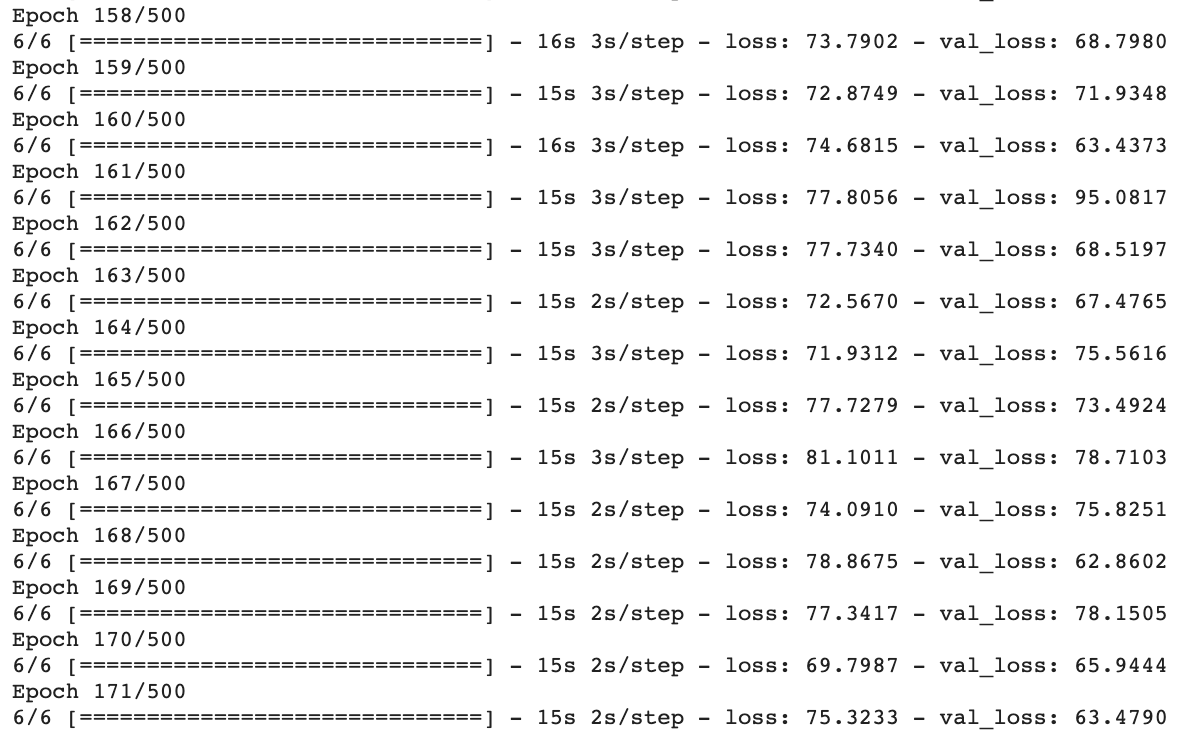
- Initiating training (...and waiting!)
- Using our trained model for inference (predictions!)
- (Optional bonus) Save our newly trained weights to our Google Drive so we can make predictions in the future without waiting for training to finish
Now, make a copy of this Colab Notebook, and continue our tutorial over there.
For your non-chess problem, to train this same architecture, you only need to change a single URL to train a YOLOv3 model on your custom dataset. That URL is the Roboflow download URL where we load the dataset into the notebook. Moreover, you can toy with the training parameters as well, like setting a lower learning rate or training for more/fewer epochs.
Inference with a trained YOLOv3 model
Once our model has finished training, we’ll use it to make predictions. Making predictions requires (1) setting up the YOLOv3 deep learning model architecture (2) using the custom weights we trained with that architecture.
In our notebook, this step takes place when we call the yolo_video.py script. This script accepts a path to either video files or images, custom weights, custom anchors (we did not train any in this example), custom classes, the number of GPUs to use, a flag describing if we’re predicting an image instead of a video, and an output path for the predicted video/image.
In our case, we’ll call the script with custom weights and custom class names. The script compiles a model, waits for an input to an image file, and provides the bounding box coordinates and class name for any objects it finds. The bounding box coordinates are provided in the format of bottom left-hand corner pixels (mix_x, min_y) and upper right-hand corner pixels (max_x, max_y).
As an important callout, the custom weights we’re loading in this example are actually not the YOLOv3 architecture’s best. We’ll be loading the “initial_weights” rather than the final trained weights. Due to Colab compute limitations, our model fails to train the final weights. This means our model is not as performant as it could be (as only the backbone architecture of YOLO have been adapted to our problem). On the bright side, it’s free compute!
Note that you can see the files available to your in your Colab notebook on the left (expand the panel if you have note already by locating the small right arrow below “+Code” and “+Text”). Inside the keras-yolo-3 folder, you can see all the image available to us.
I recommend trying out these images upon running your predict script to get a sense of our model’s performance:
- 00a7a49c47d51fd16a4cbb17e2d2cf86.jpg white-king works! + knight
- 015d0d7ff365f0b7492ff079c8c7d56c.jpg black-queen mixes up
- 176b28b5c417f39a9e5d37545fca5b4c.jpg finds only five
- 4673f994f60a2ea7afdddc1b752947c0.jpg white-rook (thinks king)
- 5ca7f0cb1c500554e65ad031190f8e9f.jpg white-pawn (missed white-king)
- fbf15139f38a46e02b5f4061c0c9b08f.jpg black-king success!
Turn back to the notebook you copied above, and let’s give this script a try.
For your non-chess problem, this step will be largely the same. Be sure to follow the arguments detailed in the notebook if you want to apply this model to a video feed or try different weights. If you’re training in a non-Colab environment that can handle producing the model’s final weights as well, be sure to provide the path to those weights rather than our initial_weights. You may consider creating a directory called predictions in the notebook or your Google Drive, and writing the results of the model’s predictions there.
Using a trained YOLOv3 model
You’ve trained an object detection model to a chess and/or a custom dataset.
Now, making use of this model in production begs the question of identifying what your production environment will be. For example, will you be running the model in a mobile app, via a remote server, or even on a Raspberry Pi? How you’ll use your model determines the best way to save and convert its format.
Consider these resources as next steps based on your problem: converting to TFLite (for Android and iPhone), converting to CoreML (for iPhone apps), converting for use on a remote server, or deploying to a Raspberry Pi.
Tell us how you’re using Roboflow or object detection, and we can create more tutorials for your use cases.