This post was contributed to the Roboflow blog by Warren Wiens, a marketing strategist with 20+ years experience in technology who is learning about AI in their spare time.
Are you ready to witness the incredible power of computer vision combined with the Raspberry Pi? Picture this: a tiny yet mighty device stationed by your window, capturing the slightest hint of a mischievous squirrel. Instantly, it springs to life, activating an alarm or any action you desire. Sounds intriguing, doesn't it?
In this article, we'll take a deep dive into the captivating realm of computer vision and show you how to leverage this technology with a Raspberry Pi. We'll guide you step by step, from setting up your Raspberry Pi to training and deploying a custom model using Roboflow, all the way to establishing a local inference server. And fear not, we've got you covered with all the Python code you'll need to bring this ingenious system to life.
By the end, you will have a fully functional squirrel sentry, capable of distinguishing between everyday outdoor movements and the distinctive darting motions of our bushy-tailed friends. Prepare to let your imagination soar as you explore the limitless possibilities of computer vision applications with the Raspberry Pi.
Grab your Raspberry Pi and get ready for an exhilarating adventure into the captivating world of squirrel recognition and relay activation. Brace yourself to witness the enchantment of machine learning unfolding right before your very eyes!
Part 1: Train and Deploy a Model on Roboflow
In order to proceed with the exploration of our squirrel detector, it is necessary to develop and train a computer vision model to activate it. A computer vision model can identify the objects it has been trained to find. For this guide, we will use a model that can identify squirrels.
I am not going to cover the details of creating and training a model, but Roboflow has a complete guide you can follow to train a computer vision model.
To promptly initiate your journey, I have a resource for you: a project on Roboflow that includes a preloaded dataset and a fully trained model. To access it, simply click on the link provided below:
https://universe.roboflow.com/warren-wiens-d0d4p/squirrel-detector-1.1
You can also train your own model to identify squirrels or anything else.
Part 2: Raspberry Pi Setup
For an optimal experience, I recommend starting this journey with a Raspberry Pi with a new SD card. This ensures a clean slate, free from any pesky configuration issues that might dampen our setup. So, grab yourself a shiny, fresh SD card and let's get this party started!
Assuming you're using a Raspberry Pi 4 for this project, it's important to note that its performance capabilities are a must-have for running the inference server. To begin, hop over to the official Raspberry Pi imager and follow the Raspberry Pi instructions to image your SD card with an operating system.
Select the 64-bit version (Debian Bullseye) as the operating system to use. Throughout this article, I'll be referring to my trusty Pi as Rocky. Feel free to come up with your own unique name for your device. Just remember, whenever I mention "Rocky," it applies to your Pi too. Here is my setup:
Hostname: Rocky
Username: rocky
Password: bullwinkle
Before you write the image, take a quick detour to the Settings and get things in order. You'll want to define the hostname, select a username and password, and if you need a wireless network connection, provide your Wi-Fi network credentials. Once you've got it all set up, write the fresh image onto the SD card, slide it into your Pi, and power it up.
Now that you have your Raspberry Pi all dressed up and ready to roll, it's time to dive into the mesmerizing world of computer vision and squirrel detection. Don't worry, I'll be right here with you, guiding you through this exciting journey!
You have multiple options to connect to your Pi. You can either directly connect it to a monitor or connect to it remotely using a tool like Putty. This is actually one of the best things about using the imager.
Set up your WiFi and define a hostname, and you'll be able to connect remotely in no time. When using Putty, the hostname will be "rocky@Rocky.local". The username comes before the "@" symbol, so it'll be automatically filled in when you login. Now we are connected, let’s make sure the Pi has the latest updates:
sudo apt-get update
sudo apt-get upgrade -y
Next, reboot your Raspberry Pi. This is usually necessary after running the `apt-get upgrade` command. After your Pi has rebooted, we need to configure the Pi through raspi-config:
- First, run
sudo raspi-config. - Under Display Options, set the VNC Resolution if you plan to connect via VNC.
- Under Interface Options, enable SSH.
- Under Interface Options, enable VNC.
While you're here, feel free to make any tweaks you'd like. The information above covers the basics you'll need to get this project up and running. Just a heads up, you'll need to reboot after you're done.
When you use Roboflow to get model predictions, there are two approaches you can take. The first one involves using their servers to analyze your images. It's the simplest option, but if you're working with live video, you'll want a local alternative. Thankfully, Roboflow has got you covered. Roboflow offers a local inference server that can analyze your images. Best part? They even have a version that'll run on a Raspberry Pi, which is exactly what we'll be using here.
Roboflow has a handy Docker container that runs an inference server through which we can run and retrieve predictions from our model. Thanks to their hard work, installing and running the inference server locally is a breeze. So, our next move is to install Docker. Use the following command to download and install Docker:
sudo curl -sSL https://get.docker.com | shNow, before we dive in and run the Docker container, let’s get the Roboflow API library installed:
pip install roboflowIt is possible that you will get a path warning at this point. If you do, here is how to resolve this:
nano .bashrcGo to the very bottom of the file and add:
export PATH=$PATH:/home/rocky/.local/bin(Where rocky is your username)
Save the file, exit, and reboot your Raspberry Pi.
And now it’s time to download and run the inference server. We can do this in one command:
sudo docker pull roboflow/roboflow-inference-server-arm-cpuDownloading and installing will take a few moments depending on the strength of your internet connection. Once the installation process is done, you'll receive a message notifying you that the server is up and ready to handle requests. Voila! You now have a fully functioning Roboflow inference server running smoothly on your Raspberry Pi! Now, let's dive in and write some code to put it to the test!
Part 3: Setting up Visual Studio Code
I am a big fan of using Visual Studio Code for development and I would definitely recommend it to you as well. Of course, feel free to use any editor you prefer, but just keep in mind that it might be a bit challenging to follow along with some of the steps if you're not using VS Code. Especially when it comes to connecting to the PI with SSH to directly edit files on the Pi.
If you don't have VS Code installed yet, now would be a great time to give it a go. I do my development on a PC, so any keyboard shortcuts you see are for Windows. Mac and Linux users may have different ones.
There are many useful extensions available for VS Code, but for our purposes, we only need one: Remote SSH. To install it, simply open the Extensions window (Ctrl-Shift-X) and search for Remote SSH. Once you find it, go ahead and install it.

Now let’s get connected to our Pi. At the very bottom left of VS Code, there is a button with two angle brackets.
Click that button to get started. Then follow these steps:
- Click Connect to Host…
- Choose "+ Add New SSH Host…".
- Type in rocky@Rocky.local (replace this with the hostname of your Pi that you set at the beginning of the guide).

It is important to specify the username here (`rocky` in my case). I have found usernames can get truncated if you don't provide them up front.
- It will ask what SSH configuration file to save to. Choose the default.
- The remote connection has been created. Click Connect.
- It will ask you for the platform. Choose Linux.
- You will be asked to verify that you want to continue.
- And then it will request the password. This is your Pi password.
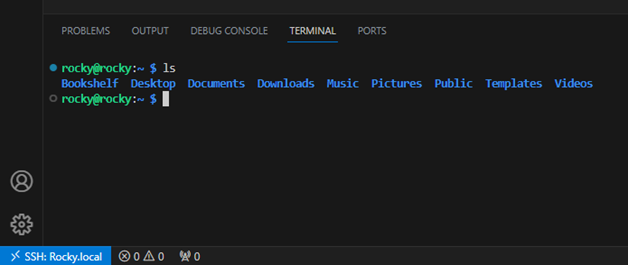
You should now be connected to the Pi from within Visual Studio Code. Test this by opening a new terminal (Ctrl-Shift-`). You should be at a Linux prompt on your Pi.
Part 4: Preparing to Run Inference
It's time to jump into coding! Let's kick things off by testing the plumbing. We'll start by writing a simple program that sends an image to our inference server. Open up Visual Studio code and create a new folder called Project. Within the Project folder, create a new file called check.py. Add the following code to the file:
from roboflow import Roboflow

rf = Roboflow(api_key="YOUR_API_KEY")
project = rf.workspace().project("YOUR_PROJECT")
model = project.version(1, local="http://127.0.0.1:9001/").model
prediction = model.predict("image.jpg")

print(prediction.json())
Alright, let's take a closer look at this code together. First, we'll import the Roboflow library and provide it with our API key. Next, you'll need to specify your project and the project version. You can easily find all of this information on your project page on Roboflow. From your project page, select the Deploy option and look for the “How to deploy…” section. It will show you what your project information is and how it should be used in the code.

One last step before we test it out. We will need an image to send to the server to test it. Grab any image you want. If you are using my Squirrel project, a photo of a squirrel would be ideal.
python3 check.py
We will set up the Roboflow API and then send a request to the inference server. Remember, the server should still be running on your Pi from the previous step.
The first time we use the inference server, it will fetch the model from your Roboflow project. If everything works smoothly, you'll receive a JSON object containing the prediction results. If you check the original terminal window where you have the inference server running, you will see the status updates listed there.
You may get some library errors when you run this. It should still work fine, but if you want to fix them you can run the following command to get the proper libraries updated:
pip install requests -UCongratulations! You have completed the setup and now have a fully functional Raspberry Pi that can serve as a local inference server. This setup is versatile and allows you to connect to any of your Roboflow projects and send requests through the local inference server. If this is all you were looking for in this tutorial, we appreciate you stopping by!
If you are curious about how I further enhanced the code to monitor live video and take action on a detected object, keep reading!
Part 5: Detect Squirrels from a Live Video Feed
Let's now focus on detecting squirrels through video analysis and taking the necessary steps (rest assured, no harm will come to the squirrels!). Additionally, it would be fascinating to have the capability to share the video footage with others.
This can be achieved by implementing a web server using Python and Flask, a tool you can use to build web applications in Python. This will enable us to effortlessly establish a live video feed on a basic web page. Let's proceed by reopening Visual Studio Code and connecting to our Pi.
Back in the Project directory, let's get some things setup for a simple web server. First, in the Project the Project folder, create a templates folder. In the templates folder, create an index.html file and add the following code. This is a very simple web page with no formatting as a starting point.
<!DOCTYPE html>
<html lang="en">
    <head>
        <meta charset="UTF-8">
        <meta name="viewport" content="width=device-width, initial-scale=1.0">
        <title>Squirrel Detector</title>
    </head>
    <body>
        <div class="container">
            <div class="page-title">Squirrel Detector</div>
            <div class="image-container">
            	<img class="camera" src="{{ url_for('video_feed') }}">
            </div>
        </div>
    </body>
</html>
We will need a couple of libraries before writing the Python code. Open up a terminal window (Ctrl-Shift-`), navigate to the Project directory, and install the OpenCV and Flask libraries:
pip install opencv-python flaskTo get started, let's create a new file called app.py in the Project folder. This is going to be the main Python script, where all the action happens. Don't worry, I've got you covered with detailed comments in the code, so you'll be able to understand how everything works. So, without further delay, let's dive in!
There is a lot happening in our app code in the GitHub Gist, so let's walk through the main parts of our code step-by-step.
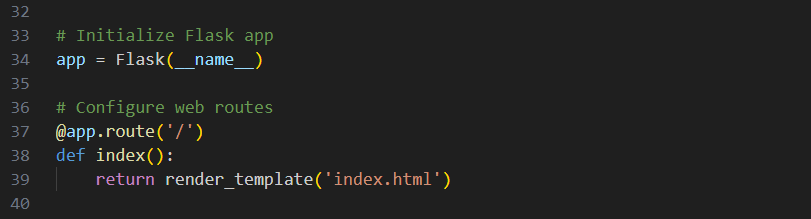
First, we import our libraries and set up our Roboflow API. Then, we set up the Flask web server. I won't go into all the details of Flask, but essentially, we're creating a web server and defining what to do when a browser requests the home page. In this case, our home page can be referenced as “/” or as “/index.html”.
Now, we define a function called get_video_feed. This function will take care of all the challenging stuff for us. In the beginning, we'll set up our camera video stream. Then, we will enter a While loop where we'll start by reading a video frame.

Here comes the interesting part. It wouldn't be very efficient to keep sending frames to our inference server all the time. Instead, we'll make the code smart enough to only send images to the server when it detects motion. That way, we'll save some time and resources.
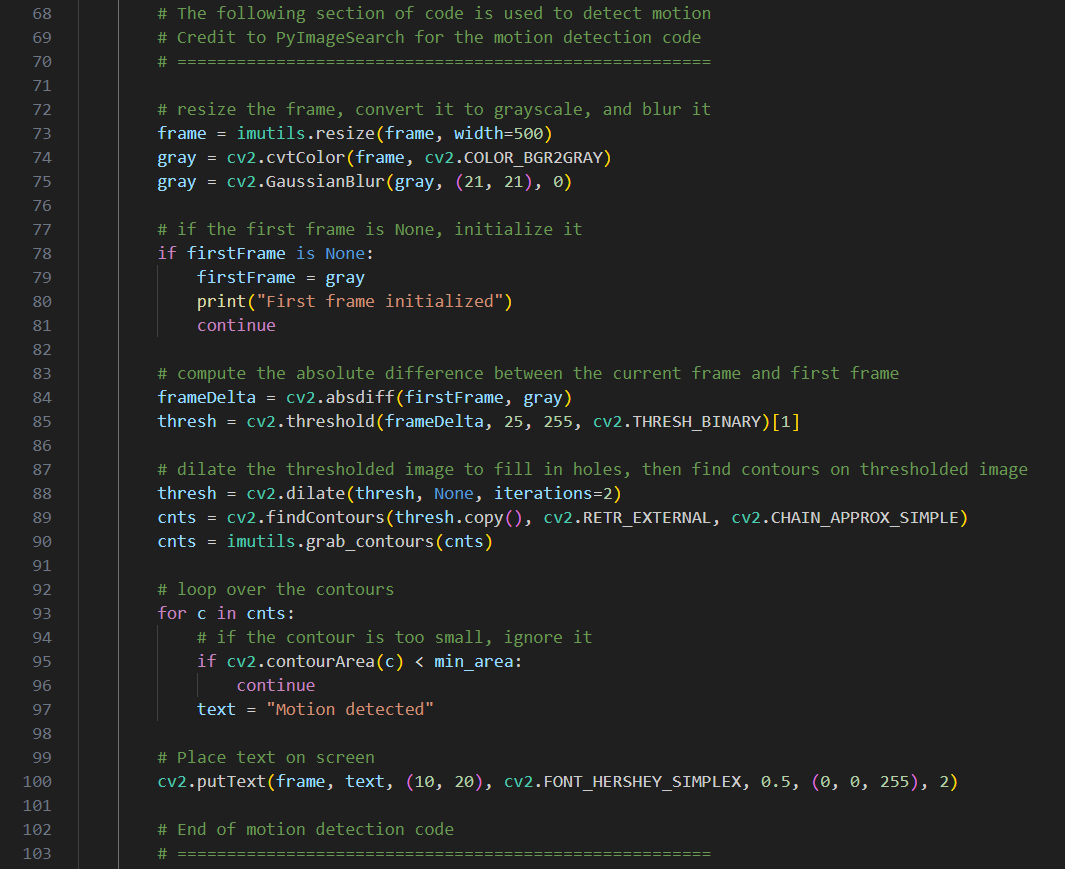
A significant portion of the code in this function is dedicated to motion detection. I won't go into the details here since there are plenty of resources available that delve specifically into motion detection. It's important to note that the motion detection approach used here is quite basic. You may want to implement a more accurate solution.
When we reach line 112, if motion is detected, we make a request to the inference server. If you want more details on motion detection, most of the code I used is from PyImageSearch. They have a ton of great resources on OpenCV and machine learning.
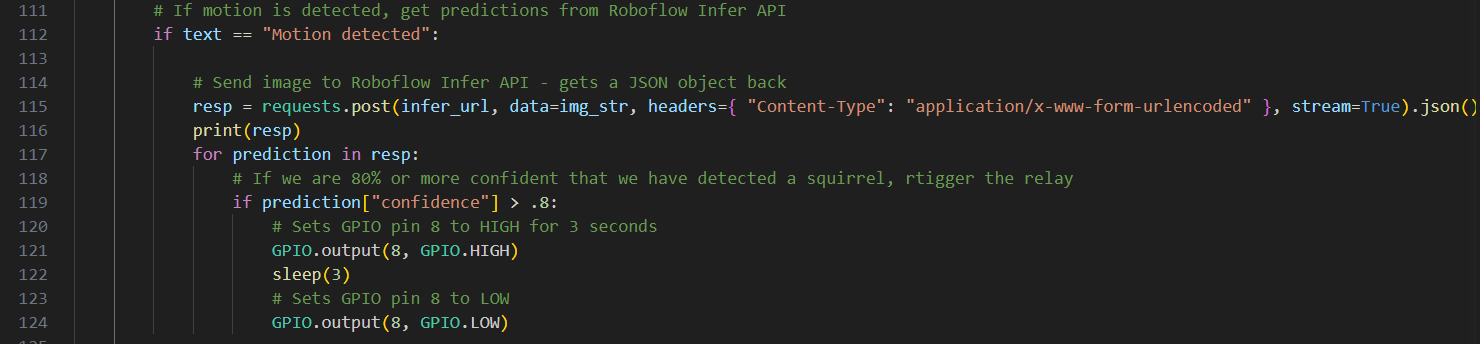
The server call will return a JSON object containing the prediction results. I have set a threshold of 80% confidence to determine if a squirrel has been observed. You can experiment with this value, as it may require adjustment based on your specific environment.
If the threshold is reached, we can confidently say that we have detected a squirrel and take action by activating a relay. The Raspberry Pi comes equipped with a fantastic library for utilizing the GPIO pins.
In this particular project, I have connected a small relay to GPIO pin 8. To activate the relay, we simply set the GPIO pin to a high state for a few seconds and then bring it back to a low state to turn off the relay. If you want more details on using relays with a Raspberry Pi, check out this Instructable: 5V Relay (Raspberry Pi) : 4 Steps (with Pictures) - Instructables.
And the last step in our code is to return the image to the web page so it can be displayed to the user. I should point out that even with a local inference server this puts a lot of load on the Pi. You will find that live video slows down then images are being sent to the inference server. But it is working and you are getting predictions that can be processed in real-time.

The Raspberry PI is an amazing little device, and this article shows just how competent it is at performing even challenging tasks. And a huge shout out to Roboflow for giving us such amazing tools that let us easily deploy computer vision tools.