What if I told you that you could train a segmentation model with only two labeled images? With SegGPT and Autodistill, this is possible.
SegGPT is designed to draw segmentation masks “in context”: by looking at the labels of a few “context” images, SegGPT can predict the labels of unseen images. autodistill_seggpt is a package that provides a wrapper for the SegGPT transformer model. We will be using this package to label images for a package detection segmentation model.
In this guide, we will create a Roboflow dataset, download a few labeled images from it, provide them to Autodistill SegGPT, and use SegGPT to label the rest of the images in the project. Finally, we will use our new dataset to train a deployable package detector.
Step #1: Create a Dataset
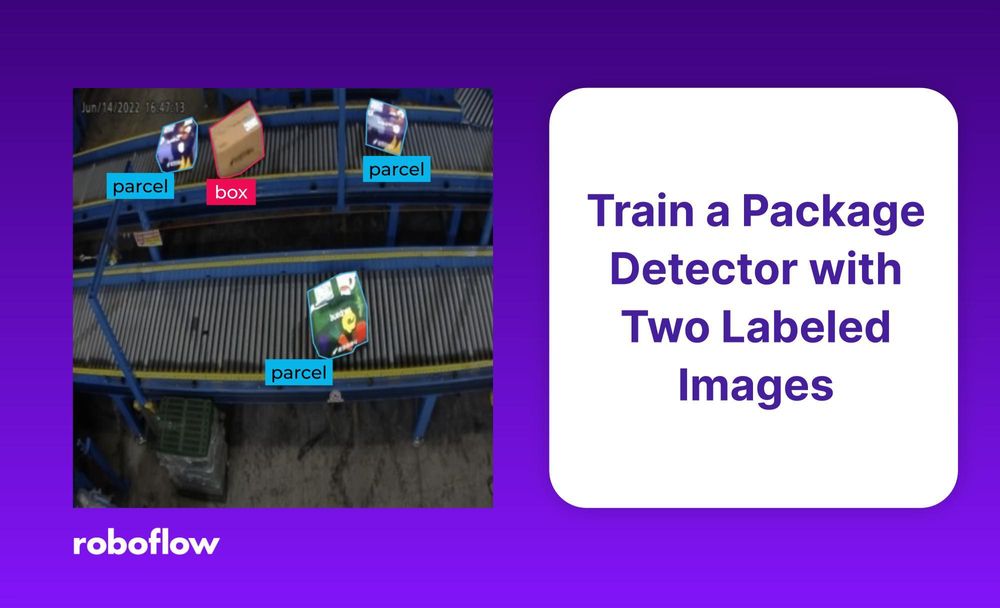
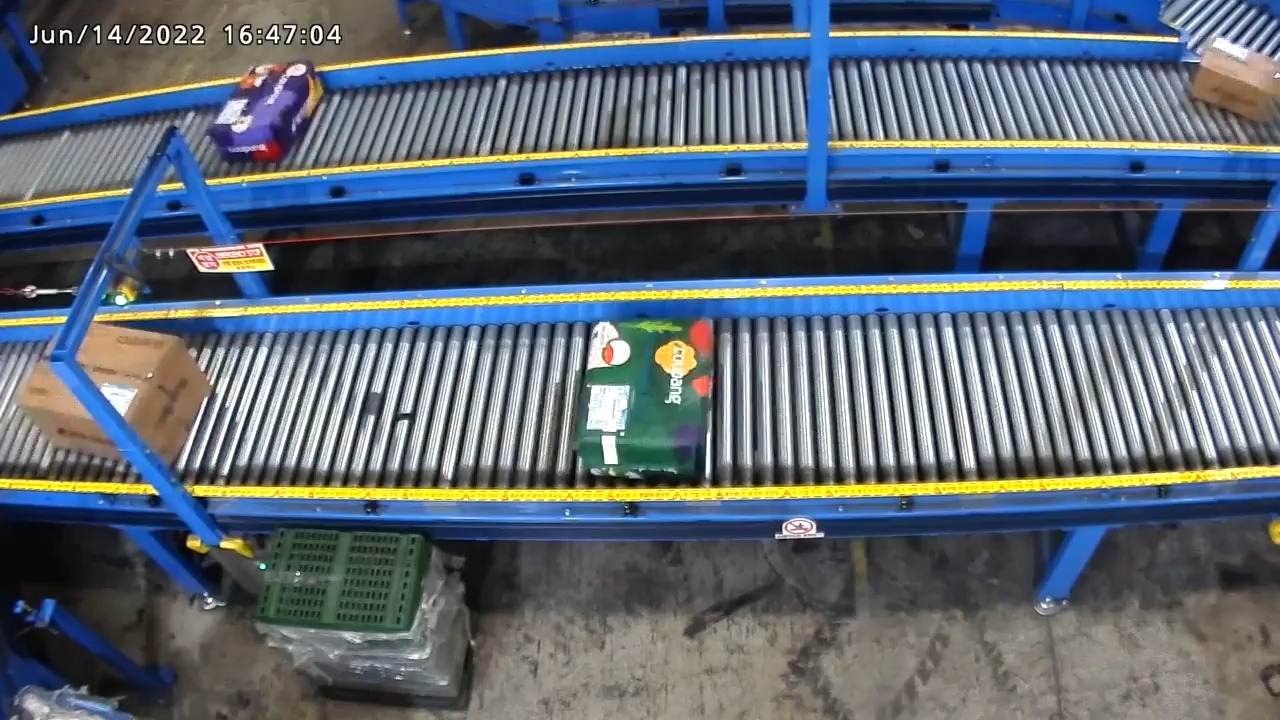
We begin with a box-and-parcel dataset of 225 images. This dataset contains pictures of boxes and parcels moving down a conveyor belt.
This dataset might be useful for mail distribution logistics – where a computer vision model could count packages to ensure none are dropped, or route boxes and parcels to different belts.
We will start by uploading our images to Roboflow. Then we will label images with one or two masks. To do so:
- Create a project on Roboflow. Select "Instance Segmentation".
- Upload many images (we recommend more than 30).
- The
autodistill_seggptpackage learns to label images from examples - so we need to provide it with a partially-labeled dataset on Roboflow.
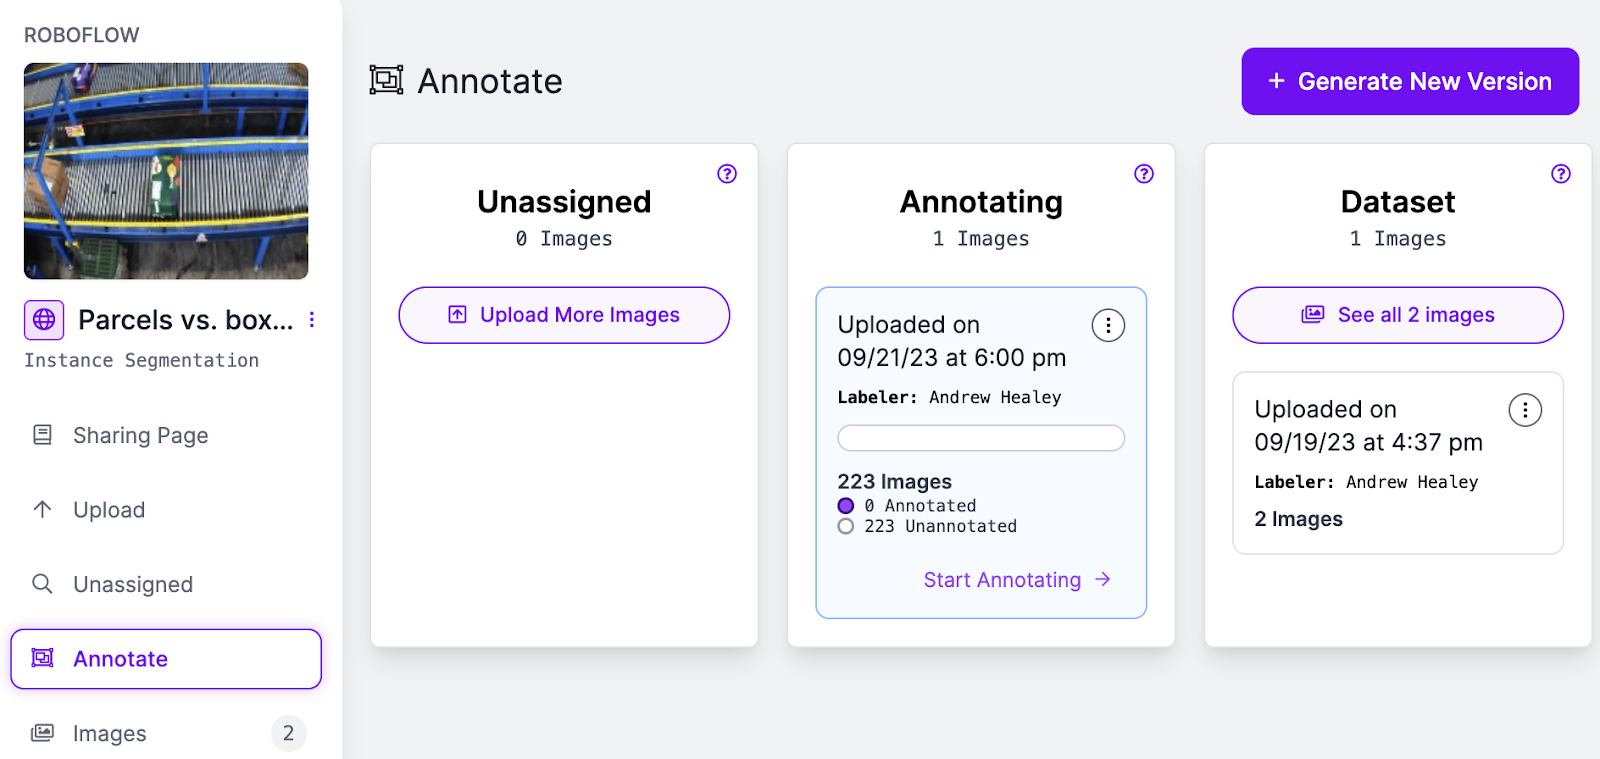
Label one or two images, and add them to your dataset. After following these steps, our dataset looks like so:
Step #2: Download Labeled Images from Roboflow
Roboflow has an export and search feature for use in building vision projects. We are going to export data for use with Autodistill. Later, we can upload our images back to Roboflow to train a model, or we can train a model and upload the model weights to Roboflow for deployment (available for select supported models).
To download our labeled images, we can export a new dataset version with the roboflow-python package:
import roboflow
rf = roboflow.Roboflow()

project = rf.workspace(workspace_id).project(project_id)

# download a new version
version_num = project.generate_version()
version = project.version(version_num)
version.export("coco-segmentation")
version.download(model_format="coco-segmentation", location=output_dir)
To download our unlabelled images, we will use the API behind Roboflow Search.
By default the notebook loads 500 unlabelled images by performing a search in a loop (loading the maximum of 250 at a time):
At the end of this process, we now have a directory labelled/ with our labeled images and a directory unlabelled/ with our unlabeled images.
Step #3: View your Labeled Images
We can use the viz_dataset function in autodistill_seggpt to visualize our images. Add the following code to the file in which you are working:
from autodistill_seggpt.dataset_utils import viz_dataset

viz_dataset(dataset)
Here are the two images I labeled:

Step #4: Create a SegGPT base model in Autodistill
A "base model" is a pre-trained computer vision model that can label your data for you. SegGPT is one such base model. Others include Grounding DINO and Segment Anything.
Each base model uses an "ontology", which is a description of what classes are in your dataset and which objects should be labeled.
Because SegGPT learns from a few data labels to improve its ability to make predictions, your labeled dataset is the ontology. We call this a "few shot ontology".
from autodistill_seggpt import SegGPT, FewShotOntology

base_model = SegGPT(
	ontology=FewShotOntology(sv_dataset)
)
Step #5: Test SegGPT on a Few Images
Now that we have a base model and some images to label, let's see what labels it makes!
Here, we take a small subset of our unlabelled images, and show how well autodistill_seggpt labels them.
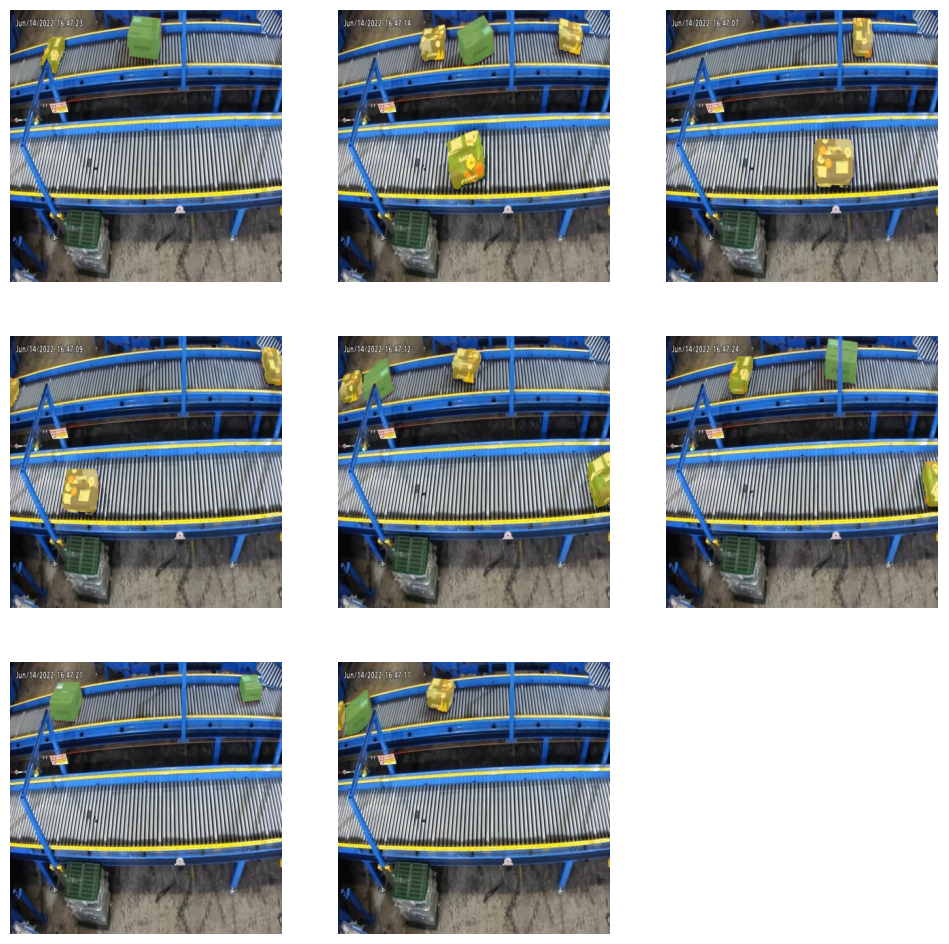
SegGPT was able to successfully label different packages on the conveyor belt in our images. It marks the parcels as yellow and the boxes as green. Let us continue on, and make autodistill_seggpt label our whole dataset!
(Optional) Improve SegGPT’s Accuracy
If autodistill_seggpt's labels are inaccurate on your project, consider labeling 2 or 3 more images and re-running the notebook.
SegGPT learns from examples, so if it is performing poorly for one class or in one environment (e.g. parcels in the top-left corner of the screen), you should label another image with a parcel in the top-left corner of the screen.
You can repeat this process–labeling more data, loading it into autodistill_seggpt, visualizing its results–until you are happy with the results.
Step #7: Upload your Dataset
Since Autodistill has done such a good job, we will use the Roboflow API to upload our newly labeled images to our dataset.
Here, we will use the roboflow-python package again, plus some code to upload multiple images in parallel:
import glob
import concurrent.futures
from tqdm import tqdm
import sys

def upload_file(img_file: str):
  project.upload(
    image_path=img_file, annotation_path=label_file, split=get_random_split()
  )

num_workers=10

def parallel_upload(file_list):
  with concurrent.futures.ThreadPoolExecutor(
    max_workers=num_workers
  ) as executor:
    list(
      tqdm(
        executor.map(upload_file, file_list),
        total=len(file_list),
        file=sys.stdout,
      )
    )
Step #8: Train a Model
Now that your dataset is complete, you are ready to train a computer vision model!
It is easy to train a model with Roboflow Train:
final_version_num = project.generate_version()
project.version(final_version_num).train(plot_in_notebook=True)
You can watch your model train in the notebook, or in the Roboflow dashboard itself. To watch your model train in Roboflow, visit your project page, then go to the Versions page.
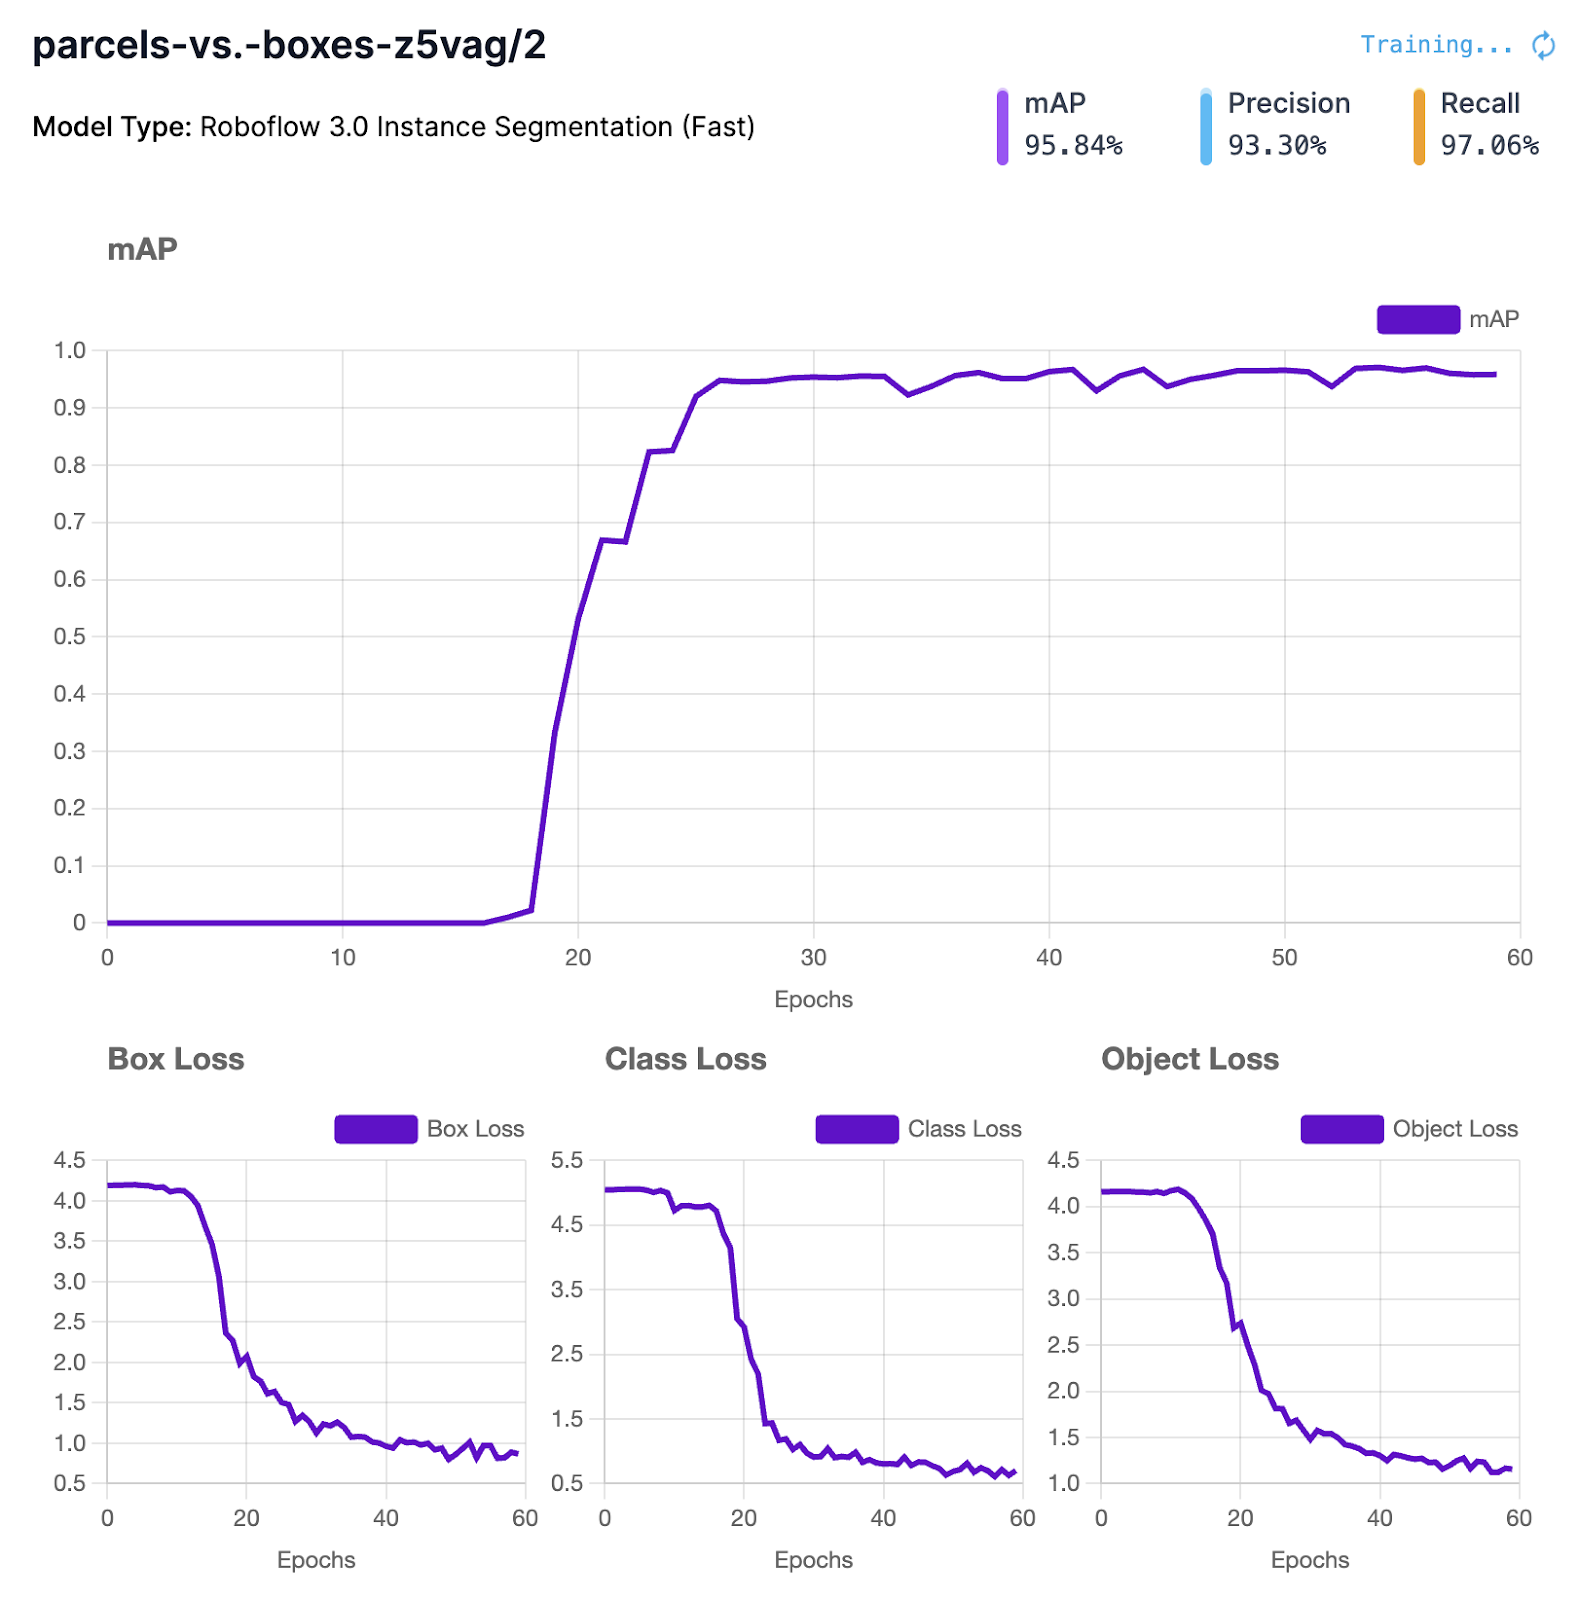
Our model reaches a 95% mAP. Below are the training graphs associated with our trained model.
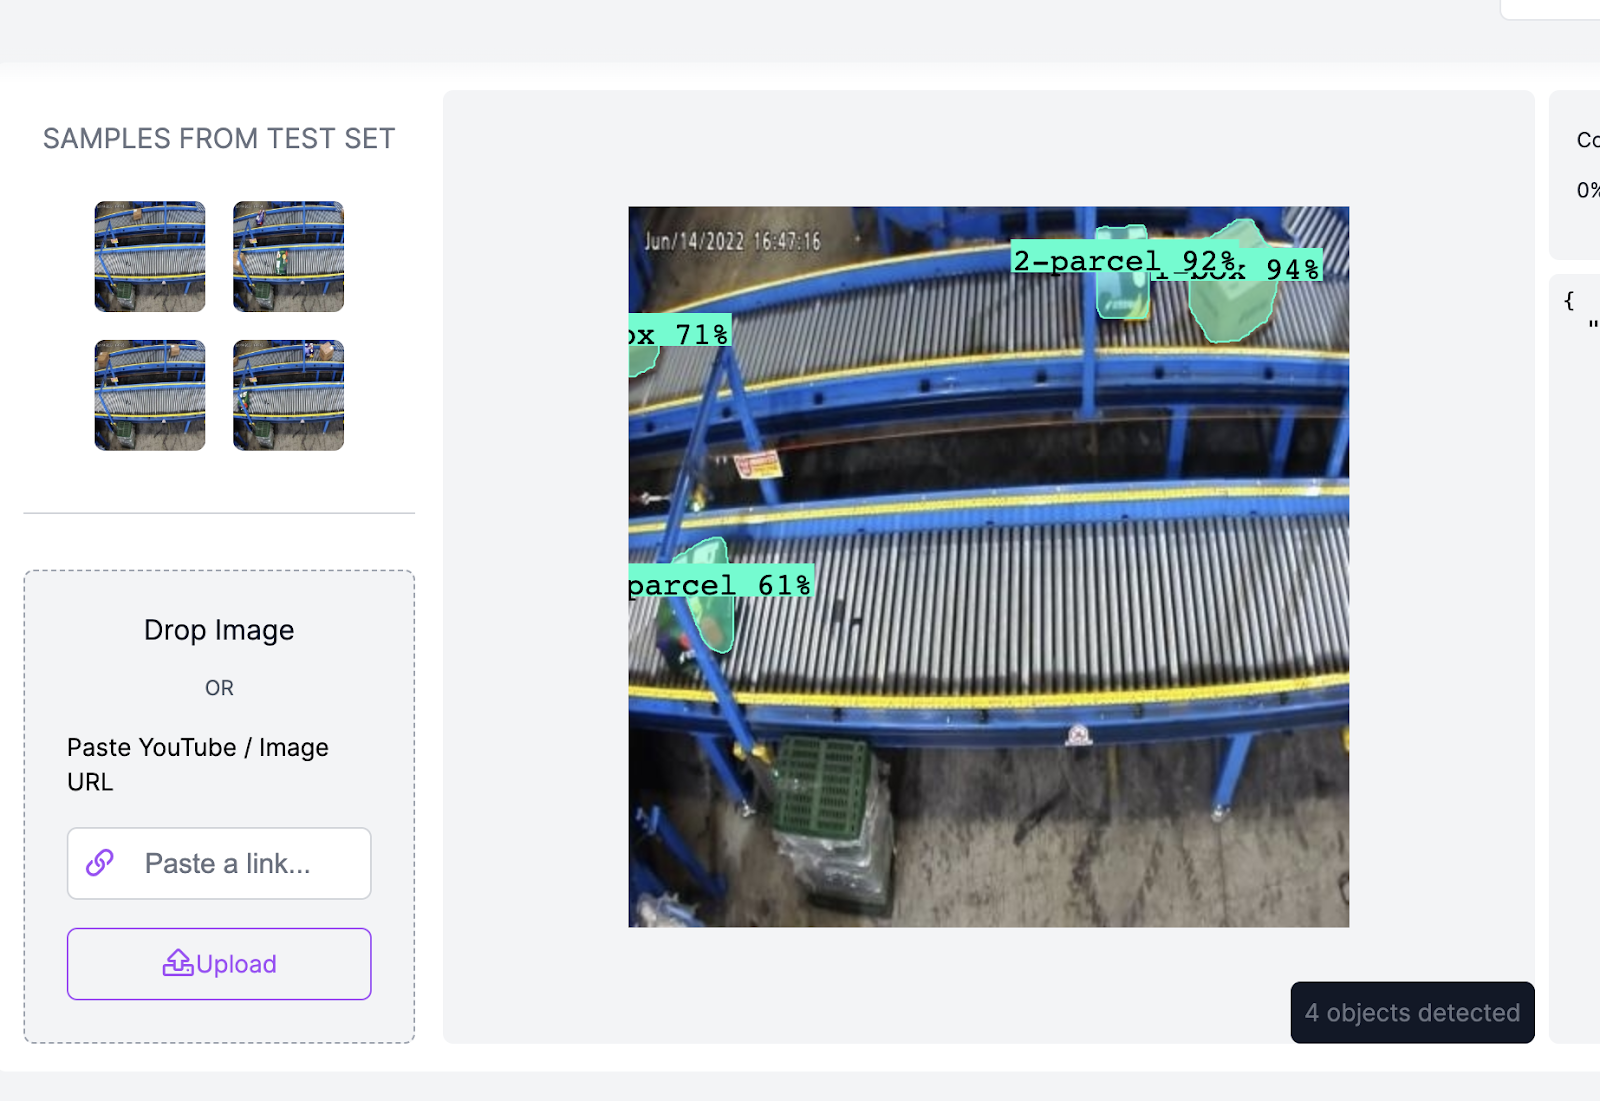
Once your model is done training, you can test it in Roboflow. Visit your project page > Deploy, and test a few images!
Below, we show how our trained model performs in the Deploy tab, which offers a range of deployment options for use in computer vision projects.
Conclusion
Your dataset is labeled and your computer vision model is trained! If you are happy with your trained model, you can deploy your model to production. If your model needs improvement, we recommend that you look through your labeled data with Roboflow Annotate to find objects that Autodistill missed.
Happy deploying!