
Introduction
Machine learning models are like well-trained chefs: the quality of the output significantly depends on the quality of the ingredients. In our case, the primary ingredient is data. However, what if the data is scarce? This is where data augmentation, especially using realistic data generators, can play a crucial role in improving the performance of your model.
In this blog post, we will dive deep into Kopikat.co, a tool for generative data augmentation. OpenCV.ai created Kopikat to improve the quality for real-life-sized datasets. Typically people use 5,000 images or less in production - compared to large research datasets that are an order of magnitude bigger. This post will show you how Kopikat enhances the results on a small dataset without requiring any changes to the model architecture.
Custom Object Detection Data
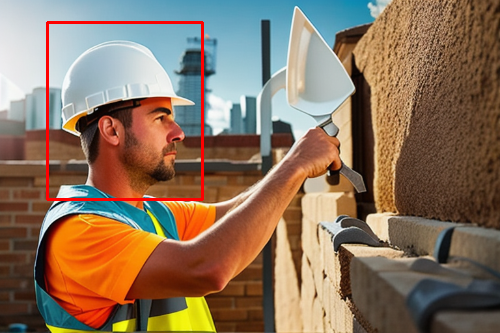
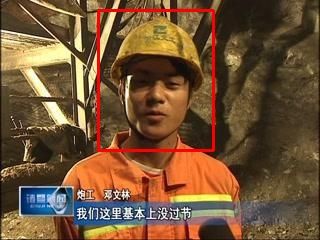
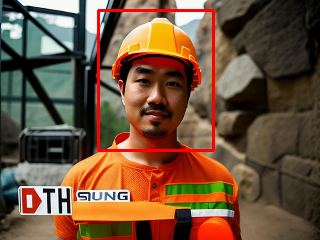
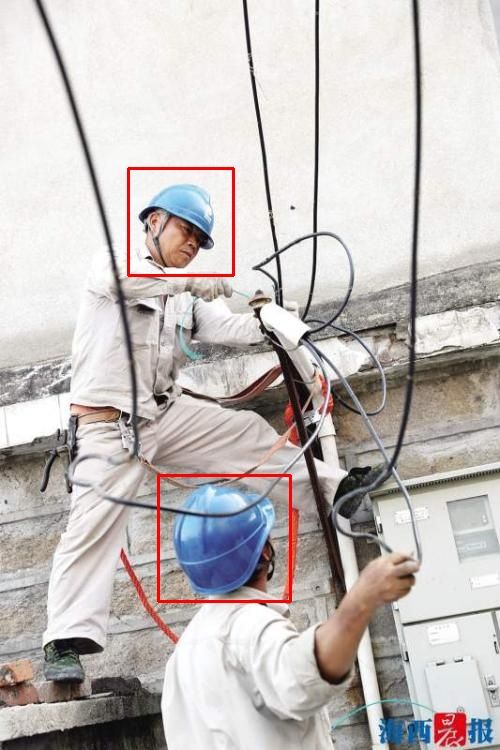
We’ll proceed with the custom Hard Hat Workers dataset from Roboflow Universe. This is an ideal example of the data available for engineers in daily practice. It represents an essential real-life task but is limited in size (only ~5,000 images in the training subset), which is a common situation.
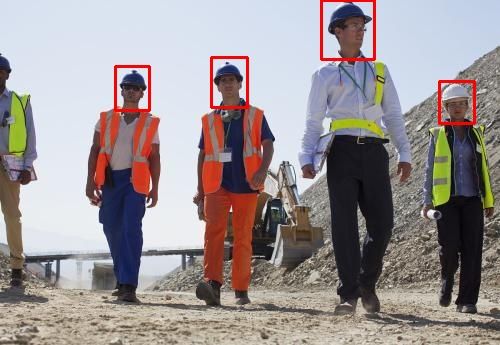
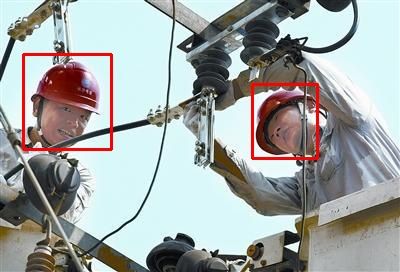
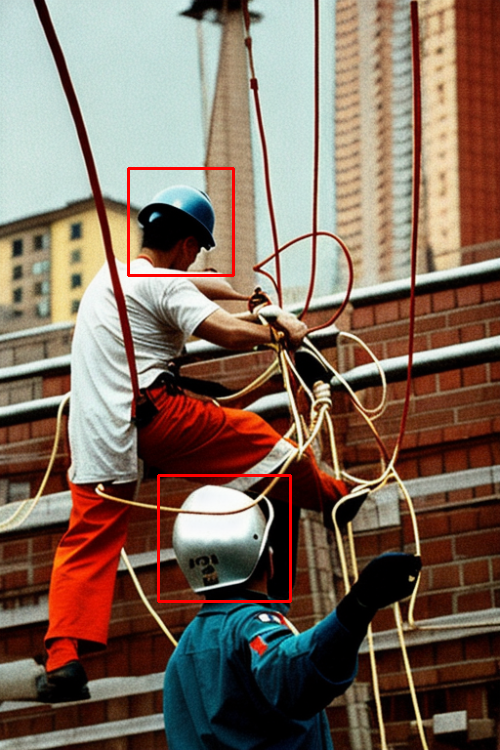
We used the v5 version of the data with the "person" class excluded. Here are some example images from the dataset. The red bounding boxes correspond to the "helmet" class, while the blue ones refer to "head".


Ultralytics YOLOv8 Training
Step 1. Dependencies
First, install the Ultralytics YOLOv8 package and all necessary dependencies:
!pip3 install ultralytics==8.0.20
Step 2. Download Data
We’ll use the dataset with annotations in COCO format. You can either download it manually or use the snippet below to use the Roboflow API:
!pip install roboflow

from roboflow import Roboflow
rf = Roboflow(api_key="YOUR_API_KEY")
project = rf.workspace("opencvai").project("hard-hat-sample-with-kopikat")
dataset = project.version(1).download("yolov8")
Step 3. Train YOLOv8
In our experiments, we’ve used YOLOv8-nano, which is the most lightweight variant of YOLOv8-family. To run training, first of all, we need to prepare a dataset config:
Training is extremely easy to start:
from ultralytics import YOLO

# Load a model
model = YOLO('yolov8n.yaml')  # build a new model from YAML
# model = YOLO('yolov8n.pth') # to initialize from weights pretrained on COCO

# Train the model
model.train(data='./Hard-Hat-Sample-With-Kopikat-1/data.yaml', # './Hard-Hat-Sample-With-Kopikat-2/data.yaml'
            batch=128,
            device=0,
            project="roboflow",
            name="baseline", # kopikat
            verbose=True,
            imgsz=416)
We trained the model from scratch.
Step 4. Evaluation
To evaluate the model, launch:
from ultralytics import YOLO

model = YOLO('path/to/best.pt')  # load the last checkpoint

# Validate the model
metrics = model.val()  # no arguments needed, dataset and settings remembered
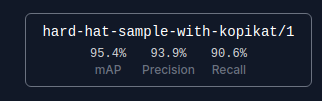
After the evaluation is finished, we achieve the following results:

We can see that mAP50 metric is 95.4, which is pretty good for our lightweight model. However, we can use Kopikat.co to augment the data and push the metrics even further.
Step 5. Model Uploading
To upload the trained model to Roboflow, you can use the snippet below:
from roboflow import Roboflow
rf = Roboflow(api_key="YOUR_API_KEY")
project = rf.workspace("opencvai").project("hard-hat-sample-with-kopikat")
version = project.version(1) # Use 2 for uploading kopikat-trained model
version.deploy("yolov8", model_path="./roboflow/baseline/") # ./roboflow/kopikat
After the upload is finished, your metrics will be shown, and you can try the model using the Deploy page:
Kopikat Augmentation
The core idea of Kopikat is to generate new copies of original images while preserving their original data annotations.
We have used Kopikat to expand the Hard Hat Workers dataset several times. Below, we show the original images (on the left) and their augmented copies (on the right):
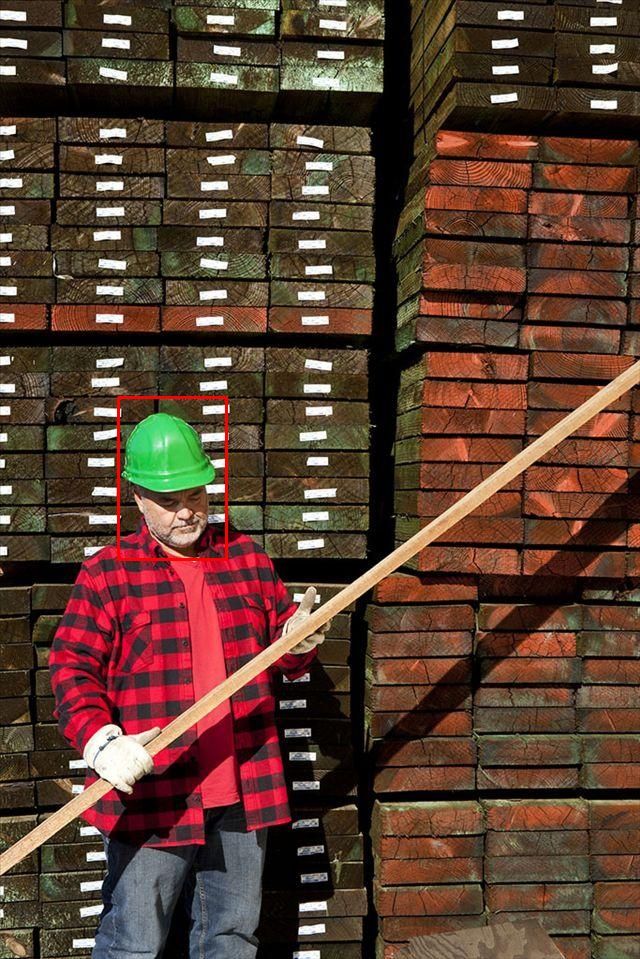
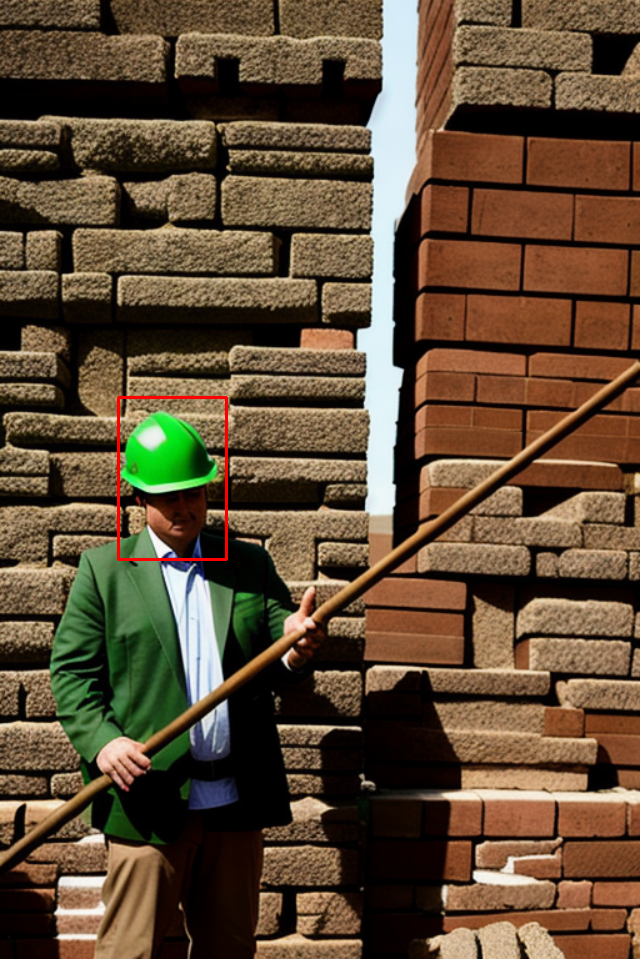
Kopikat preserves the locations and the classes of the objects, so we can apply the original dataset annotation and use the augmented data in training.
How Kopikat Affects the Results
Having an augmented copy of the data, we’ve launched several experiments:
Real data + Two augmented copies of each image. Total: 14,654 images

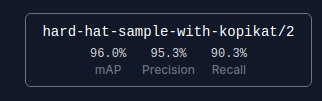
From the image above, we can see that two copies of each image helps to push metrics and achieve 96 mAP (+0.6).
After the model is uploaded to Roboflow, you can check metrics there:
It's important to note that the results may differ depending on the specific dataset. Still, the key takeaway is that generative AI and Kopikat augmentation can help to improve the results of machine learning models without any changes to the model architecture and interference into the hyperparameters of the learning process.
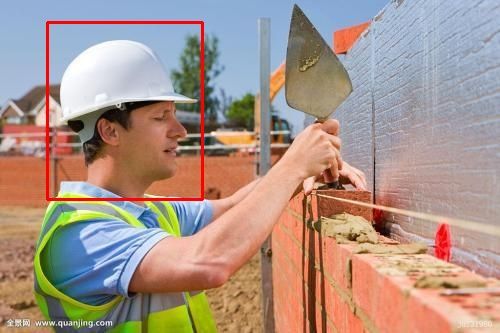
The model’s inference is presented below:
We have stored Kopikat augmented data with two copies of each image in the same project. You can find the project in Roboflow Universe following the link. It can be downloaded and training can be launched as described above (make sure to change path to the dataset).
dataset = project.version(2).download("yolov8")
Conclusion
This blog post explores how to use Kopikat, a tool for generative AI data augmentation, to improve the performance of machine learning models. The post uses a custom Hard Hat Workers dataset and YOLOv8-nano for training, achieving a mAP metric of 64.4. After using Kopikat to augment the data, the mAP metric increased to 65.5 with two copies of each image.
If you are interested in Kopikat, please go to Kopikat.co to test it on your images for free or request the augmentation for a dataset.