In the world of AI, training a computer vision model is only half the battle. Figuring out where and how to deploy it in a user friendly way? Now, that's a whole new adventure – and sometimes, it can be tougher than the training itself.
Traditional deployment methods often required extensive setups, including navigating the intricacies of Docker or relying on the Cloud. But what if deploying your model was as simple as utilizing a Python package? Let’s dive into how Roboflow inference provides a refreshing Python-centric alternative.
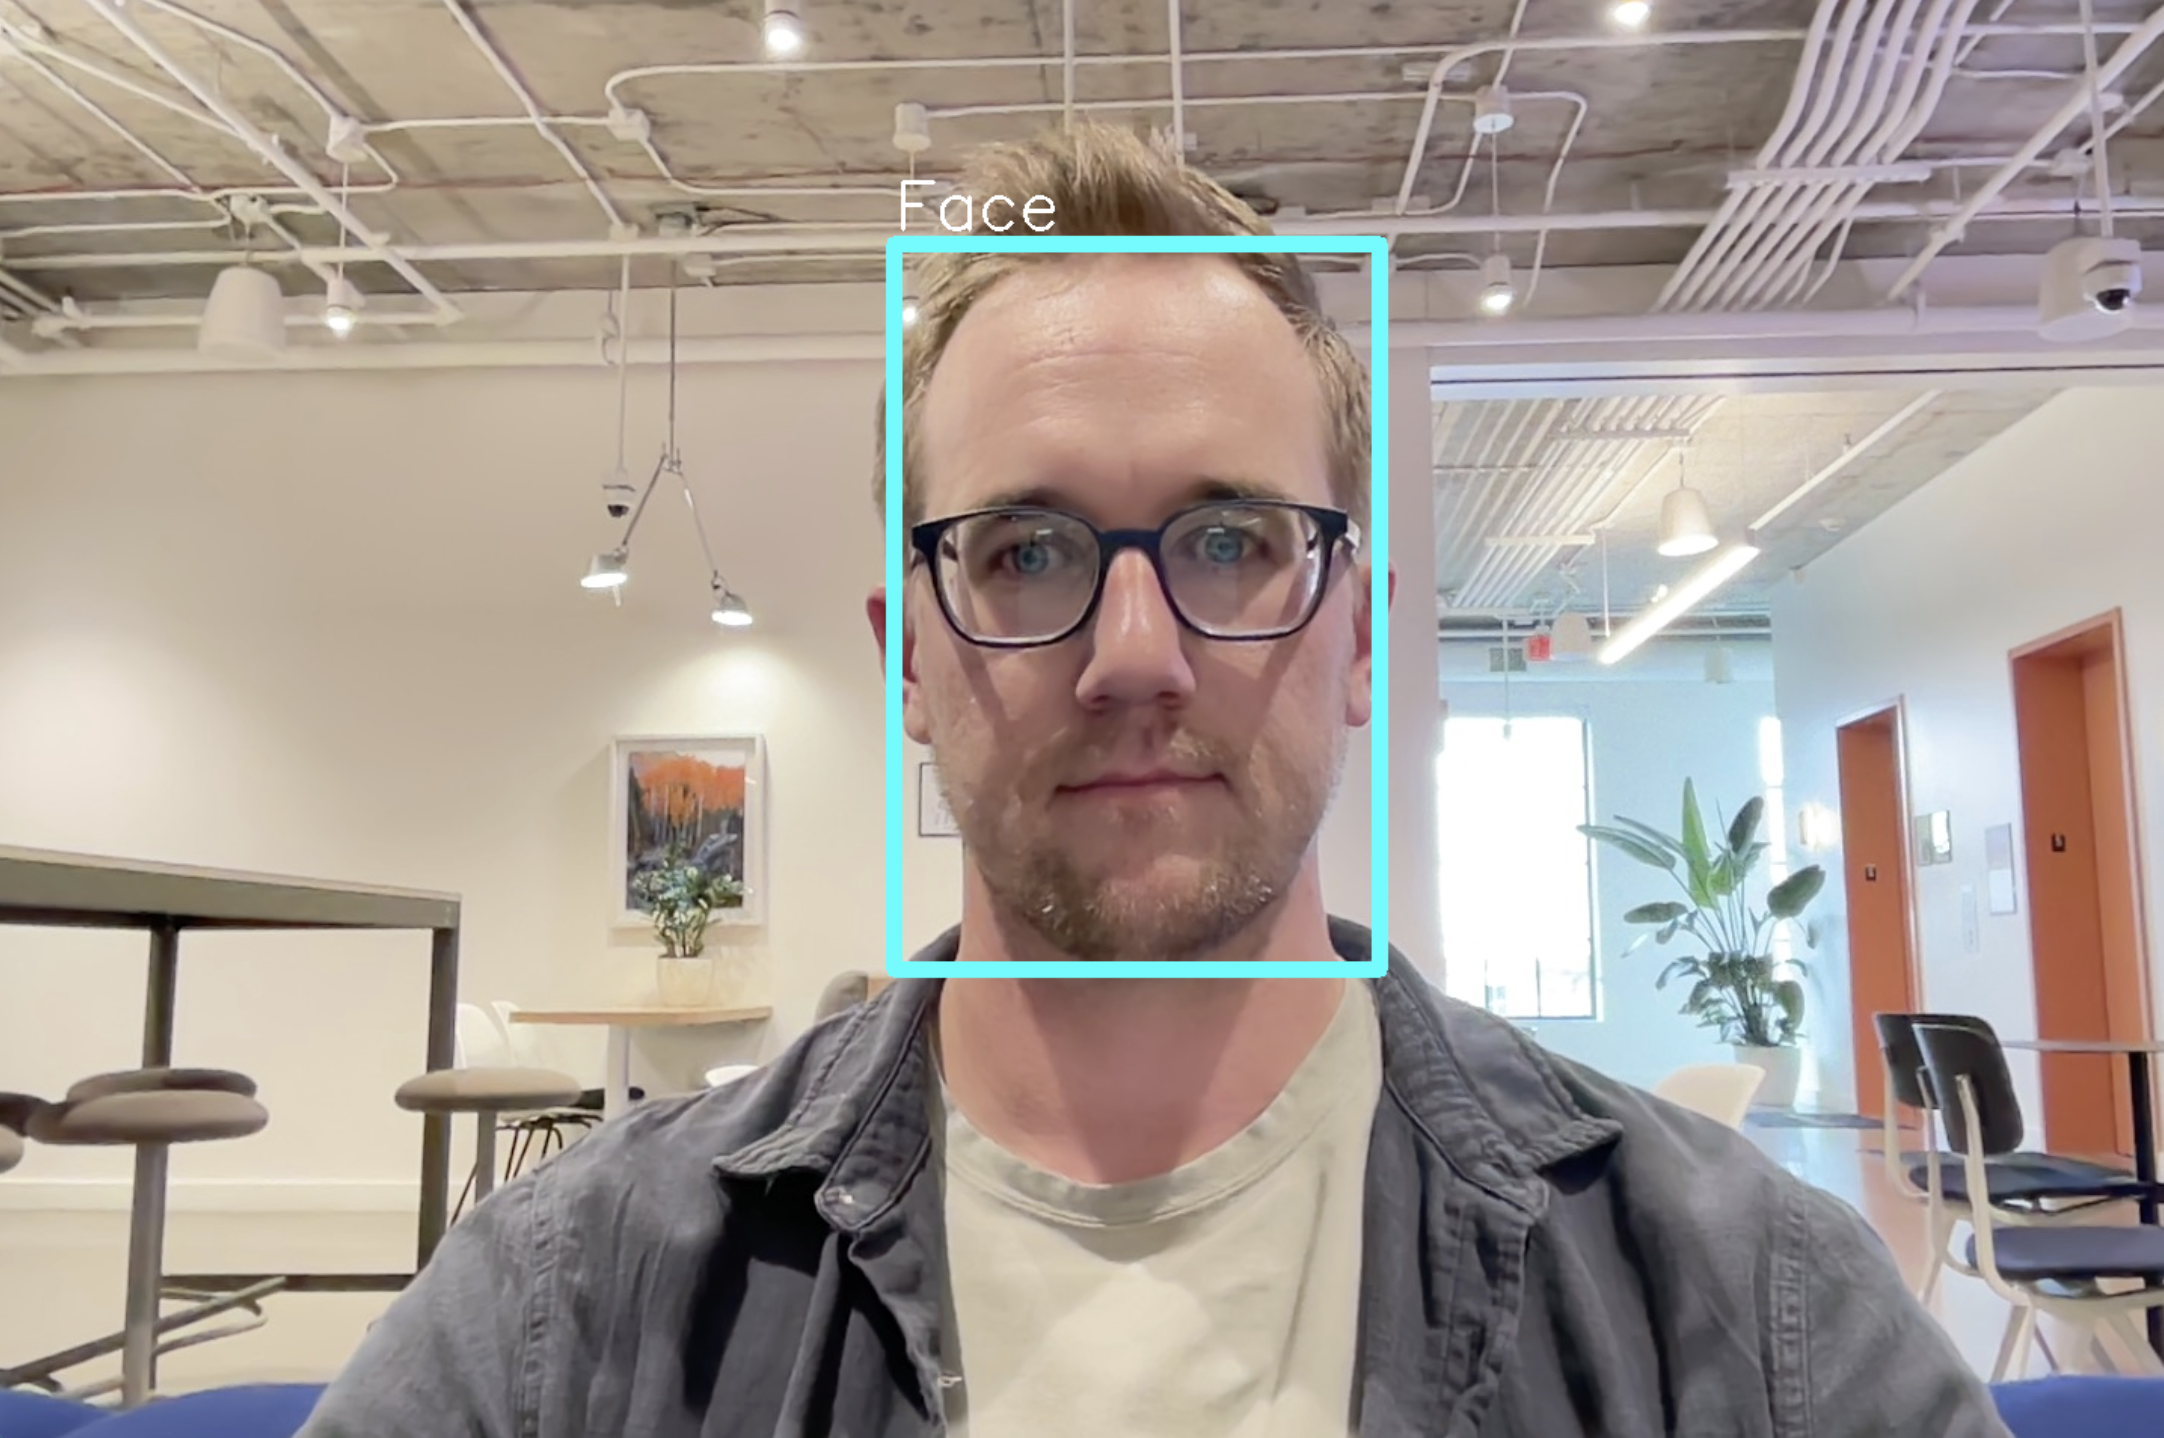
By the end of this guide, we will have Inference running a face detection model on a webcam. Here is a demo:
The Traditional Deployment Landscape
Traditionally, deploying a computer vision model meant getting your hands dirty with Docker containers or investing in cloud-based services. While these methods have their merits, they also come with challenges:
- Cost Implications: Cloud services come with ongoing expenses. As your application scales, so does your bill.
- Setup Complexities: Configuring Docker can be a maze for newcomers.
- Latency and Offline Access Concerns: Cloud-based methods can introduce latency, and without internet access, your model is unreachable.
Roboflow Inference: Local Deployment Made Easy
With Roboflow Inference (pip install inference), you can deploy and inference your computer vision models locally. The advantages are abundant:
- Cost-effective: No ongoing cloud costs or hidden fees.
- Minimal setup: Say goodbye to complex configurations.
- Reduced latency: Process data in real-time on your local machine.
- Offline capabilities: Your can inference against your models with or without the internet.
Step #1: Install Inference with pip
We will use pip to install the Python package inference into your Python environment. There are several different options to install inference depending on if you will be using a CPU vs GPU or if you plan on using CLIP or SAM and require additional dependencies (such as pytorch). To find out which option is right for you, visit the inference GitHub repo.
For this article, we will be running inference on a CPU so we will install the package by using the following command:
pip install inferenceThat's all we need to inference against a computer vision model using only our CPU! For production use cases, you will likely use inference-gpu. The Python package for running inference on GPU is the same, so this guide will work with inference-gpu, too.
You will also need to install opencv-python to visualize images and predictions on screen:
pip install opencv-pythonStep #2: Choose a Computer Vision Model
Visit Roboflow Universe to use an existing computer vision model that someone has already created (or create your own!) based off what you're trying to achieve. We'll be demonstrating face detection in this article, so we'll be using this pre-trained model here.
Some useful information from this project we'll need for our Python script:
- Project name: face-detection-mik1i
- Project version: 18
Step #3: Inference an image
Now let's create a Python script to load this model to our local machine and inference an image against it.
from inference.models.utils import get_roboflow_model
import cv2

# Image path
image_path = "photo.jpg"

# Roboflow model
model_name = "face-detection-mik1i"
model_version = "18"

# Get Roboflow face model (this will fetch the model from Roboflow)
model = get_roboflow_model(
    model_id="{}/{}".format(model_name, model_version),
    #Replace ROBOFLOW_API_KEY with your Roboflow API Key
    api_key="ROBOFLOW_API_KEY"
)

# Load image with opencv
frame = cv2.imread(image_path)

# Inference image to find faces
results = model.infer(image=frame,
                        confidence=0.5,
                        iou_threshold=0.5)


# Plot image with face bounding box (using opencv)
if results[0]:
    bounding_box = results[0][0]
    print(bounding_box)

    x0, y0, x1, y1 = map(int, bounding_box[:4])

    cv2.rectangle(frame, (x0, y0), (x1, y1), (255,255,0), 10)
    cv2.putText(frame, "Face", (x0, y0 - 10), cv2.FONT_HERSHEY_SIMPLEX, 1.5, (255, 255, 255), 2)

# Show image
cv2.imshow('Image Frame', frame)
cv2.waitKey(0) # waits until a key is pressed
cv2.destroyAllWindows() # destroys the window showing image
This code leverages the Roboflow inference package for face detection. Initially, it specifies the path of the image to be processed ("photo.jpg") and details of the Roboflow face detection model to be fetched. By utilizing the get_roboflow_model function, the code retrieves this model using the designated model name, version, and a placeholder API key.
Once the image is loaded into the program with OpenCV's imread() function, the Roboflow model is used to infer or predict faces on the image based on certain confidence and Intersection over Union (IoU) thresholds. If a face is detected, the code draws a blue bounding box around it and labels it with the word "Face" using OpenCV functions. The processed image, adorned with the bounding box (if a face is found), is then displayed to the user.
The 'image_path' variable will need to be changed to whatever image you have on your local machine. The 'model_name' and 'model_version' will also need to be updated if you are using a different one from Roboflow Universe.
Let's run our Python script and examine the output:
We can see that we accurately detected the face in the image and drew a bounding box around it. The best part is that we didn't have to run any docker containers or anything else in the background, it all worked just by pip installing inference!
Step #4: Inference on a Video (Webcam)
What if we wanted to inference using a video stream from our webcam instead of a single image? Not a problem, the above code can be adapted to read in from your webcam and inference each frame on your local machine just like with the single image.
See the Python code below to read in from a webcam and inference the frames:
from inference.models.utils import get_roboflow_model
import cv2

# Roboflow model
model_name = "face-detection-mik1i"
model_version = "18"

# Open the default camera (usually the built-in webcam)
cap = cv2.VideoCapture(0)

# Check if the webcam is opened successfully
if not cap.isOpened():
    print("Error: Could not open camera.")
    exit()

# Get Roboflow face model (this will fetch the model from Roboflow)
model = get_roboflow_model(
    model_id="{}/{}".format(model_name, model_version),
    #Replace ROBOFLOW_API_KEY with your Roboflow API Key
    api_key="ROBOFLOW_API_KEY"
)

while True:
    # Capture frame-by-frame
    ret, frame = cap.read()

    # If the frame was read successfully, display it
    if ret:
        # Run inference on the frame
        results = model.infer(image=frame,
                        confidence=0.5,
                        iou_threshold=0.5)

        # Plot image with face bounding box (using opencv)
        if results[0]:
            bounding_box = results[0][0]
            print(bounding_box)

            x0, y0, x1, y1 = map(int, bounding_box[:4])

            cv2.rectangle(frame, (x0, y0), (x1, y1), (255,255,0), 10)
            cv2.putText(frame, "Face", (x0, y0 - 10), cv2.FONT_HERSHEY_SIMPLEX, 1.5, (255, 255, 255), 2)

        # Display the resulting frame
        cv2.imshow('Webcam Feed', frame)

        # Press 'q' to quit the video window
        if cv2.waitKey(1) & 0xFF == ord('q'):
            break
    else:
        print("Error: Could not read frame.")
        break

# When everything is done, release the capture and destroy all windows
cap.release()
cv2.destroyAllWindows()
This code leverages the Roboflow inference package and OpenCV library to load a pre-trained model from Roboflow to detect faces in real-time webcam footage. Initially, the script specifies the Roboflow model's name and version to be used. It then initializes the default camera, typically the built-in webcam of the computer.
Upon successful camera initialization, the specified face detection model is fetched from Roboflow using its API key. The script then continuously captures frames from the webcam. Each captured frame is processed by the Roboflow model to identify any faces.
If a face is detected, its bounding box coordinates are printed and a rectangle, labeled "Face", is drawn around it. The processed frame, with any detected faces highlighted, is then displayed in real-time.
Let's run our video adapted Python script and examine the output:
We can see that we're able to track the face throughout the video using the computer vision model.
Conclusion
The Roboflow inference Python package offers a fresh perspective on computer vision model deployment. It's a testament to the power of simplicity, and it empowers developers to deploy effortlessly. If you've been wrestling with complicated deployment setups, inference could be the game-changer you've been waiting for.