
Verifying the integrity of metal parts during manufacturing is essential. Depending on the metal part, there may be a wide range of defects present: scratches, dents, or otherwise unwanted blemishes.
You can use computer vision to identify metal defects. Computer vision can be used to identify the exact defects present on the parts with which you are working, or the parts you are manufacturing. This allows you to build a system on which you can depend on for defect detection and quality assurance processes.
In this guide, we are going to walk through how to defect metal defects with computer vision. We will show you how to use a pre-trained computer vision model to detect defects. We will then talk about how you can train your own model and integrate computer vision into your system.
Here is an example of our system in action:

Without further ado, let’s get started!
Machine Vision vs. Computer Vision for Metal Defects
Traditional machine vision systems use tools like pattern matching to identify the presence of metal defects. These systems, while reliable, usually do one check at one time. This means that a part may have to pass through multiple cameras to run the required checks.
Computer vision systems, on the other hand, use deep learning to identify features in an object. For example, you can train a system to identify – and distinguish between – dents, cracks, and scratches. This system can run in real time, like machine vision systems, and be connected to a manufacturing execution system for use in monitoring a production line.
Use Computer Vision to Identify Metal Defects
Computer vision is an effective way to identify metal defects. To build a computer vision system to identify metal defects, you need a model that can identify defects. A model is a type of computer program that has been trained to find specific objects.
In this guide, we are going to show you how to use a pre-trained computer vision model. This model is ready for use out-of-the-box. We will then talk about how you can train your own model to identify the specific defects present in your manufacturing facility.
Step #1: Create a Roboflow Account
We are going to use the Roboflow platform to deploy our vision model. To get started, create a free Roboflow account. This will allow you to access an API key which we will use to test a pre-trained defect detection model.
Step #2: Test the Metal Defect Model
Open the metal defect detection model on Roboflow Universe. Universe is the world’s largest community of open source computer vision models, with over 50,000 pre-trained models available for use.
To test the model, click “Model” in the sidebar. Then, choose an image from the left pane on the screen labeled “Test Set”. This will allow you to test the model on an image that has been set aside for use in testing model performance. You can also upload your own image or video to use on the model.
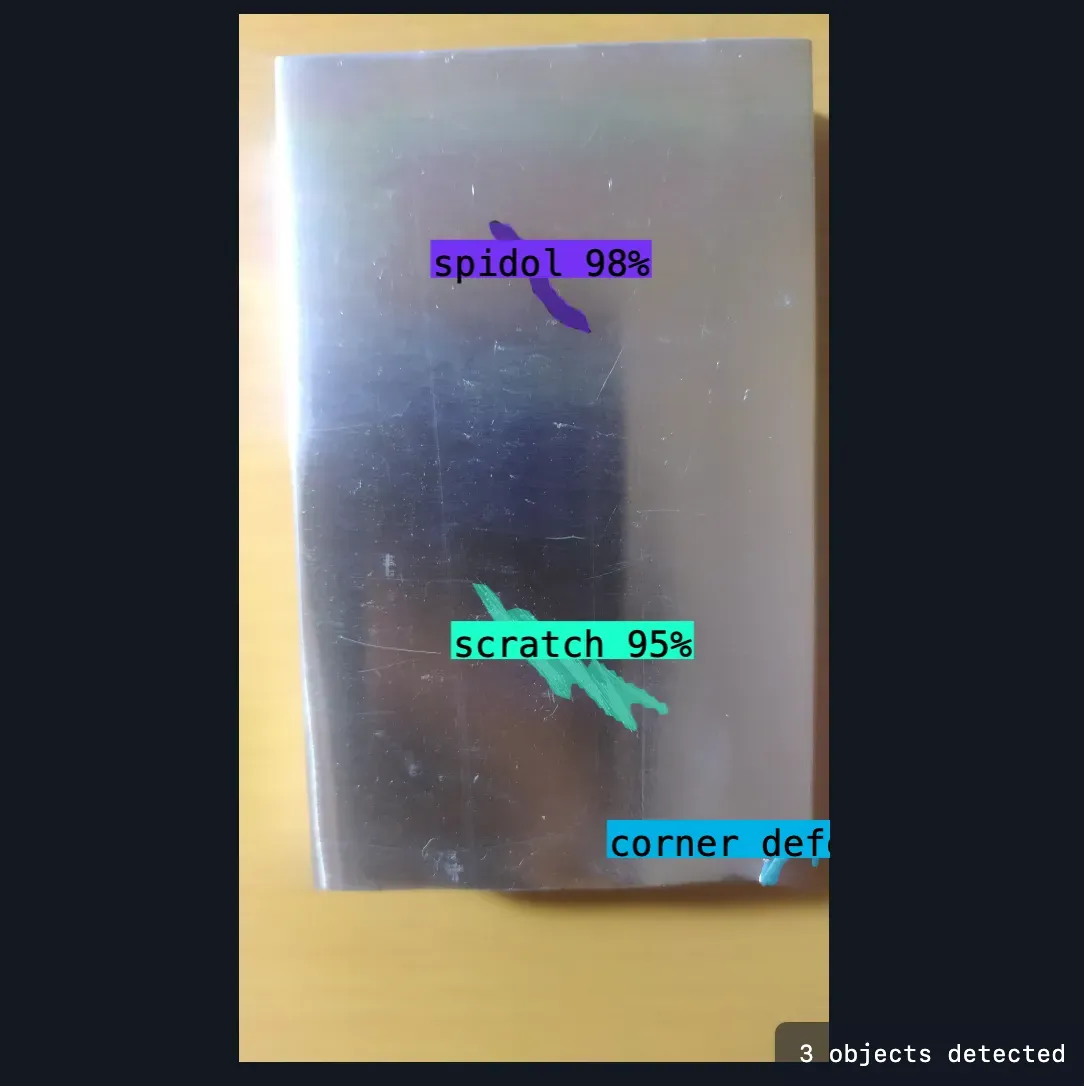
In the image above, our model successfully identified surface defects. "spidol" marks discolorations identified on the surfac.
Step #3: Deploy the Model
All models trained on Roboflow can be deployed on your own hardware.
For this guide, we are going to deploy our model on an edge device. For the best performance, we recommend deploying on a dedicated edge compute device such as an NVIDIA Jetson. For testing, you can deploy the model on your computer.
We first need to install Inference, a system that allows you to run computer vision models on your own hardware. For this guide, we will also need to install supervision, a Python package that provides a range of tools for use in working with vision models.
To install the required dependencies, run:
pip install inferenceWe need to set our API key in our environment. We will use this API key to authenticate with Roboflow. Learn how to retrieve your API key.
When you have retrieved your API key, run the following command:
export ROBOFLOW_API_KEY=”key”Where “key” is your API key.
Next, create a new Python file and add the following code:
from inference import get_roboflow_model
import supervision as sv
import cv2

image = cv2.imread("image.jpg")

model = get_roboflow_model(model_id="defect-detection-dqcko/4")

results = model.infer(image)

labels = [i.class_name for i in results[0].predictions]
detections = sv.Detections.from_inference(results[0].dict(by_alias=True, exclude_none=True))

bounding_box_annotator = sv.BoundingBoxAnnotator()
label_annotator = sv.LabelAnnotator()

annotated_image = bounding_box_annotator.annotate(
    scene=image, detections=detections)
annotated_image = label_annotator.annotate(
    scene=annotated_image, detections=detections, labels=labels)

sv.plot_image(annotated_image)
This code will run our model on an image called “image.jpg”. Substitute the name “image.jpg” with the file on which you want to run your model. Then, the results from inference will be displayed in an interactive window for evaluation.
Here is the result of running our script on an example image with a metal defect present:
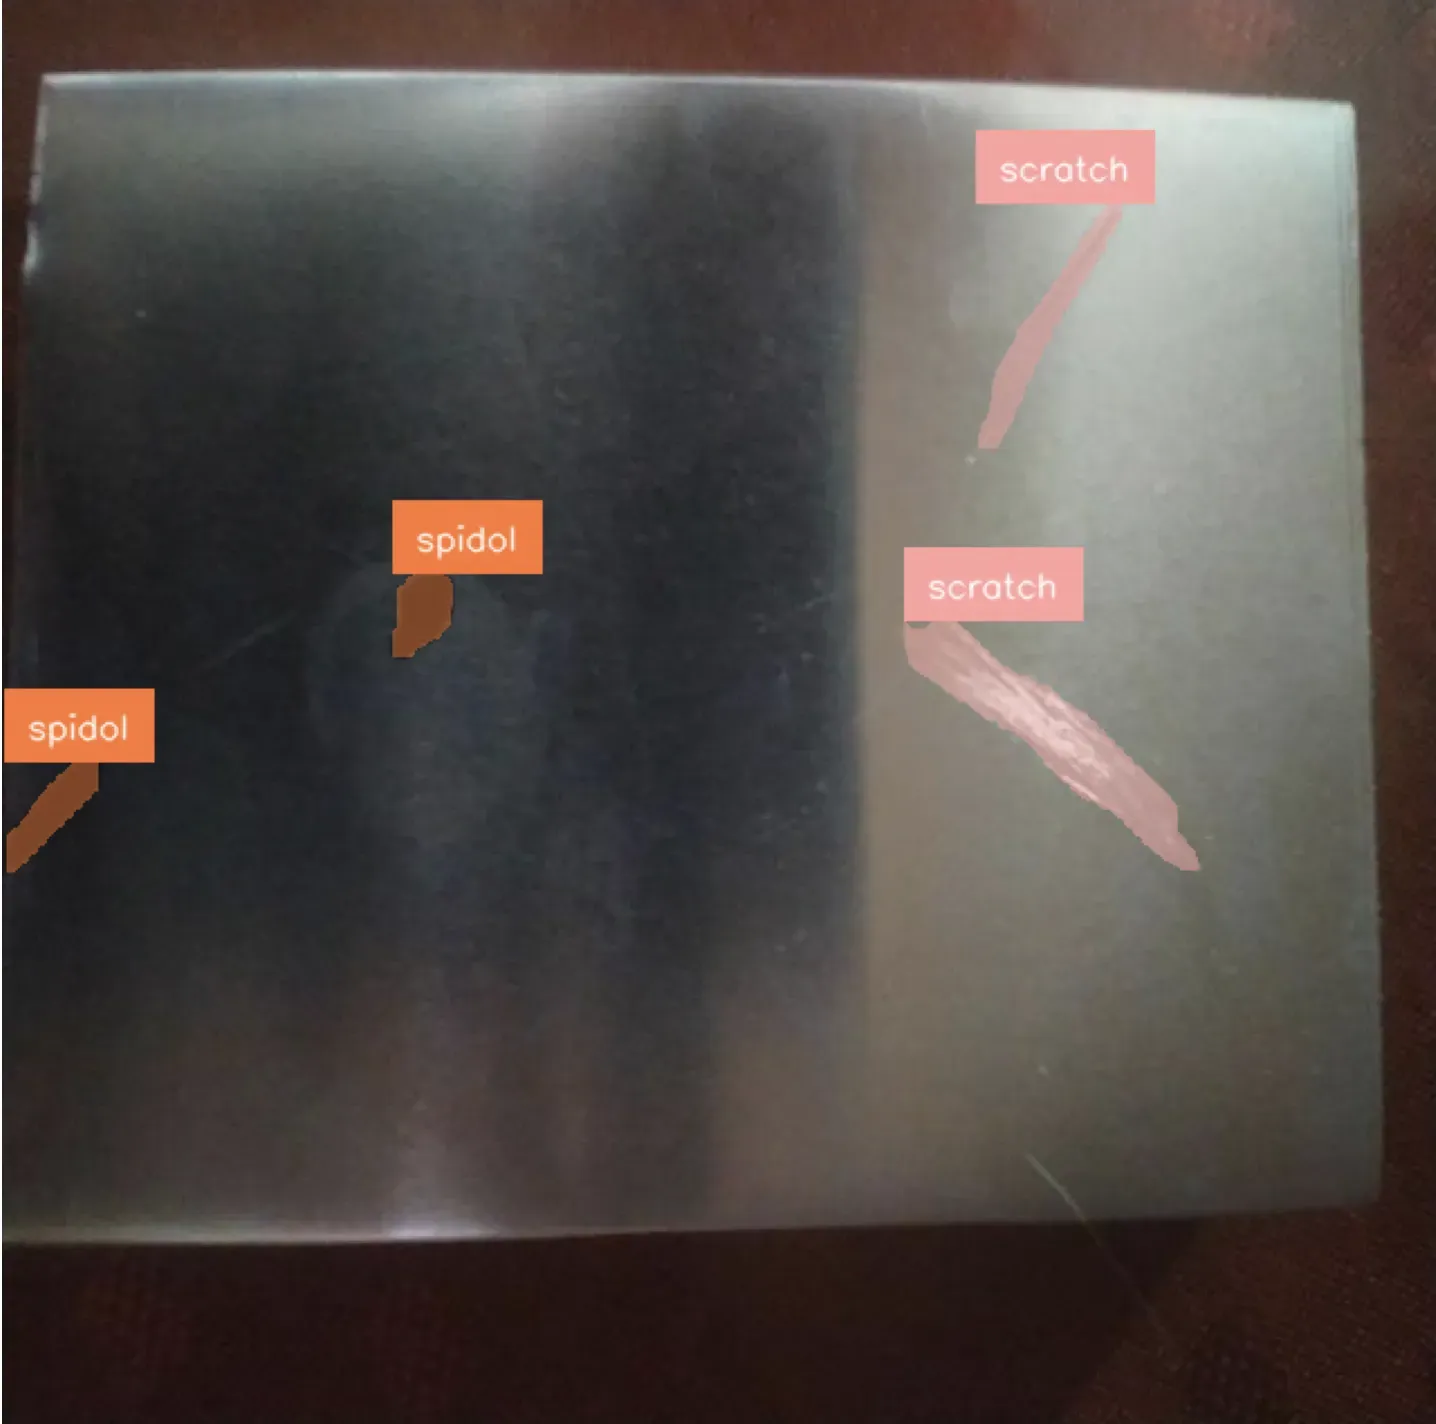
Our model successfully identified the presence of a surface metal defect.
Next Steps: Training a Custom Model and Integration into MES Systems
Above, we demonstrated how to use a pre-trained model to identify surface metal defects. With that said, we recommend training a custom model for a production system using your own data. This will allow you to ensure your system identifies as many instances of defects as possible. The more representative the images on which a model is trained are of the environment in which your model will be deployed, the better your model will perform.
The steps of building a vision model are as follows:
- Collect images.
- Annotate defects in each image using a labeling tool.
- Generate a dataset.
- Train a model.
- Deploy your model.
You can train the first version of a vision model in an afternoon. To get started, refer to the Roboflow Getting Started guide.
Once you have trained a custom model, you can start applying business logic to the output of the model. For example, you can search for defects in a particular corner of an object. You can measure the length of scratches or you can track the stage of your manufacturing process where defects are most likely.
The supervision Python package provides an extensive suite of utilities for use in integrating computer vision into your business logic. Supervision has tools for visualizing results from computer vision models, counting the amount of time an object spends in a zone, counting when objects cross a line, filtering predictions by size, and more.
If you need assistance in building a vision model for your use case and deploying the model to production, contact the Roboflow sales team. The Roboflow team works with enterprises such as Rivian Automotive on building robust quality assurance models with computer vision models.