
This article was contributed to the Roboflow blog by Abirami Vina.
Introduction
Digital transformation is a common practice in various fields, including education. There has been a significant shift towards online learning and tests, offering advantages like increased access and flexibility for learners worldwide. However, this shift has also raised concerns about academic honesty, particularly in remote exams.
Online proctoring systems play a critical role in ensuring fair and honest evaluations of students' knowledge and skills in remote settings. Some students may be tempted to use their smartphones during these assessments, making it essential to detect and prevent this behavior.
In this guide, we’ll build an application that uses computer vision to create an online proctoring system.
Let’s get started!
Project Overview
Our objective is to create an online proctoring system that can detect when a person taking an online exam is using a phone. We’ll use object detection to detect the phone, a webcam to capture live footage of the person taking the exam, and Roboflow Inference to deploy our system. Let’s quickly go through the parts of the system.
Detecting the Phone
To detect a phone being used by a student writing an online exam, we need a trained object detection model. Roboflow Universe is a great place to look for trained models. Roboflow Universe is an exciting community-driven initiative that hosts a vast collection of over 200,000 computer vision datasets, many of which have associated trained models. For this guide, we’ll be using the trained model shown below from Roboflow Universe.
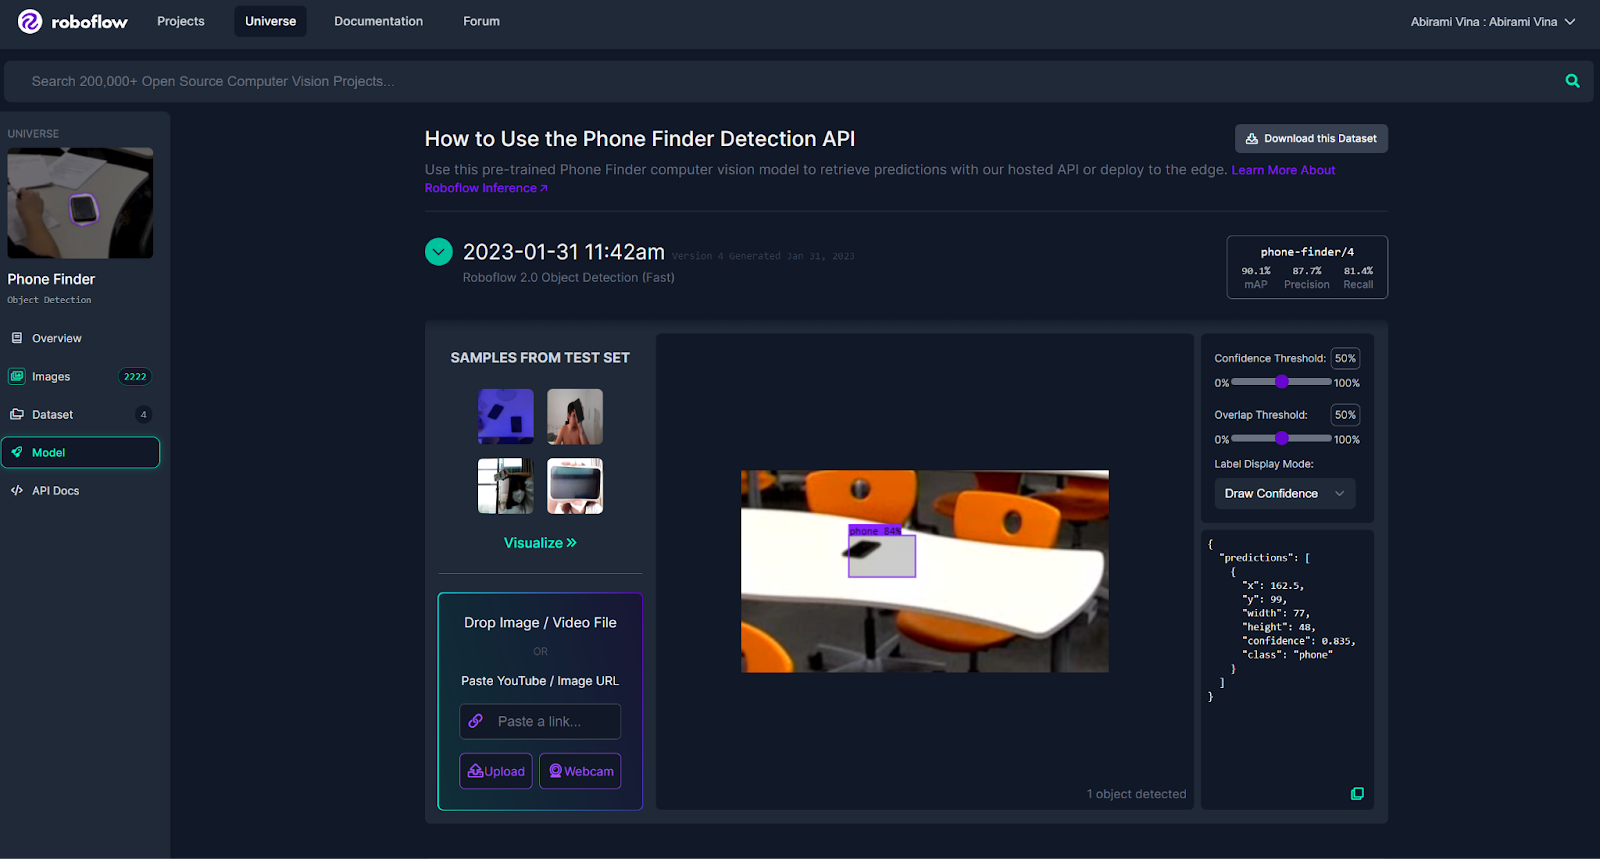
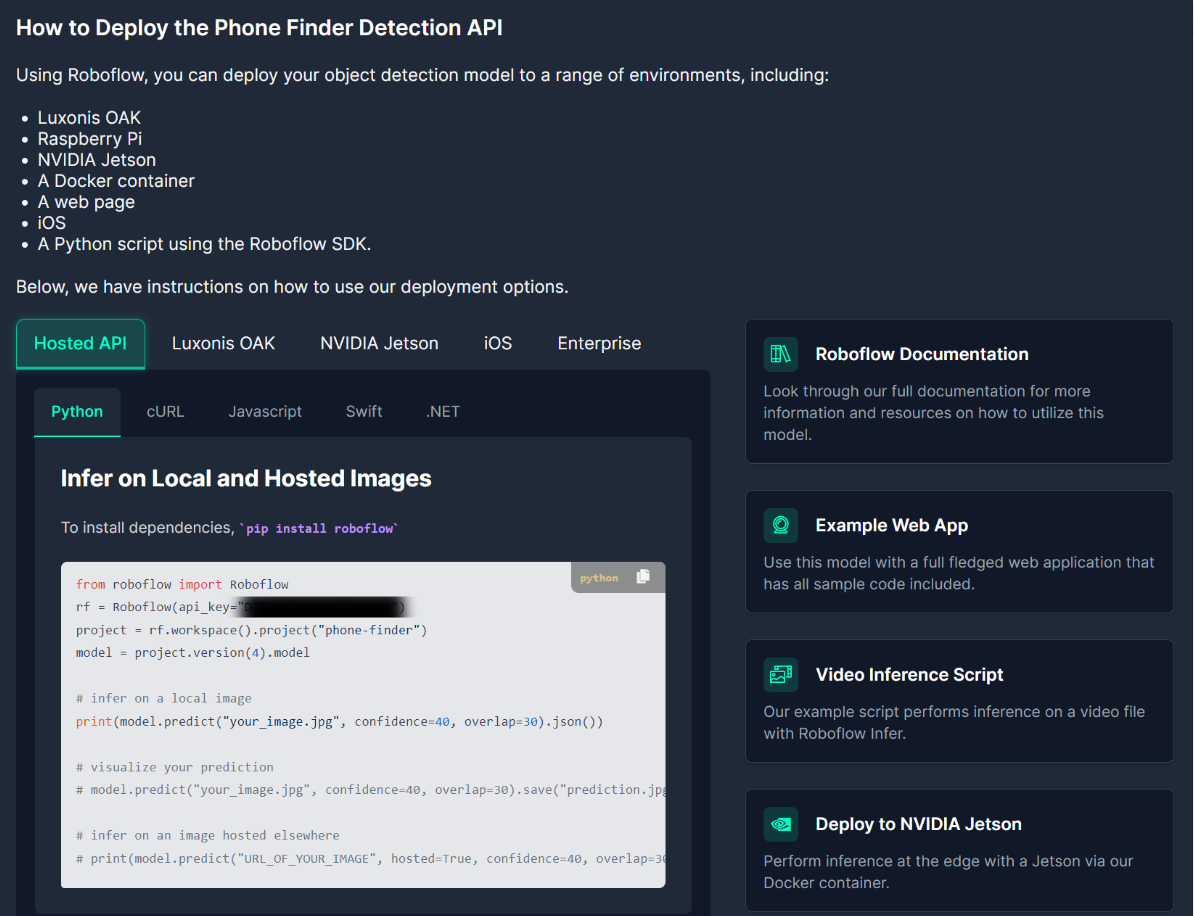
Upon signing up for a Roboflow account, reloading the page shown above, and scrolling down, you’ll see a section on how to deploy the API for this model, as shown below.
You can understand the model ID and version number from the third and fourth lines of the sample code. In this case, the model ID is “phone-finder,” and it’s the fourth version of the model. This information will be useful for us when we put together our deployment script.
Deploying the Model
We’ll be leveraging a webcam in our online proctoring system because it provides a direct window into the test-taker’s environment, enabling real-time monitoring of phone usage. We have a trained model to detect phones, a webcam for capturing the visual data, and we will use Roboflow Inference to serve the model and receive predictions.
The Roboflow Inference Server is an HTTP microservice interface designed for inference tasks. It is adaptable for various deployment scenarios using Docker and has been fine-tuned to efficiently handle requests from both edge devices and cloud-based setups in a consistent format.
Creating an Online Exam Proctor
Let’s put the pieces together now!
Setting up Roboflow Inference
Roboflow Inference provides a Python library and Docker interface. Using pip installs the "inference" package directly into your Python environment. It's a lightweight option, well-suited for Python-focused projects.
On the other hand, Docker packages "inference" along with its environment, ensuring uniformity across different setups. This makes it an excellent choice for scalable deployments where consistency is paramount.
We’ll take a look at how to set up both, and you can choose one to try.
Setting up Docker
First, we’ll need to install Docker. Docker gives us a containerized environment that ensures the Roboflow Inference Server operates consistently and independently, irrespective of the underlying host system. You can refer to the official Docker installation guide.
Once Docker is successfully installed, you're all set to download Roboflow Inference. The specific command to execute depends on the type of device you're using.
If you are using an x86 CPU, pull the official Roboflow Inference server Docker image using the following command:
Then, run the Docker image using the following command:
The Docker image will start to run, as shown below.

Take a look at the documentation for more options.
Pip Installing Roboflow Inference
To install Roboflow Inference on a CPU device, run:
To install Roboflow Inference on a GPU device, run:
Quickstart
You can use the following pieces of code to ensure that you have Roboflow Inference set up correctly and have the correct parameters like API key, dataset id, and version number.
Docker Quickstart
Remember to have the Docker image running before you try out this code.
Pip Quickstart
Online Exam Proctor
Now that we have Roboflow Inference set up, we can connect our model and the webcam together to create an online exam proctoring system. Depending on whether you installed the Python library or Docker interface of Roboflow Inference, you can go through the code for the online exam proctor below.
The code begins by setting up essential dependencies, and then it continuously captures frames from the webcam feed and uses the object detection model to check each frame for phone usage. When an unauthorized phone is detected, the system triggers an alert. The results are displayed on the screen, providing a real-time monitoring status.
Implementation Using Docker
Ensure to have the Docker image running before you try out this code.
Implementation Using Pip
Sample Output
Here is an example of the output:
Conclusion
As education and technology continue to evolve, so must our methods for ensuring fairness and honesty in assessments. In this guide, we went over how to create an online proctoring system capable of detecting phone usage during online exams. This system combines the strengths of object detection, webcam monitoring, and the robust capabilities of Roboflow Inference.
Frequently Asked Questions
Where can you find your Roboflow API key?
To get your API key, navigate to your Roboflow dashboard, and from there, access the Roboflow API tab found in the sidebar navigation of the settings page. Lastly, make sure to securely copy your Private API Key, treating it with the same confidentiality as a password, as it provides access to all data and models within your workspace.
Where can you find the Model ID and version of a model you train?
To access the trained model for object detection, you'll need to identify the model ID and version number associated with the model you intend to use. You can find your model ID and version number within the URL of the dataset version page, which is the page where you initiated training and viewed your results.