
Having the correct class ontology is crucial for a smooth labeling process, reducing annotation mistakes, and enabling top model performance. We are excited to introduce a new class management page, available for all projects in the Roboflow dashboard. This page is the new central hub for adding, renaming, and deleting your classes and managing annotation colors.
In this guide, we are going to show you how to use the new class management page to manage ontologies for computer vision projects.
What is a Class Ontology?
A class ontology is the different types of objects that a computer vision system can recognize and understand. This is the collection of classes, such as different types of vehicles, animals, or parts, that are included in the dataset.
Your ontology structure helps the computer vision system to accurately identify, classify, and understand the objects in images or videos, based on the defined ontology.
For example, if you have an ontology where “bird” is the only class, you will train a model to identify birds. If you choose an ontology with more specific types of birds (i.e. “robin”), the resulting model can be more specific, provided your annotations are more specific too.
Here are some recommended best practices for defining your ontology:
- Label the most specific classes you can think of. It's much easier to combine classes into more broad categories than it is to split a class into more specific segments. For example, if you are creating a dataset for a cleaning robot, you'll want to create labels for dining table, coffee table, and end table instead of a single class for table because if you someday needed your robot to behave differently for different table types you would have to pay someone to go back and categorize each table later vs simply merging the classes with a tool like Roboflow.
- Ensure all of your labelers are on the same page. For instance, if you have a category in your self driving car dataset for semi-truck, does the whole vehicle including the trailer get labeled as a semi-truck or only the cab? Either way is valid but it's important that they're all labeled the same way.
- Ensure you have some null examples. When your model is deployed to the real world it won't always find the things it's looking for. If you're training a raccoon detector and only feed it photos of raccoons, it's going to learn that everything is a raccoon because it doesn't know that dogs, cats, and people exist.
- But not too many null examples. Similarly, if you have too many null examples, your model may learn that its best strategy to minimize its loss function is to never predict anything!
- Make sure you have examples with multiple classes present if that is a situation that may be encountered in the real world. For example, if you're collecting images of fish to survey a coral reef, you'll want to ensure that you have examples with multiple fish rather than a single fish in each image.
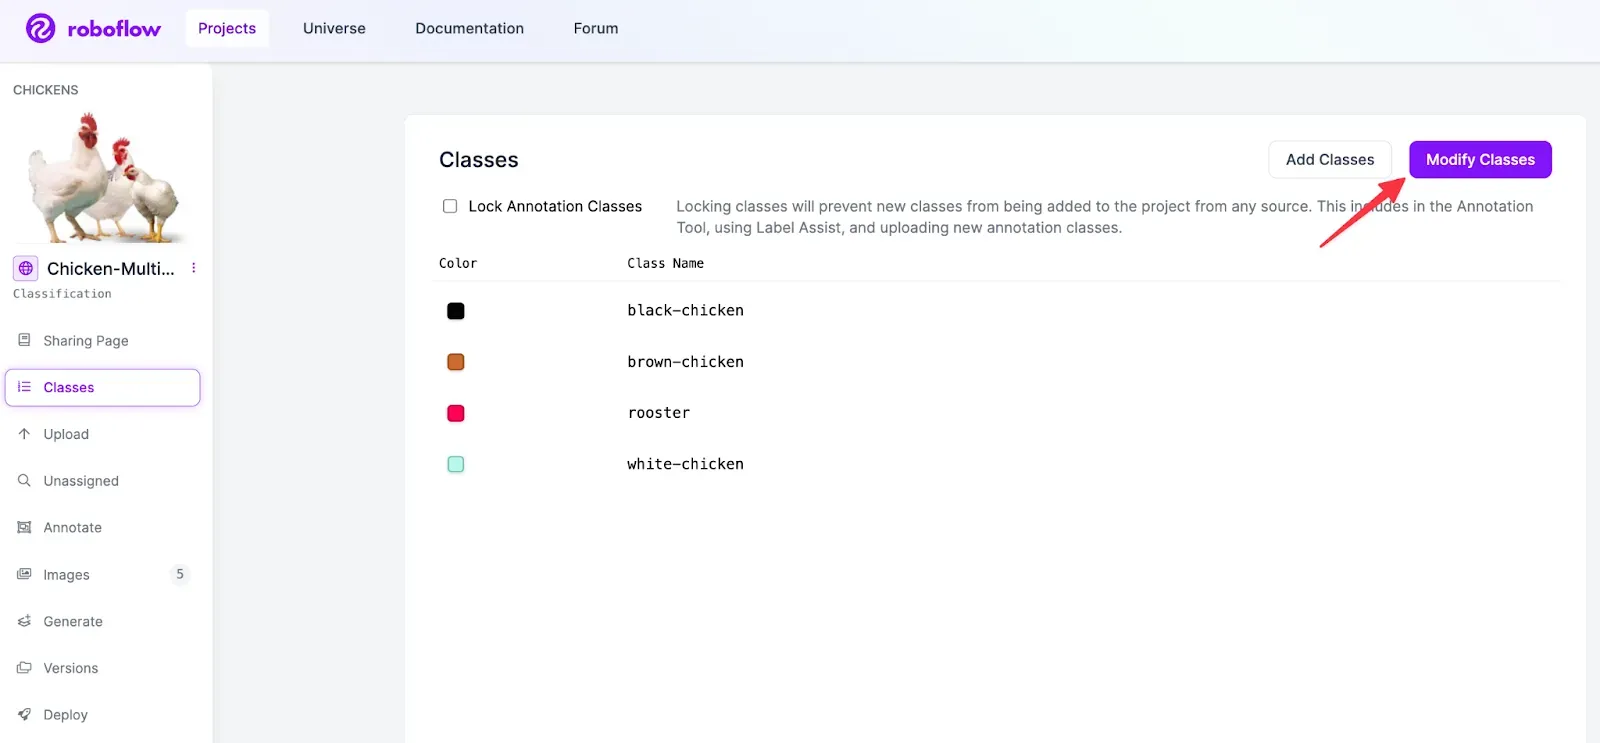
Introducing the New Class Management Page
You can now manage all your classes from the class management page. This includes adding new classes after project creation, remapping and renaming classes, deleting unused or unneeded classes, and assigning custom colors to each class.
Add Classes to a Dataset
- You can now add classes before starting the labeling process.
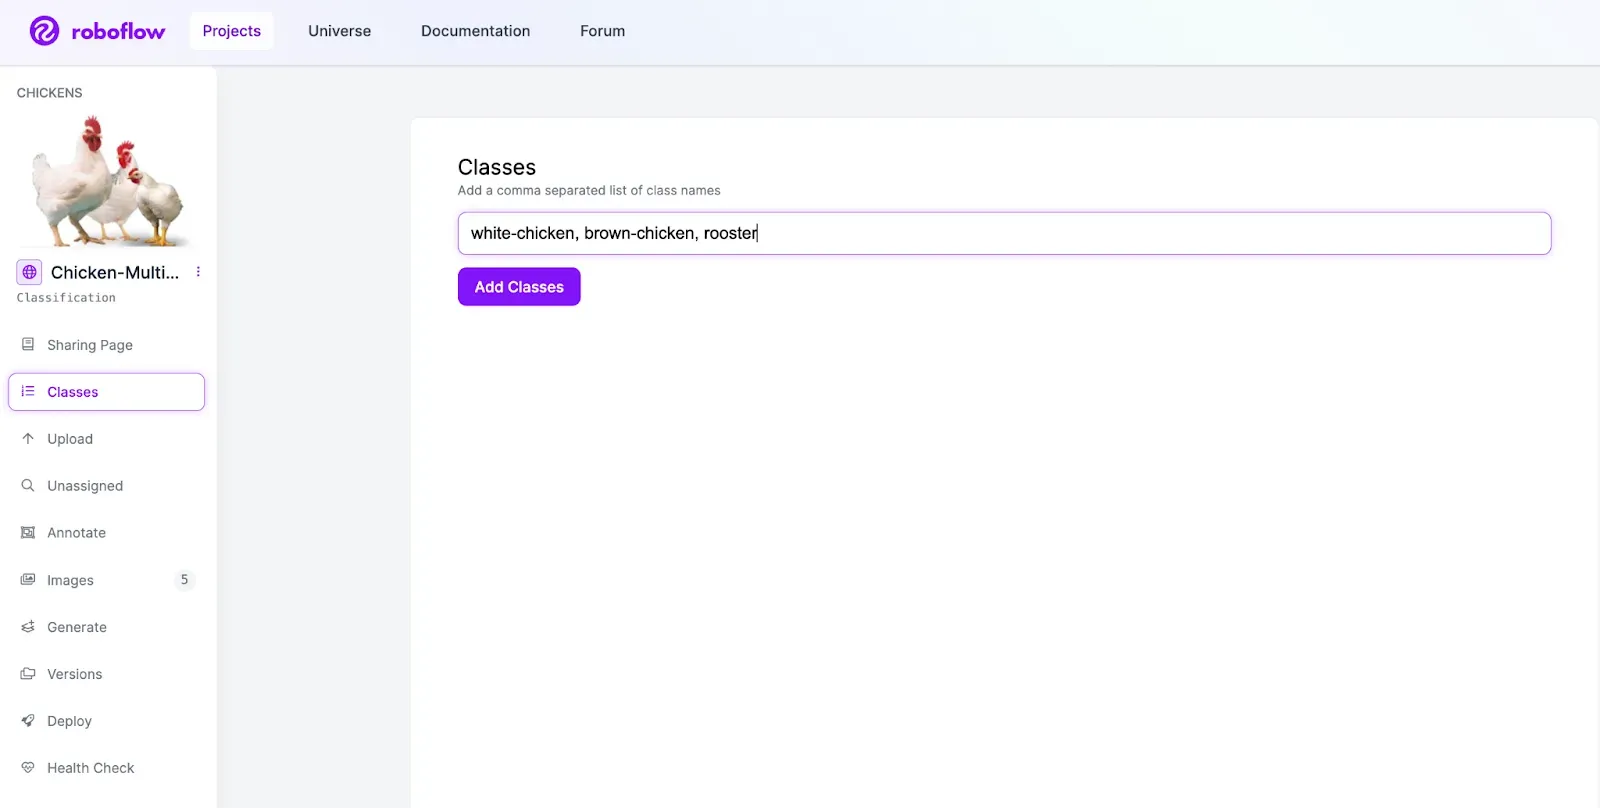
If you’re in a new project, you can define your classes on the Classes page by entering a comma separated list of class names, and clicking Add Classes.
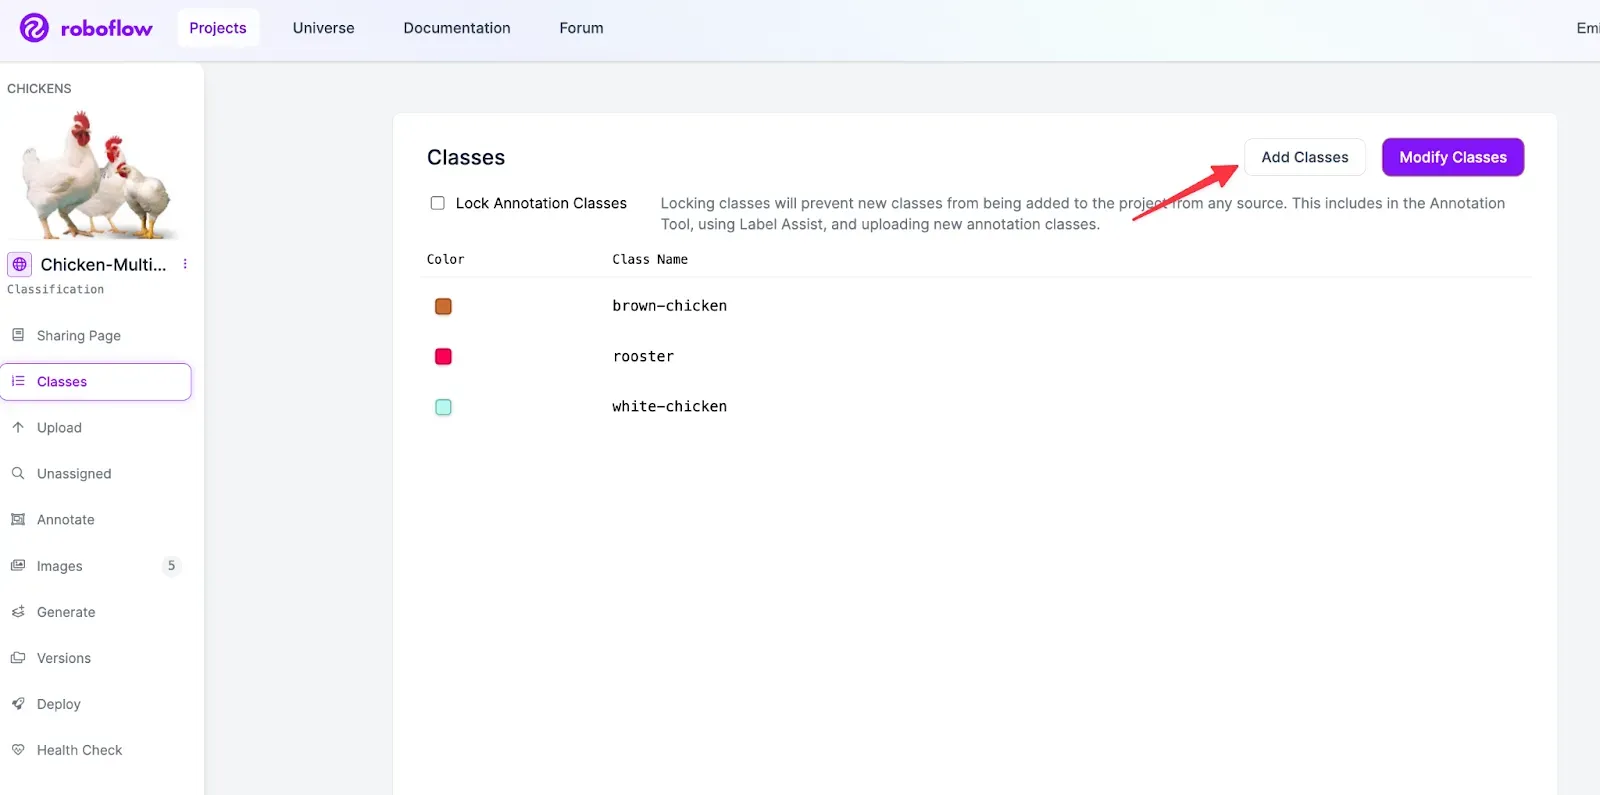
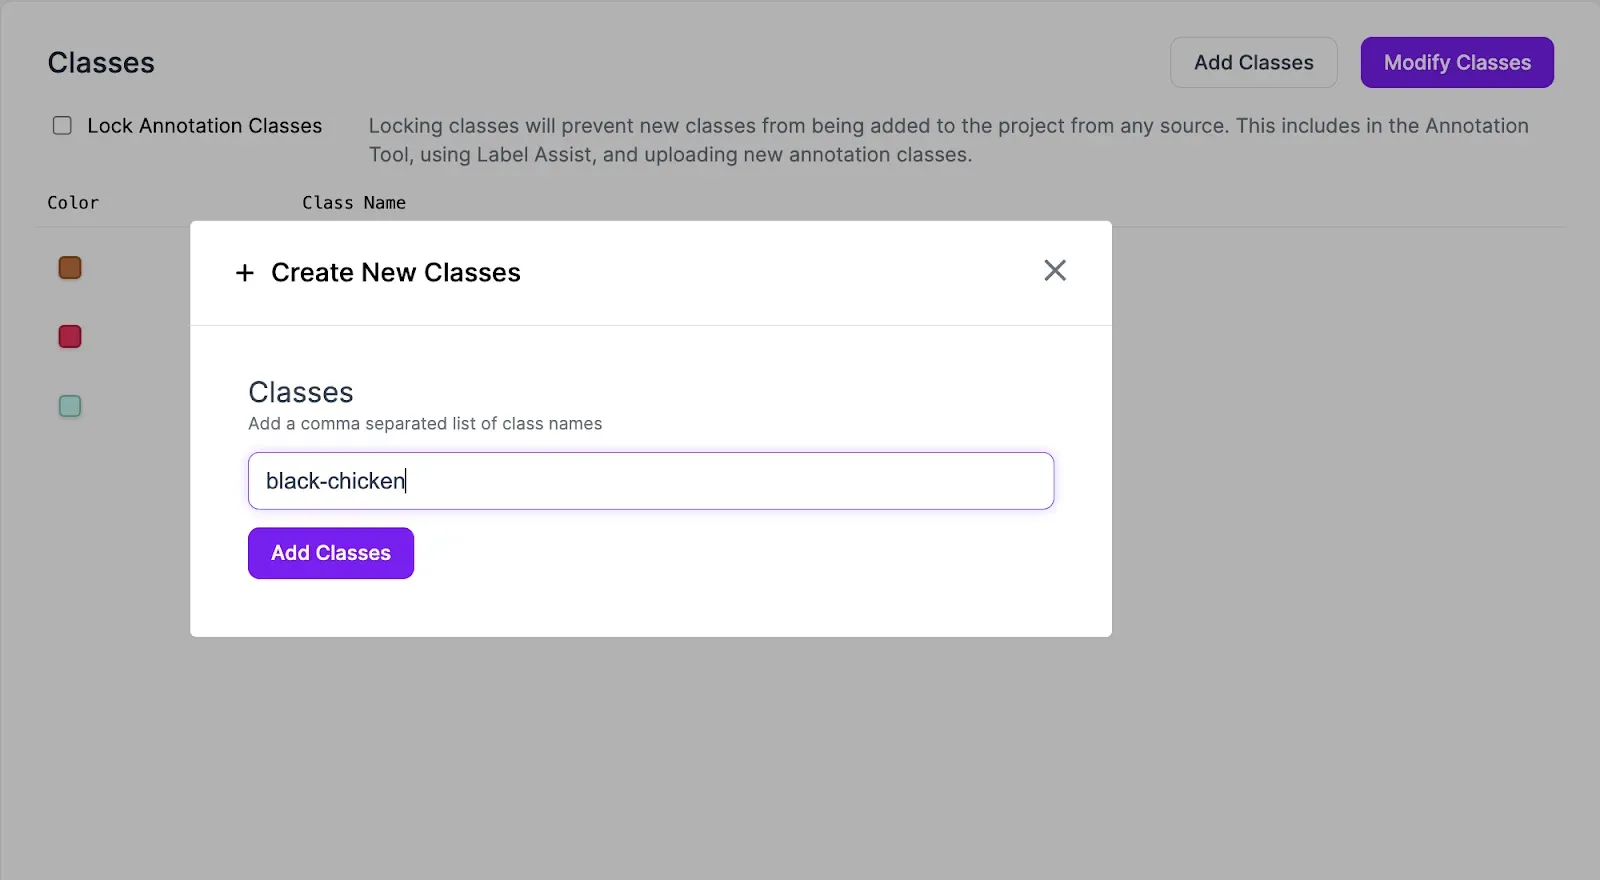
If you have an existing project, you can add new classes by selecting Add Classes and then entering a comma separated list of class names.
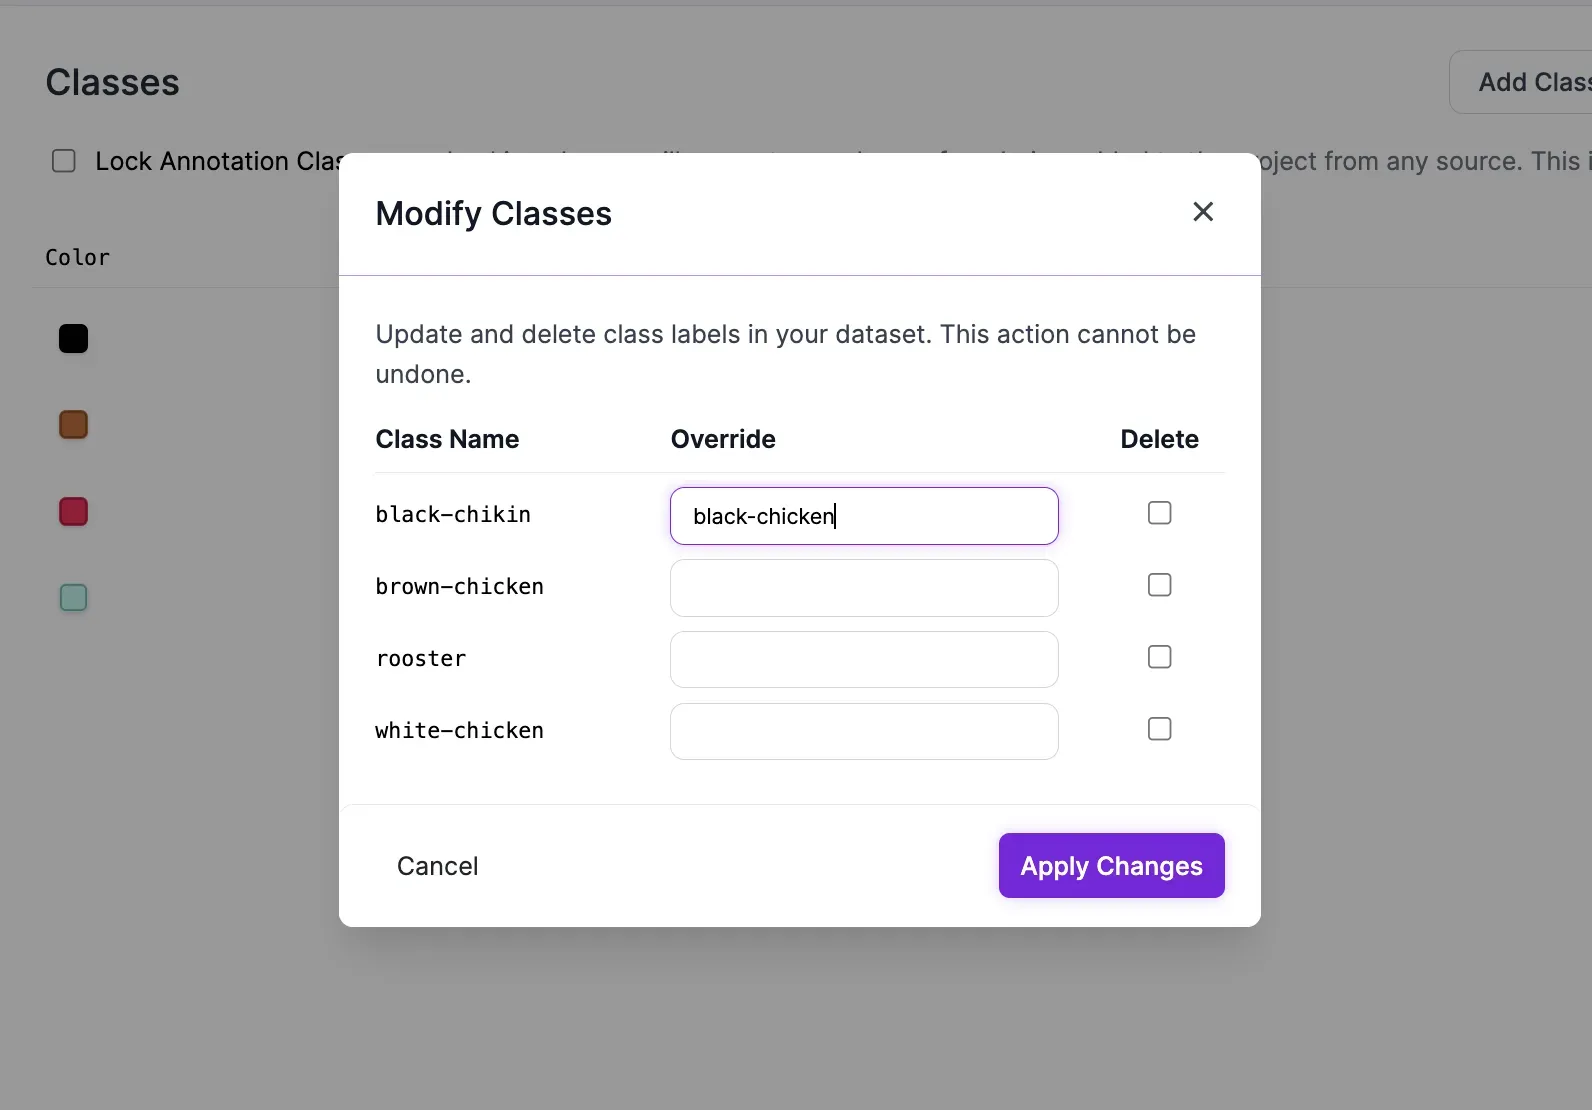
Rename Classes
Let's face it, sometimes we make mistakes when labeling. Maybe you ended up with few a turck or Truck labels instead of truck. Or perhaps you only ended up with a few yellow lights and want to remove them altogether.
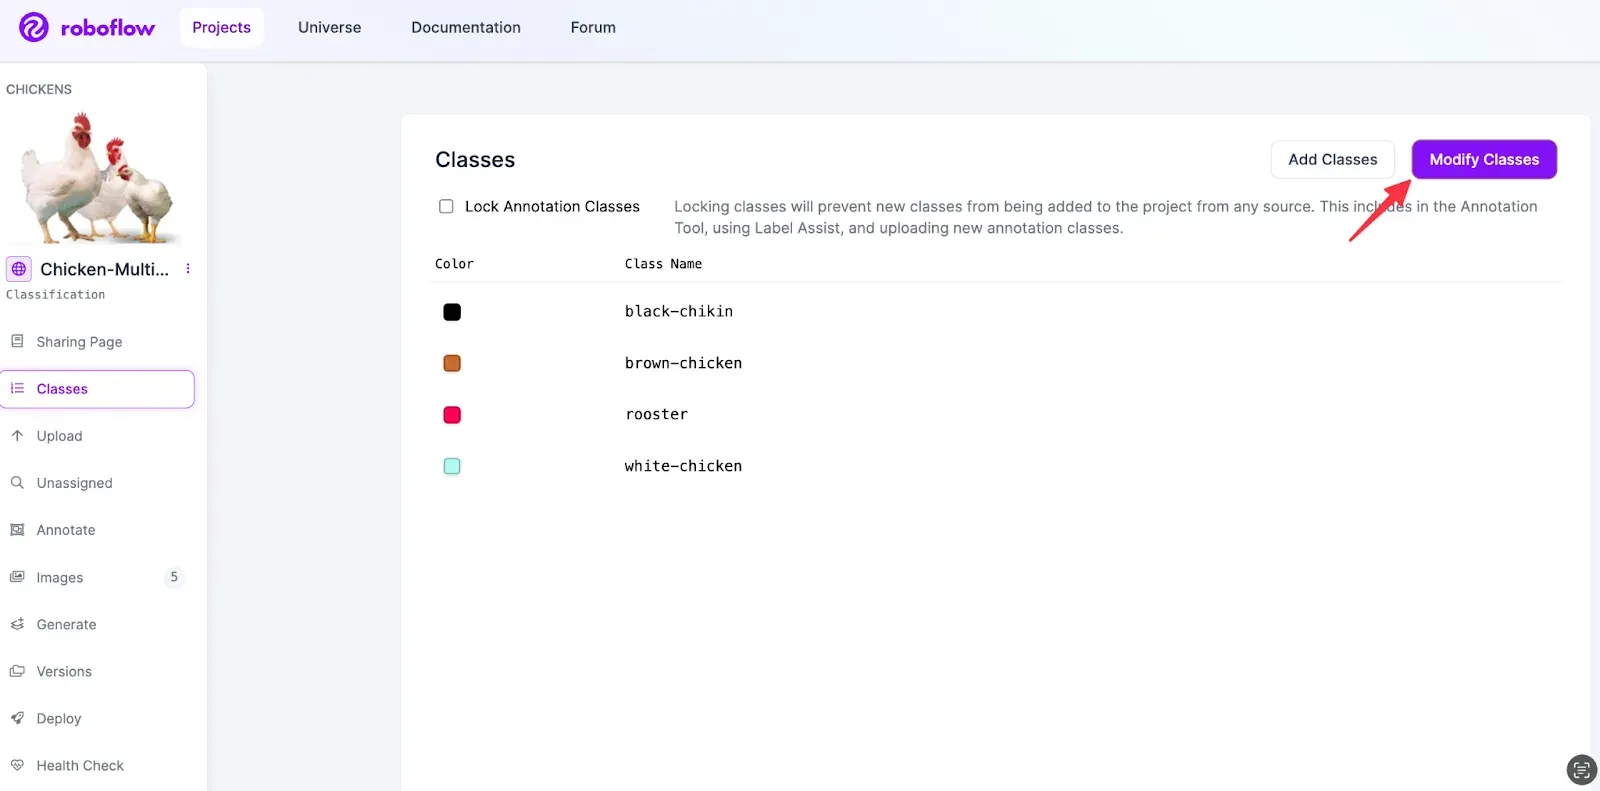
You can rename classes by selecting Modify Classes and entering a new class name, and selecting Apply Changes.
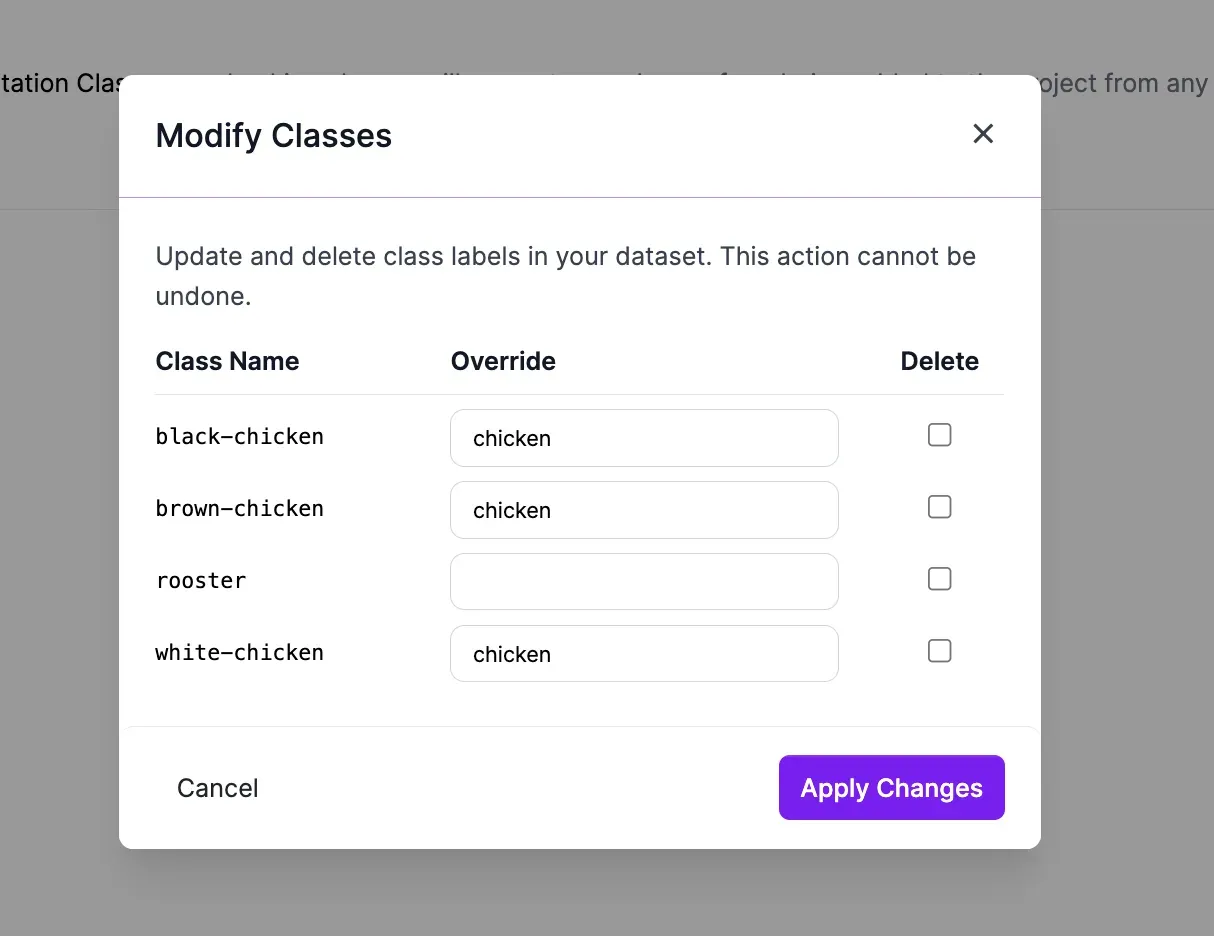
Combine Classes
Sometimes, you will want to lump classes together into one category. For example, if you want your model to treat jet-ski, car and boat all as vehicles in your drone dataset, you can do that with the Modify Classes preprocessing step as well. Warning, this is a destructive action and you will lose your original class labels. You can experiment with remapping classes on the version level by using the remap preprocessing step. In that case, you can always go back to your original ontology later if you decide you actually do need to distinguish between boats and jetskis.
Similar to the rename classes step, you can combine classes by selecting Modify Classes and entering the new class names, and selecting Apply Changes.
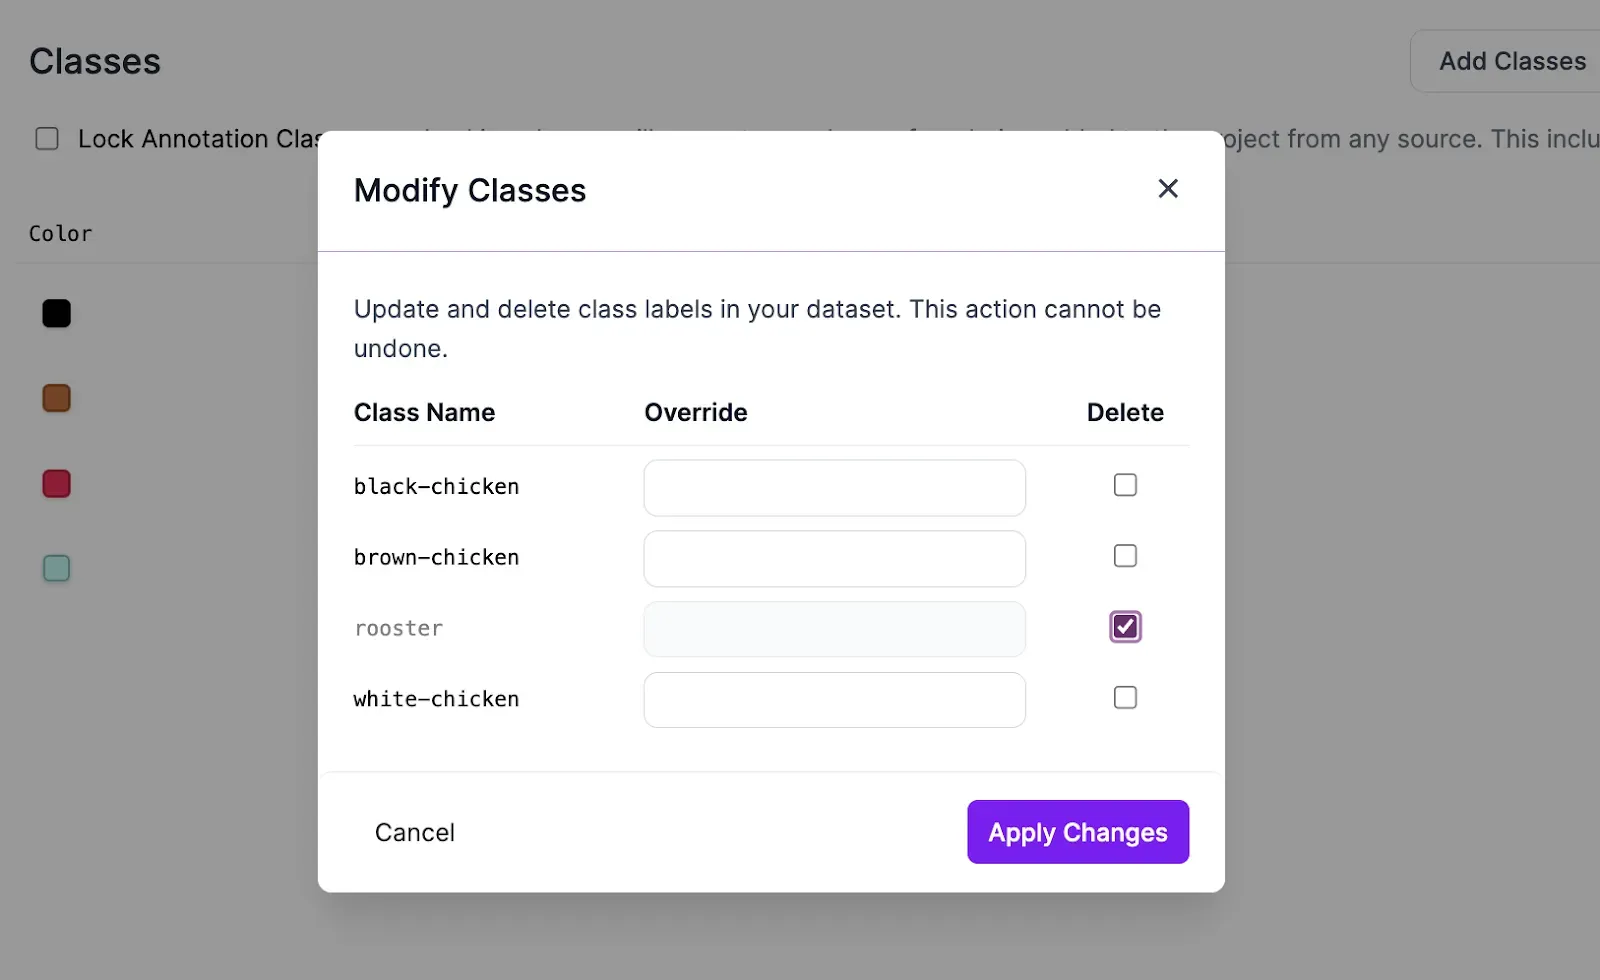
Delete Classes
You may no longer need a class and may want to permanently delete it from the dataset. You can remove all instances of a class using the delete operation, which cannot be undone. If you’d like to experiment with excluding a class, you can exclude the class using the remap preprocessing step.
To delete a class, click Modify Classes, select the class you’re deleting, and then Apply Changes.
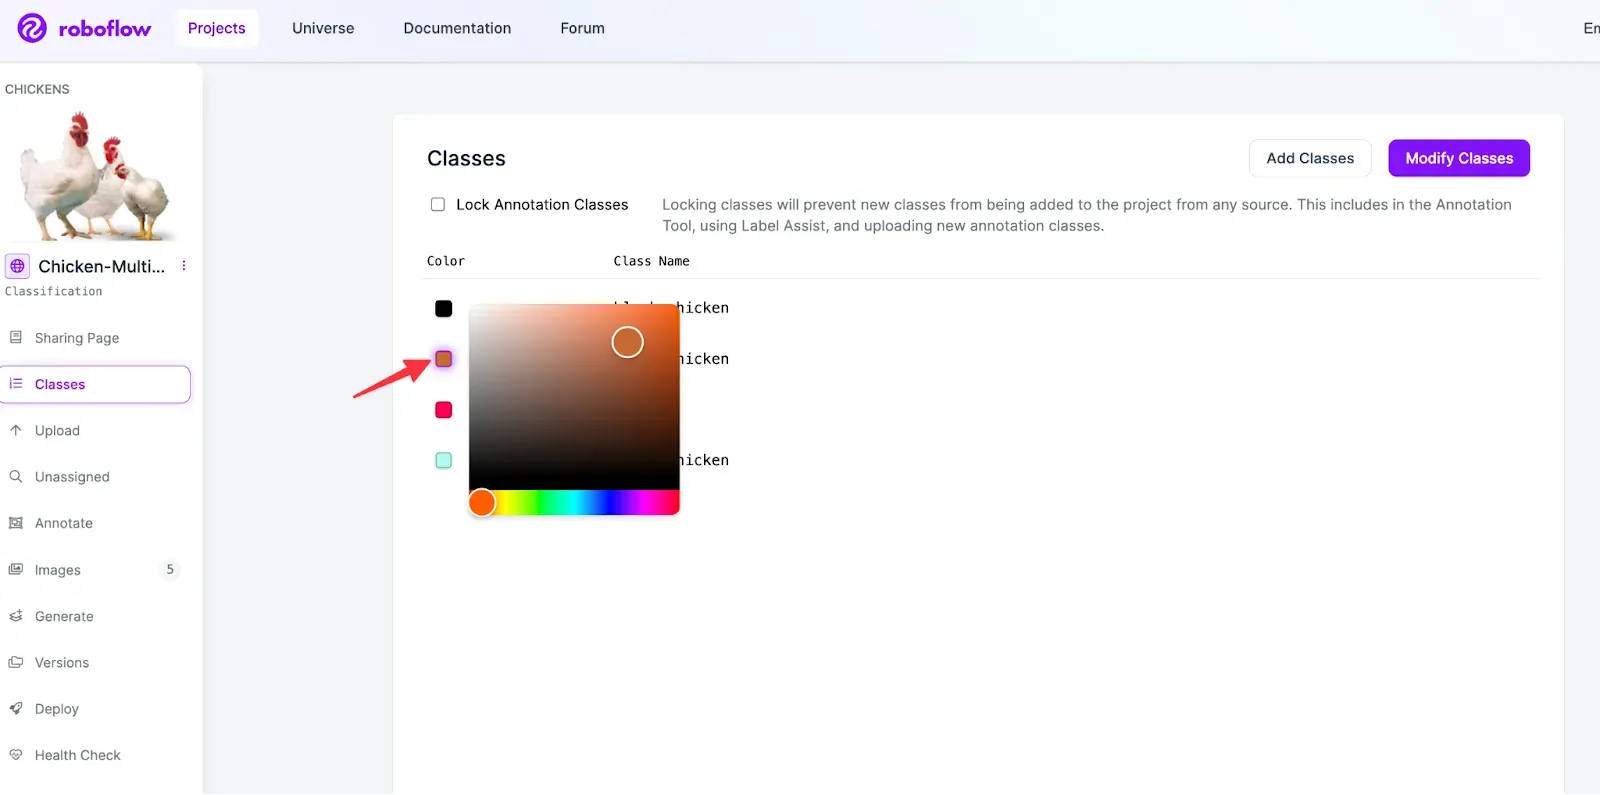
Update Class Colors
Sometimes, the auto generated class colors may not be ideal for your labelers. You may want to increase the contrast between the image background and class label, or select a more fitting color based on your use case, such as a bright red for defects.
To change the class color, click on the color and select the new one on the color picker.
Conclusion
Good computer vision class ontology is the foundation of effective, accurate, and scalable computer vision models. Thoughtfully defining your classes before beginning the labeling process can drastically speed up the labeling process, decrease annotation mistakes, and enhance model performance.
With the new Roboflow class management page, it’s easy to go back and update your classes to continue creating the best computer vision models when you need to do so!